Growing Wings
Well-known member
I've found that a lot of every day looks can look quite heavy on me. As there was a request posted for a tutorial for fair skinned people with blue eyes, I thought I'd share a softer look I like that gives my blue/grey eyes a little bit of a pop.
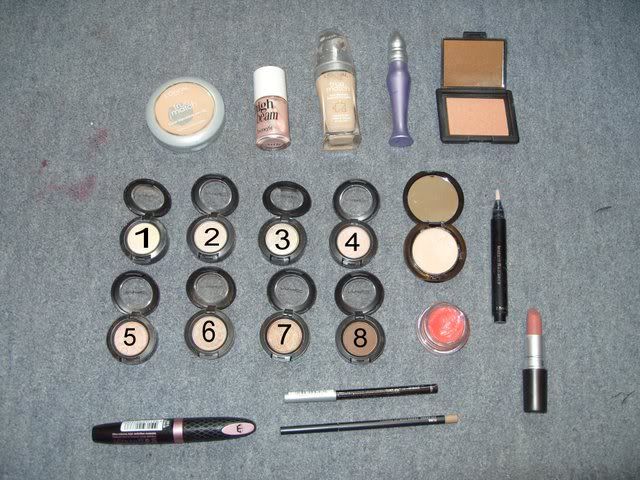
Makeup

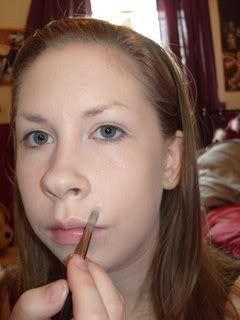
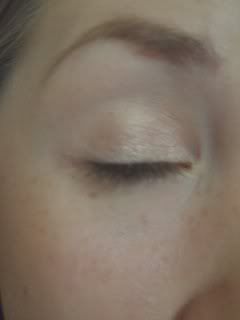
I mix a little bit of High Beam with my foundation. This gives a little more of a glow, without the overly sparkliness that High Beam usually gives.
Apply your foundation with the 187 brush. And apparently pull a silly face.
Using the 194 brush apply the Boi-ing concealer over any spots or blemishes you may have. Use the brush (or your finger) to pat the concealer in, rather than wiping it over the area.
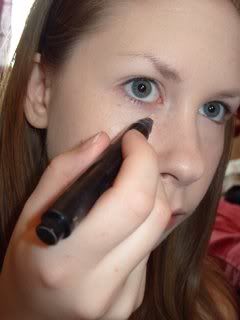
Next, use the Instant Radiance concealer to hide those dark under eye circles. I find this is better than that boi-ing concealer which tends to crease when used under the eye.
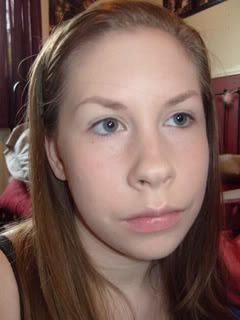
Looking better already! Fill in your brows.
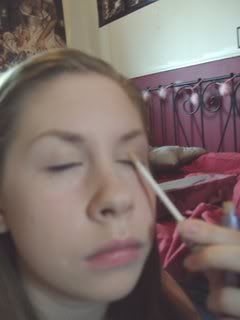
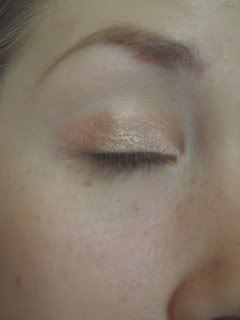
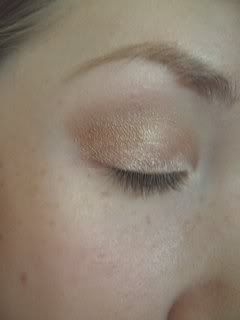
Apply the UDPP all over the lid. Once it's completely dry, use the 224 brush to apply a thin layer of Shroom all over the eye area. There doesn't need to be a lot (Shroom doesn't really show up on me anyway), just enough to make blending easier later on.
Use the 213 brush to pat Naked Lunch onto the inner half of your lid. We'll be using the 213 to apply all eye shadows unless otherwise noted.
Then apply All That Glitters to the outer half. Blend them together using the 224 brush. For some reason mine doesn't look blended, but it is, I promise!
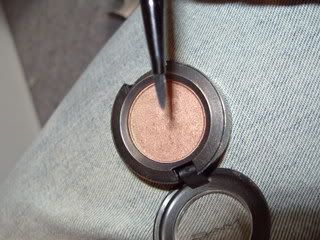
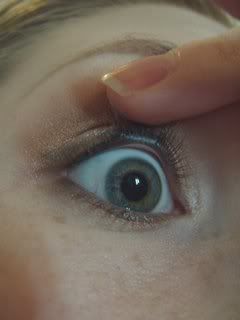
Next, take Era and apply it to the crease. Take it slightly above, and form a shape like the one pictured below. Blend that out using the 275, as it's denser than the 224 so will soften the line easier.
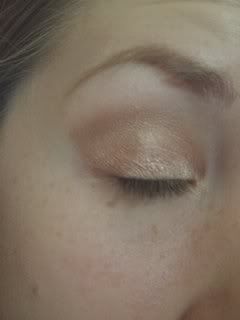
Now's the time for that concealer brush and Woodwinked.
Apply Woodwinked to your outer V and crease, and blend it out. I also applied a little Retrospeck over Naked Lunch using the 213 and blended upwards.
Take the stiff eyeliner brush and line your lid with Espresso. Using eyeshadow creates a far softer look, as fluidlines, or even pencil eyeliners at time, can look a little too dark and harsh.

Line under your eye with All That Glitters (inner) and Espresso (outer). You don't need a lot, just enough to add a little definition. I also used my 224 brush to apply a little of Nylon to highlight under my brow.
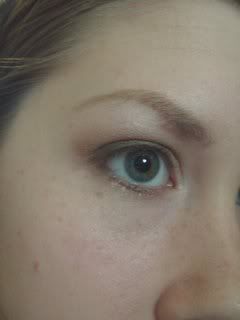
Next, line your upper water line with your black pencil eyeliner. This darkens your lashes without the 'OMG you're wearing black eyeliner' look. This was so hard to take a photo of!
Add your mascara, and that's your eyes done!
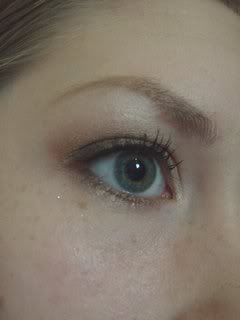
Apply NARS Luster using the 187 brush. It's such a pretty colour and really gives you a healthy glow, but applied with a normal blush brush it's waaaay to dark for us pale girls.
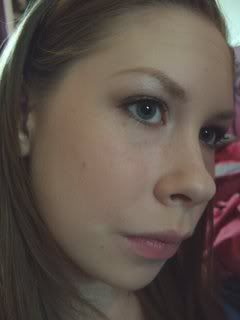
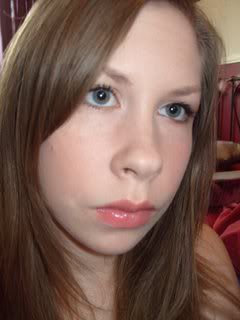
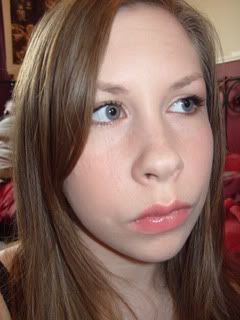
Add Hug Me l/s and Sweet Tooth tendertone and you're all done!
I hope this has been useful. Constructive criticism is always helpful too

Makeup
- Foundation - At the moment I'm using L'Oreal True Match in Neutral Ivory, but it's a little too dark. The search for a good foundation continues

- Benefit High Beam
- Powder (again, I use L'Oreal True Match in Ivory)
- Benefit Boi-ing concealer, shade 1
- No7 Instant Radiance concealer
- MAC eyebrow pencil
- UDPP
- MAC eyeshadows in
- Nylon
- Shroom
- Retrospeck
- Naked Lunch
- All That Glitters
- Era
- Woodwinked
- Espresso
- Black pencil eyeliner
- Mascara (I'm currently using Rimmel Glam Eyes and loving it!)
- NARS Luster
- MAC Hug Me l/s
- Sweet Tooth Tendertone
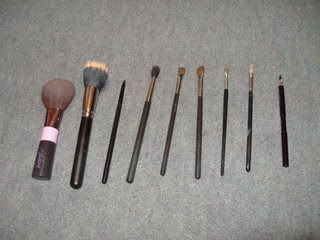
- Random powder brush
- 187
- 194
- 224
- 213
- 275
- Concealer brush that works well for outer V (closer pic shown when it's used)
- Stiff eyeliner brush
- 318
I mix a little bit of High Beam with my foundation. This gives a little more of a glow, without the overly sparkliness that High Beam usually gives.
Apply your foundation with the 187 brush. And apparently pull a silly face.
Using the 194 brush apply the Boi-ing concealer over any spots or blemishes you may have. Use the brush (or your finger) to pat the concealer in, rather than wiping it over the area.
Next, use the Instant Radiance concealer to hide those dark under eye circles. I find this is better than that boi-ing concealer which tends to crease when used under the eye.
Looking better already! Fill in your brows.
Apply the UDPP all over the lid. Once it's completely dry, use the 224 brush to apply a thin layer of Shroom all over the eye area. There doesn't need to be a lot (Shroom doesn't really show up on me anyway), just enough to make blending easier later on.
Use the 213 brush to pat Naked Lunch onto the inner half of your lid. We'll be using the 213 to apply all eye shadows unless otherwise noted.
Then apply All That Glitters to the outer half. Blend them together using the 224 brush. For some reason mine doesn't look blended, but it is, I promise!
Next, take Era and apply it to the crease. Take it slightly above, and form a shape like the one pictured below. Blend that out using the 275, as it's denser than the 224 so will soften the line easier.
Now's the time for that concealer brush and Woodwinked.
Apply Woodwinked to your outer V and crease, and blend it out. I also applied a little Retrospeck over Naked Lunch using the 213 and blended upwards.
Take the stiff eyeliner brush and line your lid with Espresso. Using eyeshadow creates a far softer look, as fluidlines, or even pencil eyeliners at time, can look a little too dark and harsh.
Line under your eye with All That Glitters (inner) and Espresso (outer). You don't need a lot, just enough to add a little definition. I also used my 224 brush to apply a little of Nylon to highlight under my brow.
Next, line your upper water line with your black pencil eyeliner. This darkens your lashes without the 'OMG you're wearing black eyeliner' look. This was so hard to take a photo of!
Add your mascara, and that's your eyes done!
Apply NARS Luster using the 187 brush. It's such a pretty colour and really gives you a healthy glow, but applied with a normal blush brush it's waaaay to dark for us pale girls.
Add Hug Me l/s and Sweet Tooth tendertone and you're all done!
I hope this has been useful. Constructive criticism is always helpful too

")
