~LadyLocks~
Well-known member
Hi dawls
 Another tutorial, hope you likey

Here's what were doing:
*Mother By Day*

*Lauver By Night*
What you'll need:
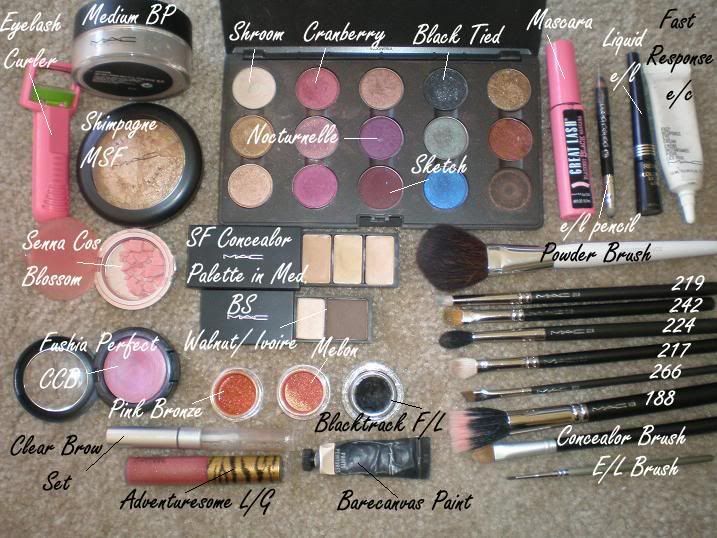
Items that I forgot in pic: Large Shader Brush, Vanilla p/m, Happening Gal l/g
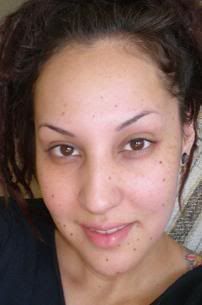
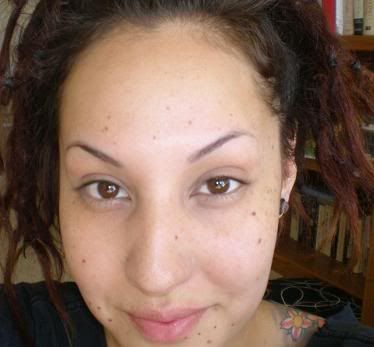
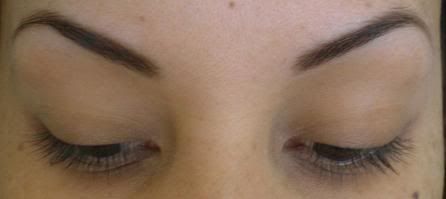
Bare Face

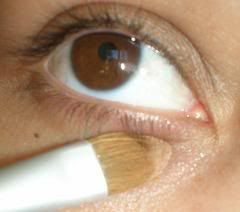
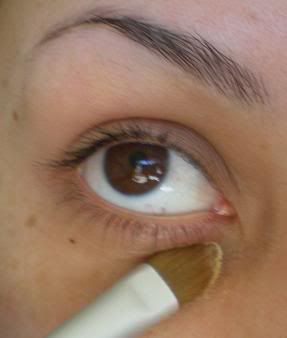
Take your concealor brush and dab some FR e/c on it, apply it all around eye area
With the same brush, grab some concealor and apply it to any shadows on the face and on places that need covering
You should have this
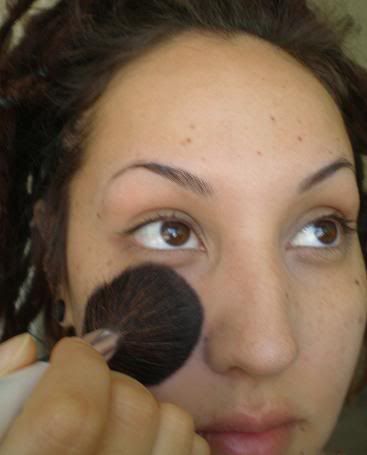
Shake up your Blot Powder, grab your powder brush and dab in on the lid and apply it all over your face
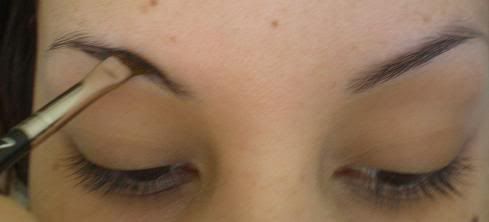
Now grab your 266 and put some Walnut BS on it. Start at the tip on your brow and in short strokes, fill in the entire area.
You bows should look something like this when you’re done.
Now grab your same concealor brush and dab a bit of paint on there. Spread it all over lid and up to your brow bone.
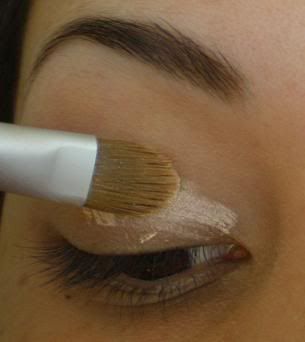
Next, grab your Large Shader Brush and pick up some Shroom. Apply all over brow bone and into tear duct area.
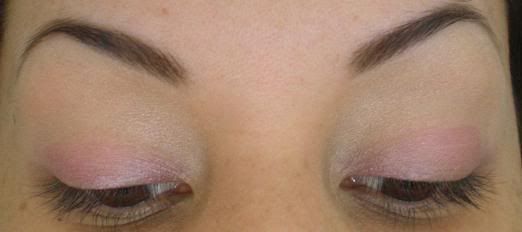
Clean off your concealor brush and grab some Fushia Perfect CCB and apply it to eye lids. You should have this.
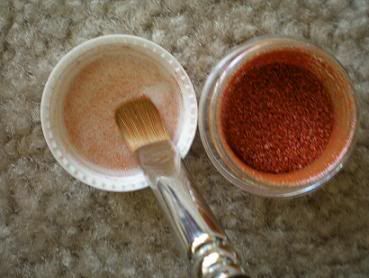
Next, get out your 242 brush and on the lid of Pink Bronze p/m, put some on your brush. Doing it this way helps control how much you pick up. Don’t forget to “tap” off the excess!
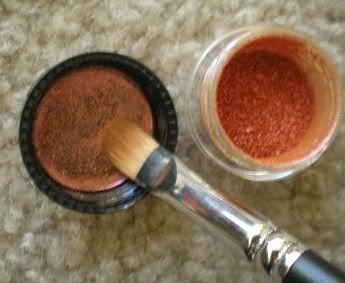
Pat the pigment on your lid from lash line to crease. Don’t cover the entire lid, 2/3’s of the lid is all you need. It should look something like this.
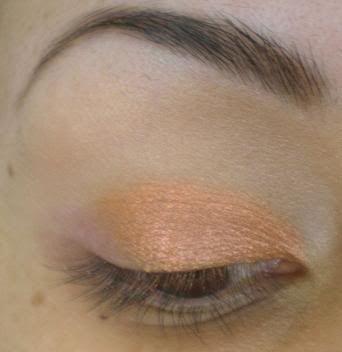
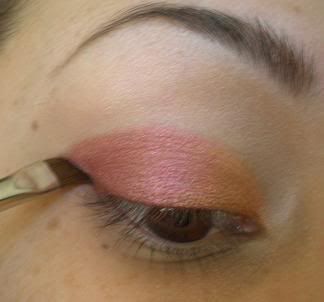
Now flip your 242 over and grab some Cranberry, again tapping off the excess. Apply it to the outer 3rd of your lid slightly overlapping the Pink Bronze.
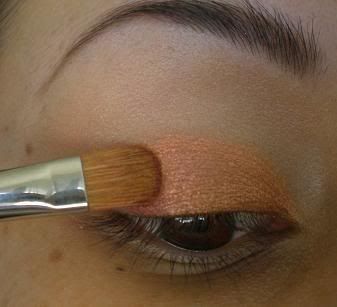
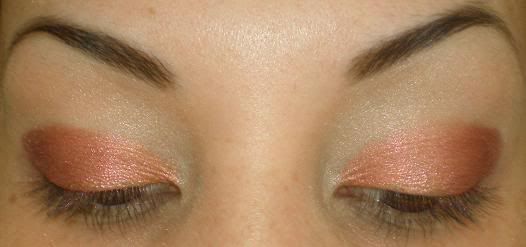
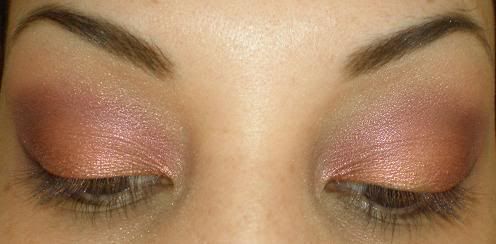
Keep overlapping the Pink Bronze and Cranberry until it looks well blended. Both eyes should look something like this now.
Next, grab your 266 and pick up some Sketch, tap. Position the brush so it’s lined up with your lower lash line and make a line like so. Doing this helps as a guide in shaping your outer <.
Still with brush 266, line the eye to the middle of your lash line. It should look something like this.

Now grab your 217 and pick up some Nocturnelle. Position the brush right on your outer <, right on the line your created with your 266. Keeping the shape of the v, add more color to the crease but don’t go all the way to the inner v, just slightly.
Unblended.
Next, wipe off your 217 onto a clean towel and pick up some more Cranberry. Add color to inner crease just slightly overlapping Nocturnelle.
Unblended.
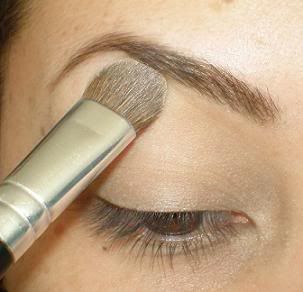
Next, get out your 224 and pick up some Vanilla p/m. Place the brush at your brow bone and blend right where the seams of the colors are. Make sure everything is well blended.
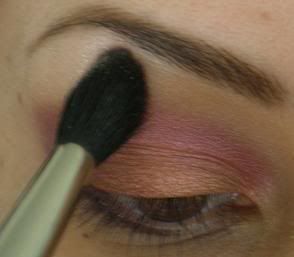
All blended.
Next, get your 219 and pick up some Sketch. Place the brush right in your crease and make a < with the 219 making sure to pack in the color.
You should have this.
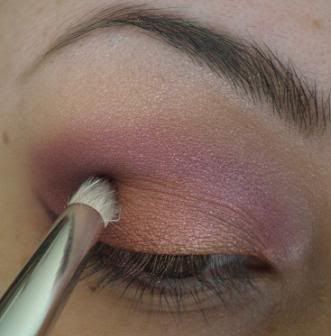
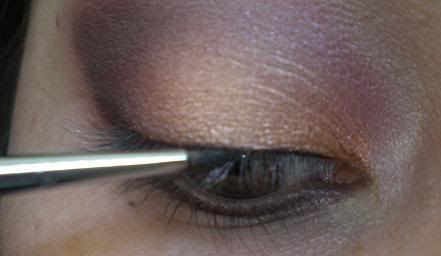
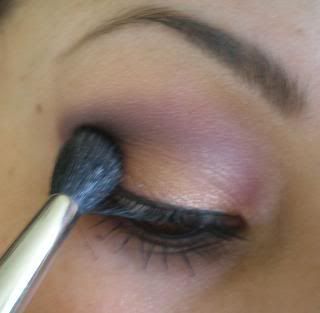
Grab your 224 and pick up more Sketch. Starting from the outer <, blend lightly into the crease to darken the color.

You should have this once finished.
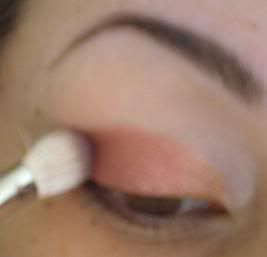
Ok, almost done! Get your 242 and wipe off the left over color from before and pick up a bit of Melon.
Pat it lightly right in the middle of your lid, like so.

You should have this now.
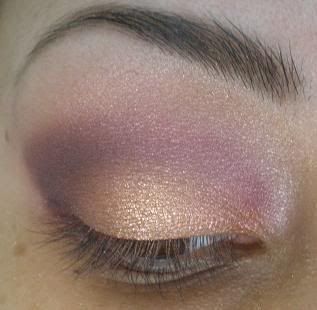
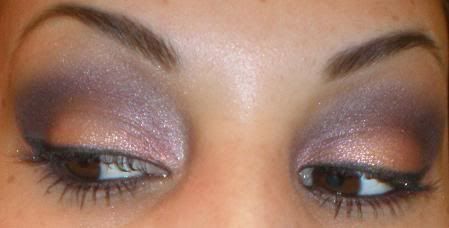
Next, get your 266 again and pick up some Sketch for the last time. Line the rest of your eye. (I didn’t do this before because I was going to put another color on the inner lash line but then decided, one color looked best. *This step is optional. You can either use one color or two, totally up to you!
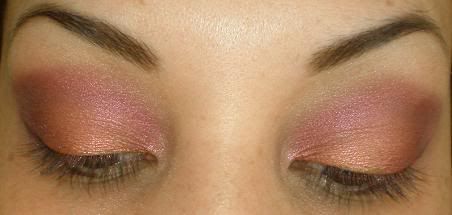
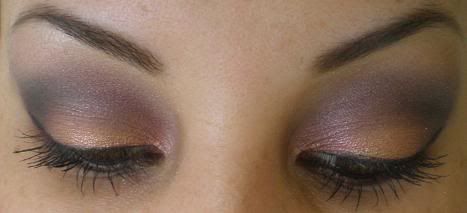
Both eyes should look like this when you’re done.
Almost there! Grab your e/l brush or your 266 and dip it into some Blacktrack f/l.
Line the eye like so.
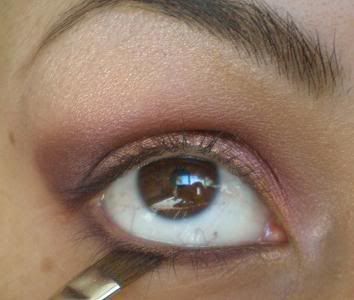
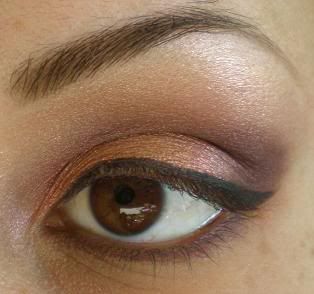
Now for the wing. Position the 266 right at lash line and make a slight line. Finish the top of the wing by bringing the brush across the top of the line to meet the line on the eye. Once you’re all done, the liner part should look something like this.
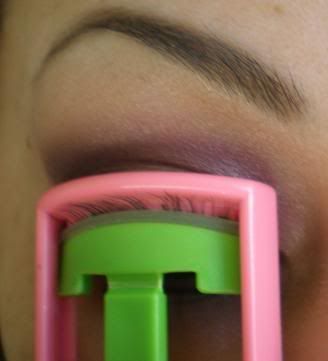
Curl those lashes!
Line your upper tightline with liquid e/l.
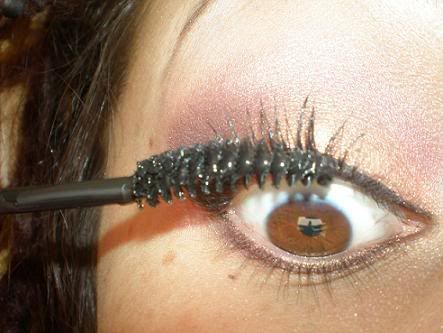
Add mascara to your upper lashes starting from the base, wiggle the brush upwards though your lashes. Add some mascara to the lower lashes as well.
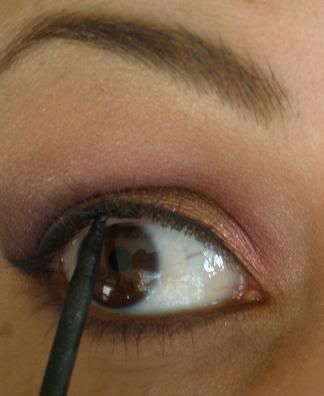
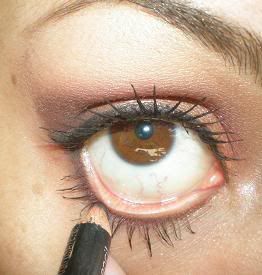
Grab your e/l pencil and line your waterline.
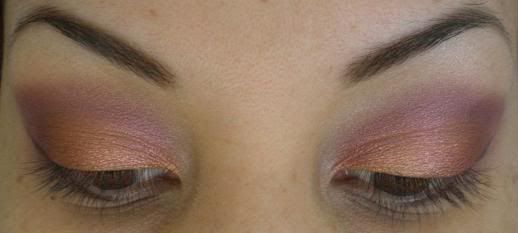
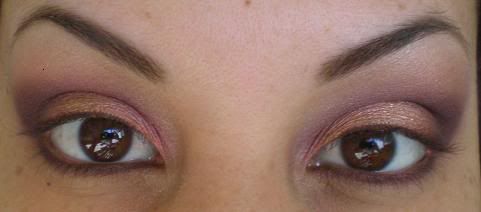
Both eyes should look like this once you’re all done.
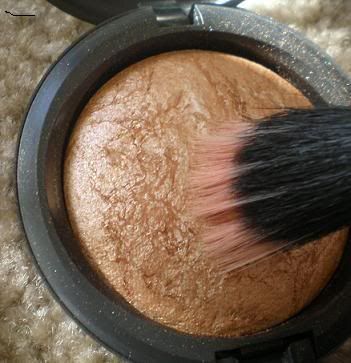
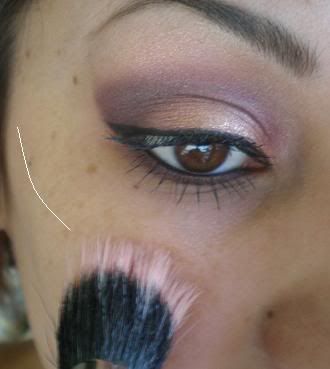
Next, grab your 188 and load it up with Shimpagne MSF.
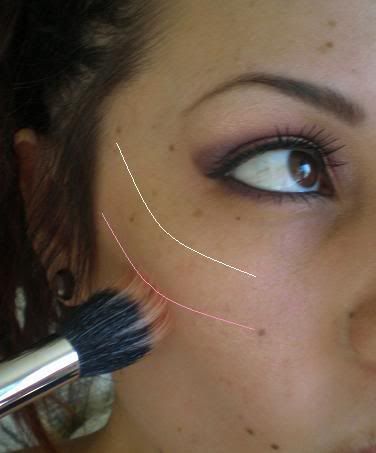
Starting for the top of the apples of your cheeks, drag the brush up towards your temples like this.
Bridge of your nose.
And your jaw line.
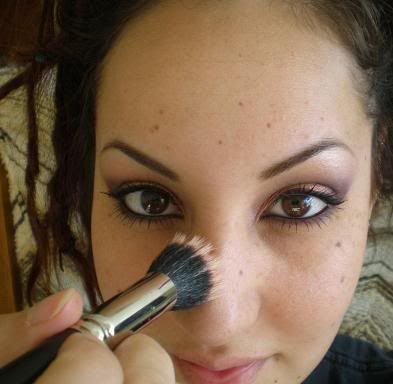
Now with the same 188 brush, pick up your favorite blush and make a fishy face. Drag the brush form the apples of your cheeks towards your temples, like this.
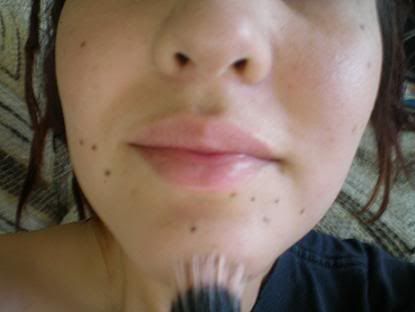
Lastly, your lips. Put some Adventuresome l/g on those puckers.

Dab your index finger into the lid of Melon.
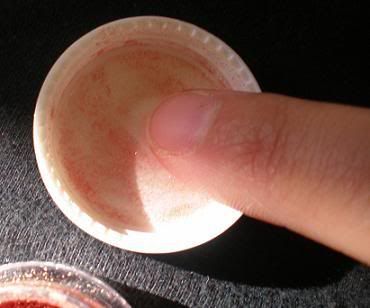
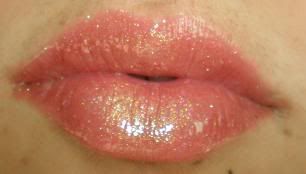
Dab your finger right in the middle of your lips like this.

Blot those babies together!
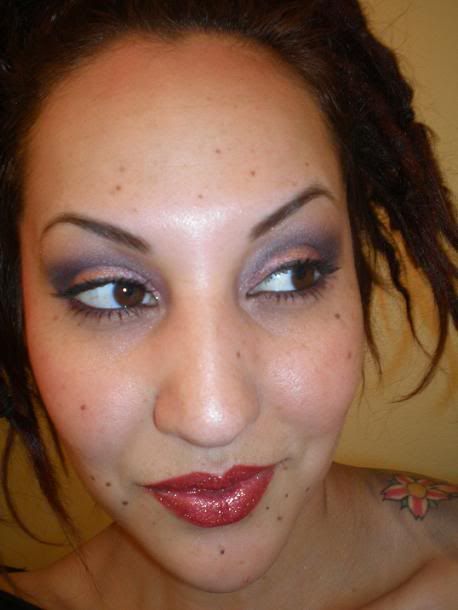
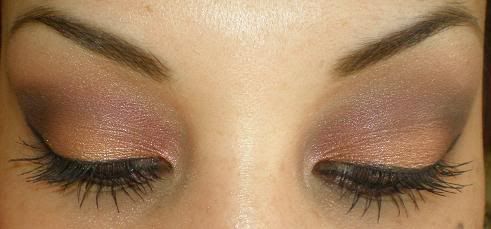
Wallah, here’s the finish product!!
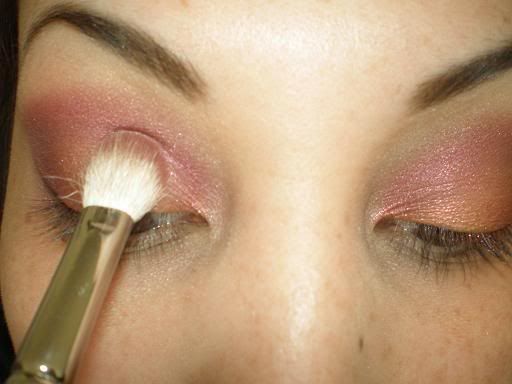
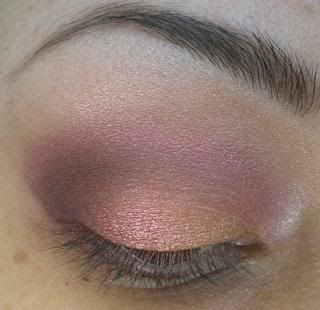
Now, if your want to turn this look into a “night” time look it’s really simple. All you need to do it get your 224, dab it in some Black Tied and position the brush right at the outer <.
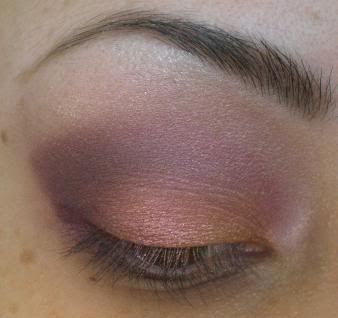
Blend the Black into the crease until it looks well blended, like so. (NO FLASH)
FLASH
To make it even more dramatic, put some dark lippie on. I used Happening Gal l/g, I love this stuff!!
And now it’s time to go out!!!
Here's what were doing:
*Mother By Day*
*Lauver By Night*
What you'll need:
Items that I forgot in pic: Large Shader Brush, Vanilla p/m, Happening Gal l/g
Bare Face
Take your concealor brush and dab some FR e/c on it, apply it all around eye area
With the same brush, grab some concealor and apply it to any shadows on the face and on places that need covering
You should have this
Shake up your Blot Powder, grab your powder brush and dab in on the lid and apply it all over your face
Now grab your 266 and put some Walnut BS on it. Start at the tip on your brow and in short strokes, fill in the entire area.
You bows should look something like this when you’re done.
Now grab your same concealor brush and dab a bit of paint on there. Spread it all over lid and up to your brow bone.
Next, grab your Large Shader Brush and pick up some Shroom. Apply all over brow bone and into tear duct area.
Clean off your concealor brush and grab some Fushia Perfect CCB and apply it to eye lids. You should have this.
Next, get out your 242 brush and on the lid of Pink Bronze p/m, put some on your brush. Doing it this way helps control how much you pick up. Don’t forget to “tap” off the excess!
Pat the pigment on your lid from lash line to crease. Don’t cover the entire lid, 2/3’s of the lid is all you need. It should look something like this.
Now flip your 242 over and grab some Cranberry, again tapping off the excess. Apply it to the outer 3rd of your lid slightly overlapping the Pink Bronze.
Keep overlapping the Pink Bronze and Cranberry until it looks well blended. Both eyes should look something like this now.
Next, grab your 266 and pick up some Sketch, tap. Position the brush so it’s lined up with your lower lash line and make a line like so. Doing this helps as a guide in shaping your outer <.
Still with brush 266, line the eye to the middle of your lash line. It should look something like this.
Now grab your 217 and pick up some Nocturnelle. Position the brush right on your outer <, right on the line your created with your 266. Keeping the shape of the v, add more color to the crease but don’t go all the way to the inner v, just slightly.
Unblended.
Next, wipe off your 217 onto a clean towel and pick up some more Cranberry. Add color to inner crease just slightly overlapping Nocturnelle.
Unblended.
Next, get out your 224 and pick up some Vanilla p/m. Place the brush at your brow bone and blend right where the seams of the colors are. Make sure everything is well blended.
All blended.
Next, get your 219 and pick up some Sketch. Place the brush right in your crease and make a < with the 219 making sure to pack in the color.
You should have this.
Grab your 224 and pick up more Sketch. Starting from the outer <, blend lightly into the crease to darken the color.
You should have this once finished.
Ok, almost done! Get your 242 and wipe off the left over color from before and pick up a bit of Melon.
Pat it lightly right in the middle of your lid, like so.
You should have this now.
Next, get your 266 again and pick up some Sketch for the last time. Line the rest of your eye. (I didn’t do this before because I was going to put another color on the inner lash line but then decided, one color looked best. *This step is optional. You can either use one color or two, totally up to you!
Both eyes should look like this when you’re done.
Almost there! Grab your e/l brush or your 266 and dip it into some Blacktrack f/l.
Line the eye like so.
Now for the wing. Position the 266 right at lash line and make a slight line. Finish the top of the wing by bringing the brush across the top of the line to meet the line on the eye. Once you’re all done, the liner part should look something like this.
Curl those lashes!
Line your upper tightline with liquid e/l.
Add mascara to your upper lashes starting from the base, wiggle the brush upwards though your lashes. Add some mascara to the lower lashes as well.
Grab your e/l pencil and line your waterline.
Both eyes should look like this once you’re all done.
Next, grab your 188 and load it up with Shimpagne MSF.
Starting for the top of the apples of your cheeks, drag the brush up towards your temples like this.
Bridge of your nose.
And your jaw line.
Now with the same 188 brush, pick up your favorite blush and make a fishy face. Drag the brush form the apples of your cheeks towards your temples, like this.
Lastly, your lips. Put some Adventuresome l/g on those puckers.
Dab your index finger into the lid of Melon.
Dab your finger right in the middle of your lips like this.
Blot those babies together!
Wallah, here’s the finish product!!
Now, if your want to turn this look into a “night” time look it’s really simple. All you need to do it get your 224, dab it in some Black Tied and position the brush right at the outer <.
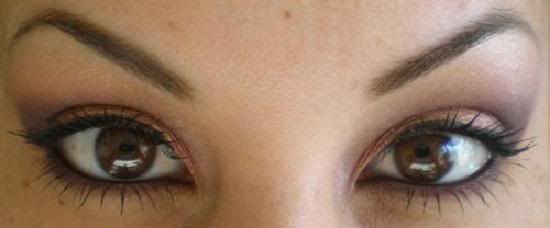
Blend the Black into the crease until it looks well blended, like so. (NO FLASH)
FLASH
To make it even more dramatic, put some dark lippie on. I used Happening Gal l/g, I love this stuff!!
And now it’s time to go out!!!


