Updated 2/13/06!
I had these little clam shell containers from one of my craft endeavors so I decided to try to press pigments in there! hehe It was so much easier and almost no mess. ^_^ The secret is mixing the pigment so it has a "dryish" consistency and pulls away from the container in a blob so there is minimal waste. Wonderful!
 lol
lol
The purple one took me about 10-15 mins and the green one took me longer, only cuz I made some too runny and I had to use a q-tip to clean the edges and push it around so the back is neat too! Hope you guys like the update, I'll try to make a tutorial or just an add on to this one for how I made the ones in the clamshells. ^_^
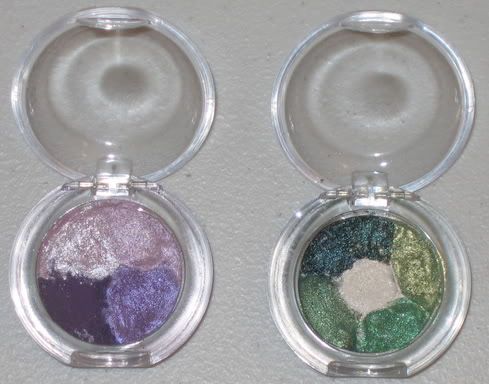
Purple: From upper left-hand corner clockwise, Kitschmas, Lovely Lily, Violet, and Rich Purple!
Greens! From upper left-hand corner clockwise, Deep Blue Green, Forest Green (they are "1/8ths"! It looks like one color but it's really 2 ), Golden Olive, Emerald Green, Green, and Vanilla in the center!

The back view ^_^
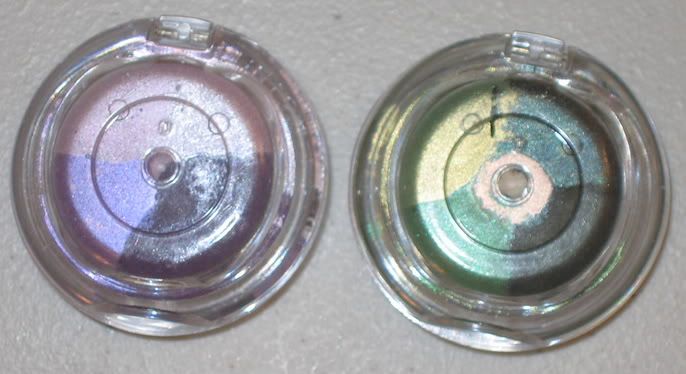
Oh yeah and you can tell when it's dry by sniffing it. hehe The alcohol smell should be completely gone.
--------------
Since I started working full time, it was getting to be a pain in the mornings to bust out little jars of pigments and in my half-asleep state not spill them. I really like using pigments because of their versatility and quick pop of color so I decided to press them into an eyeshadow pan. Being a cheap@$$, I didn't want to use so much pigment so I put two pigment colors in each pan.
It only took about 1/2 a tsp. of pigment per half. Some took a little more (up to 3/4-1tsp. because of their finer texture.)
Hope you guys enjoy the tutorial!
Step 1:
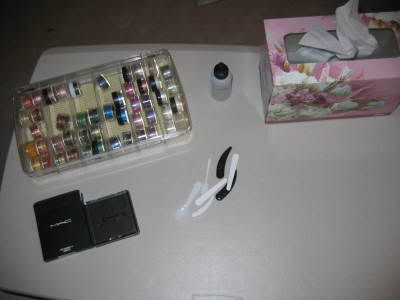
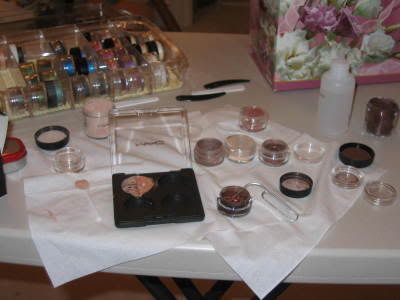
Gather everything you need for pressing loose pigments.
- Pigments
- Small scoopers/spatual
- Paper clip
- Alcohol in a small squeeze container or dropper bottle
- Empty palette or container you want to press the pigments into
- Tissues
- Wax Paper (optional)
- Quarter (optional)
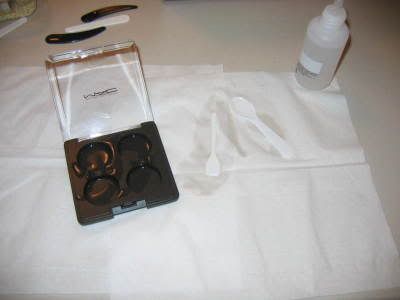
Step 2:
Sanitize everything! The palette, spoons, and paperclip.
Step 3:
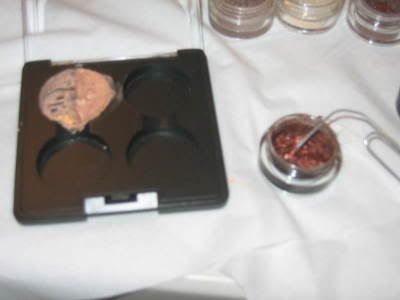
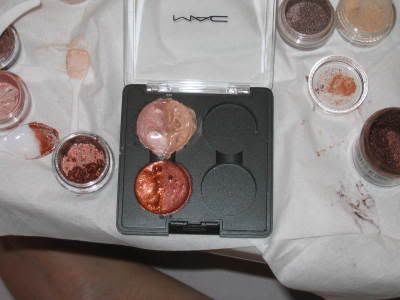
Lay down some tissues cuz it's gonna get messy! I first tried to mix the pigment with the alcohol in the pan but ended up scraping some of the black paint off the bottom into the pigment mixture. YUCK.
I made a thickish paste and pushed it over to one side as you can see in this picture. It was messy and the black flecks of pan was gross. Definitely not the way to do it.
Step 4:
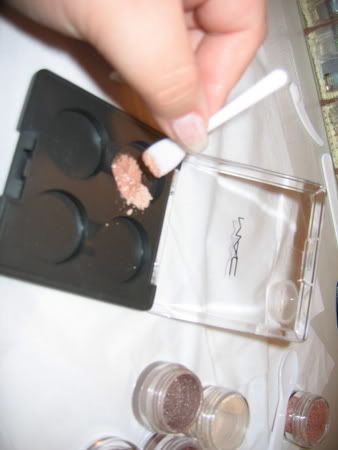
I next tried to mix it in the little sample jar first making a smooth, thinner paste (not too runny!) and pouring it into the pan. It made for a better press because 1. it was neater and 2. no black pan flecks. I use a paperclip to stir it and pour it out and a little spatula to push it to one side. It had the consistency of thinned out gak (remember that stuff?) haha
Step 5:
After pushing it to one side, I'd move on and do another half pan, coming back later when the half pan I did before was a little more "set" and firmer so it could be pushed into a little wall to mark the dividing line. Then I would pour the second color in the pan.
Continue until you are all done.
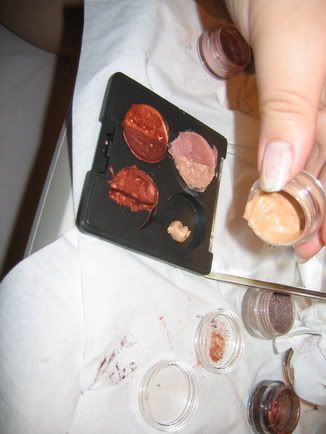
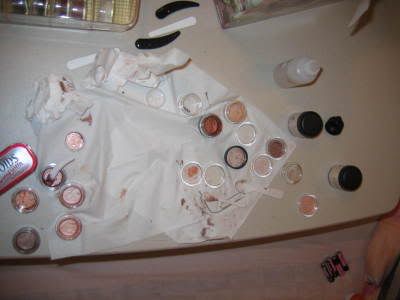
The Aftermath
Some disclaimers, since you aren't pressing it into a pan, this method is more or less permanent. So don't do it unless you are really sure you want it like that for a looong time.
You do end up wasting quite a bit of pigment (on the paperclip, on the spoons, etc) but I figure I'm going to waste a lot less than I would if I dropped a whole jar. hehe And, you can always use the dried pigment in the samples jars, those are still totally useable.
Step 6:
Letting it dry. If you let it dry naturally, it'll take a while. Maybe up to 2 days. If you're impatient and want it NOW, use a heater. I had mine on so I tossed it in front of it for maybe 15 mins? I think that was too long, it dried QUICK to a crisp.
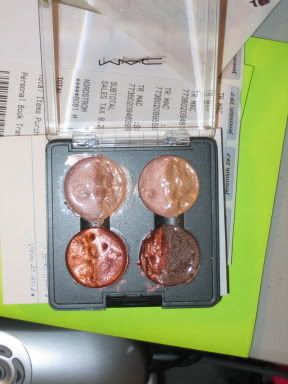
Before: Wet
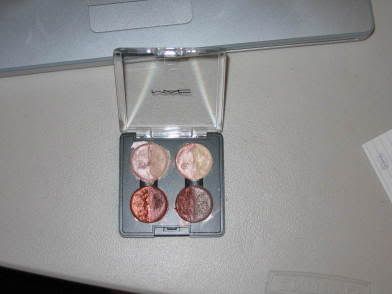
After: Dry
I've tried it out and let me tell you, it's AMAZING! SO much easier, and it's nice to pop open the palette and have eight 8! Shadows just waiting there to be used. ahaha It's like a economical dream come true, I save pigment over time and it makes me much more efficient in the mornings when I put on MU.
It's a little messy, and some of them are ugly, but this was my first shot, I still have lots of other pigments to press! XD
Oh yeah, and if you want them to look pretty, I haven't tried this but you can probably wet the top of the pigment after it has dried with some alcohol and put a piece of wax paper over it and press on it with a quarter (or something the size of a MAC e/s pan, a quarter was the best I could come up with.) I'm not too picky about what it looks like so I left it as is, I might clean up the sides eventually though.

Colors:
Top Left: Goldenaire and Naked
Top Right: Deckchair and Provence
Bottom Left: Copper Sparkle and Chocolate Brown
Bottom Right: Coco Beach and Coco
Hope you guys like it as much as I liked making it!
I had these little clam shell containers from one of my craft endeavors so I decided to try to press pigments in there! hehe It was so much easier and almost no mess. ^_^ The secret is mixing the pigment so it has a "dryish" consistency and pulls away from the container in a blob so there is minimal waste. Wonderful!
The purple one took me about 10-15 mins and the green one took me longer, only cuz I made some too runny and I had to use a q-tip to clean the edges and push it around so the back is neat too! Hope you guys like the update, I'll try to make a tutorial or just an add on to this one for how I made the ones in the clamshells. ^_^
Purple: From upper left-hand corner clockwise, Kitschmas, Lovely Lily, Violet, and Rich Purple!
Greens! From upper left-hand corner clockwise, Deep Blue Green, Forest Green (they are "1/8ths"! It looks like one color but it's really 2
), Golden Olive, Emerald Green, Green, and Vanilla in the center!
The back view ^_^
Oh yeah and you can tell when it's dry by sniffing it. hehe The alcohol smell should be completely gone.
--------------
Since I started working full time, it was getting to be a pain in the mornings to bust out little jars of pigments and in my half-asleep state not spill them. I really like using pigments because of their versatility and quick pop of color so I decided to press them into an eyeshadow pan. Being a cheap@$$, I didn't want to use so much pigment so I put two pigment colors in each pan.
Hope you guys enjoy the tutorial!
Step 1:
Gather everything you need for pressing loose pigments.
- Pigments
- Small scoopers/spatual
- Paper clip
- Alcohol in a small squeeze container or dropper bottle
- Empty palette or container you want to press the pigments into
- Tissues
- Wax Paper (optional)
- Quarter (optional)
Step 2:
Sanitize everything! The palette, spoons, and paperclip.
Step 3:
Lay down some tissues cuz it's gonna get messy! I first tried to mix the pigment with the alcohol in the pan but ended up scraping some of the black paint off the bottom into the pigment mixture. YUCK.
I made a thickish paste and pushed it over to one side as you can see in this picture. It was messy and the black flecks of pan was gross. Definitely not the way to do it.
Step 4:
I next tried to mix it in the little sample jar first making a smooth, thinner paste (not too runny!) and pouring it into the pan. It made for a better press because 1. it was neater and 2. no black pan flecks. I use a paperclip to stir it and pour it out and a little spatula to push it to one side. It had the consistency of thinned out gak (remember that stuff?) haha
Step 5:
After pushing it to one side, I'd move on and do another half pan, coming back later when the half pan I did before was a little more "set" and firmer so it could be pushed into a little wall to mark the dividing line. Then I would pour the second color in the pan.
Continue until you are all done.
The Aftermath
Some disclaimers, since you aren't pressing it into a pan, this method is more or less permanent. So don't do it unless you are really sure you want it like that for a looong time.
You do end up wasting quite a bit of pigment (on the paperclip, on the spoons, etc) but I figure I'm going to waste a lot less than I would if I dropped a whole jar. hehe And, you can always use the dried pigment in the samples jars, those are still totally useable.
Step 6:
Letting it dry. If you let it dry naturally, it'll take a while. Maybe up to 2 days. If you're impatient and want it NOW, use a heater. I had mine on so I tossed it in front of it for maybe 15 mins? I think that was too long, it dried QUICK to a crisp.
Before: Wet
After: Dry
I've tried it out and let me tell you, it's AMAZING! SO much easier, and it's nice to pop open the palette and have eight 8! Shadows just waiting there to be used. ahaha It's like a economical dream come true, I save pigment over time and it makes me much more efficient in the mornings when I put on MU.
It's a little messy, and some of them are ugly, but this was my first shot, I still have lots of other pigments to press! XD
Oh yeah, and if you want them to look pretty, I haven't tried this but you can probably wet the top of the pigment after it has dried with some alcohol and put a piece of wax paper over it and press on it with a quarter (or something the size of a MAC e/s pan, a quarter was the best I could come up with.) I'm not too picky about what it looks like so I left it as is, I might clean up the sides eventually though.
Colors:
Top Left: Goldenaire and Naked
Top Right: Deckchair and Provence
Bottom Left: Copper Sparkle and Chocolate Brown
Bottom Right: Coco Beach and Coco
Hope you guys like it as much as I liked making it!


