Renakins
New member
This is my first tutorial. I'll use it as an excuse for the lack of detailed pictures!
I find putting on makeup in the morning to be absolutely horrendous. Especially since I usually wake up 30 minutes before I'm due somewhere important and have to rush the (makeup) process so that I can get into the car and be ready for the twenty-something minutes drive to some happy place.
Therefore, this routine is quite minimum and will have you looking (re)fresh(ed) and somewhat presentable in under 10 minutes. And for the record, you can actually do this WHILE you're eating - I recommend a nice cool cup of yogurt to go with this routine. That's two birds with one stone!
Now:
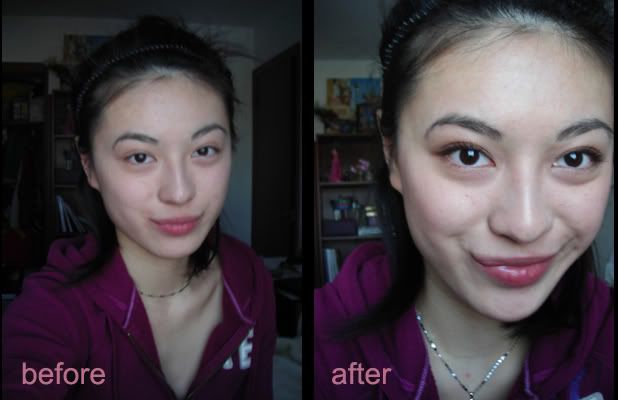
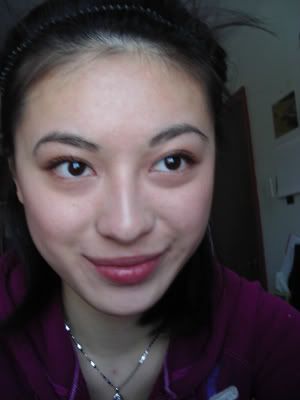
On the left is what I usual look like - and what you'll usually find me looking like. First step is of course to wash & moisturize. No matter how much time you don't have, you should NEVER skip these two steps. Always wash and moisturize.
I recommend St. Ives Apricot Scrub Gentle Formula for Sensitive Skin (that IS a mouthful) for all year round.
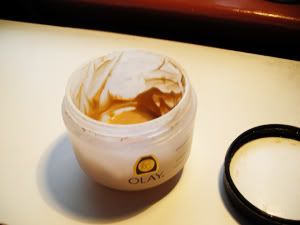
By mixing your choice of foundation and a moisturizer such as:

You can also create your very own tinted moisturizer which will probably save you a whole load of time in the future!
You're probably wondering how this can be done - it's quite simple. You take an old container, squeeze in foundation & add moisturizer. (Yah, as you can probably see, I'm no professional) For more coverage, add more foundation, for a lighter formula add more moisturizer! Experiment! (when you have time)

Slap on your tinted moisturizer and you're done step one.
(OR if you're REALLY pressed for time, stop here, pinch your cheeks, curl your eyelashes and get out of that house! - Story of my life.)
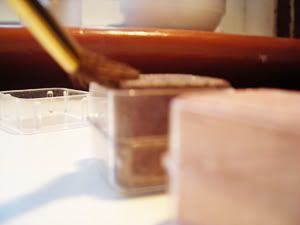
Step two, figure out the tools:

I use ^.
From the left that is:
1. My own selfmade tinted moisturizer
2. The Body Shop Summer Shimmer Cube
3. Estee Lauder (FREE) blending brush
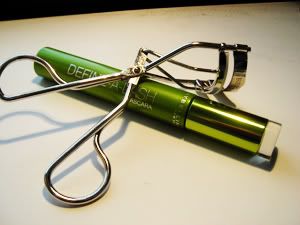
4. Eyelash curler
5. Maybelline New York Define-A-Lash Mascarra
6. Dark brown eyeliner
7. Clinique blush
8. Softlips lipbalm!
Keep it simple, keep it neutral, stick to the essentials (listed above!)
Step three, start by lining your LIDS with a dark brown eyeliner.
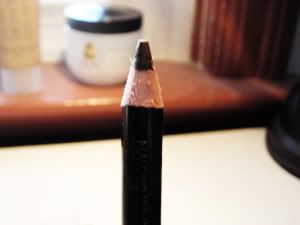
I know you're tempted to use black, but trust me, in this case, brown will do more for your eye.
Stick as close to the lashline as possible. Use light, feathery strokes and feel free to smudge a little with ring finger!

This helps define the eyes and ultimately, its only purpose is to make you look awake.


Step four, dip brush into a pink eyes shadow.
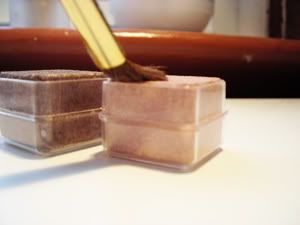
I'm using Marshmellow from The Body Shop Summer Cube Pallet.
Sweep the colour across your eyelid.

I'm Asian. Therefore I always stop "sweeping" below my brow bones. I think (regardless of your ethnicity) you should do the same!
At this point, chances are you look "good" enough and therefore you may go and take a bite of something to eat!
Step five, take a second colour, in some shade of light mocha - it should be bronzy with a bit of purple (I'm using Choc Chip from The Body Shop Summer Cube Pallet) and sweep across your "crease".
Now, if you're non-chinky eyed, this would probably be a very easy step. However, if you are, you're looking to "sweep" across this area:

The result should look somewhat like:

So now you might have realized that the brown eyeliner - which you applied earlier will have probably disappeared completely under the eyeshadows. No worries - if you wish, just re-line your lids.
Step six,
Curl & apply mascara to your lashes. I would stick to a lash-defining mascara as oppose to a volumizing mascara just so you can keep your look fresh and natural.
Step seven,
Blush! - It'll stop you from looking like a vampire.
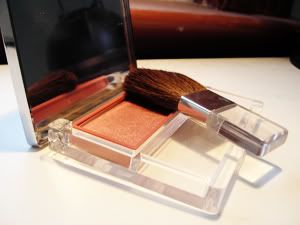
I'm using 103 Sunset Glow by Clinique. I find that Clinique's formula are light and glow-y - but if you don't want to pay $30 for a blush, go with a drugstore brand. Whatever you do, pick a pink with a bit of peach. It blends better with all skin tones.
Blush can also be used for "contouring" (according to my makeup artist!) but I really can't tell you how. What I always do is once again, "sweep" the brush upwards towards my temples (as taught by my makeup artist) in a shape as such:

And this now brings us to step last:

Apply generously - and never leave the house without lipbalm!
If you practice, this routine should take all of ... 6:50 minutes. Leaving you with enough time to finish the rest of your breakfast, find your bags, shoes, keys and run to wherever the world needs you.
Happy running!
I find putting on makeup in the morning to be absolutely horrendous. Especially since I usually wake up 30 minutes before I'm due somewhere important and have to rush the (makeup) process so that I can get into the car and be ready for the twenty-something minutes drive to some happy place.
Therefore, this routine is quite minimum and will have you looking (re)fresh(ed) and somewhat presentable in under 10 minutes. And for the record, you can actually do this WHILE you're eating - I recommend a nice cool cup of yogurt to go with this routine. That's two birds with one stone!
Now:
On the left is what I usual look like - and what you'll usually find me looking like. First step is of course to wash & moisturize. No matter how much time you don't have, you should NEVER skip these two steps. Always wash and moisturize.
I recommend St. Ives Apricot Scrub Gentle Formula for Sensitive Skin (that IS a mouthful) for all year round.
By mixing your choice of foundation and a moisturizer such as:
You can also create your very own tinted moisturizer which will probably save you a whole load of time in the future!
You're probably wondering how this can be done - it's quite simple. You take an old container, squeeze in foundation & add moisturizer. (Yah, as you can probably see, I'm no professional) For more coverage, add more foundation, for a lighter formula add more moisturizer! Experiment! (when you have time)
Slap on your tinted moisturizer and you're done step one.
(OR if you're REALLY pressed for time, stop here, pinch your cheeks, curl your eyelashes and get out of that house! - Story of my life.)
Step two, figure out the tools:
I use ^.
From the left that is:
1. My own selfmade tinted moisturizer
2. The Body Shop Summer Shimmer Cube
3. Estee Lauder (FREE) blending brush
4. Eyelash curler
5. Maybelline New York Define-A-Lash Mascarra
6. Dark brown eyeliner
7. Clinique blush
8. Softlips lipbalm!
Keep it simple, keep it neutral, stick to the essentials (listed above!)
Step three, start by lining your LIDS with a dark brown eyeliner.
I know you're tempted to use black, but trust me, in this case, brown will do more for your eye.
Stick as close to the lashline as possible. Use light, feathery strokes and feel free to smudge a little with ring finger!
This helps define the eyes and ultimately, its only purpose is to make you look awake.
Step four, dip brush into a pink eyes shadow.
I'm using Marshmellow from The Body Shop Summer Cube Pallet.
Sweep the colour across your eyelid.
I'm Asian. Therefore I always stop "sweeping" below my brow bones. I think (regardless of your ethnicity) you should do the same!
At this point, chances are you look "good" enough and therefore you may go and take a bite of something to eat!
Step five, take a second colour, in some shade of light mocha - it should be bronzy with a bit of purple (I'm using Choc Chip from The Body Shop Summer Cube Pallet) and sweep across your "crease".
Now, if you're non-chinky eyed, this would probably be a very easy step. However, if you are, you're looking to "sweep" across this area:
The result should look somewhat like:
So now you might have realized that the brown eyeliner - which you applied earlier will have probably disappeared completely under the eyeshadows. No worries - if you wish, just re-line your lids.
Step six,
Curl & apply mascara to your lashes. I would stick to a lash-defining mascara as oppose to a volumizing mascara just so you can keep your look fresh and natural.
Step seven,
Blush! - It'll stop you from looking like a vampire.
I'm using 103 Sunset Glow by Clinique. I find that Clinique's formula are light and glow-y - but if you don't want to pay $30 for a blush, go with a drugstore brand. Whatever you do, pick a pink with a bit of peach. It blends better with all skin tones.
Blush can also be used for "contouring" (according to my makeup artist!) but I really can't tell you how. What I always do is once again, "sweep" the brush upwards towards my temples (as taught by my makeup artist) in a shape as such:
And this now brings us to step last:
Apply generously - and never leave the house without lipbalm!
If you practice, this routine should take all of ... 6:50 minutes. Leaving you with enough time to finish the rest of your breakfast, find your bags, shoes, keys and run to wherever the world needs you.
Happy running!

