mrs. bebee917
Well-known member

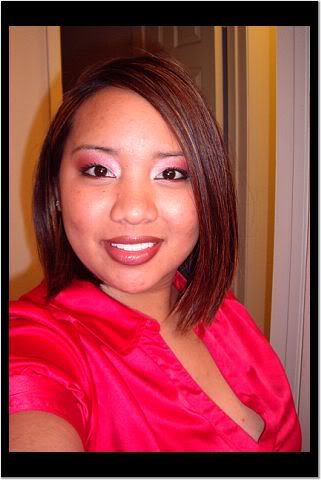
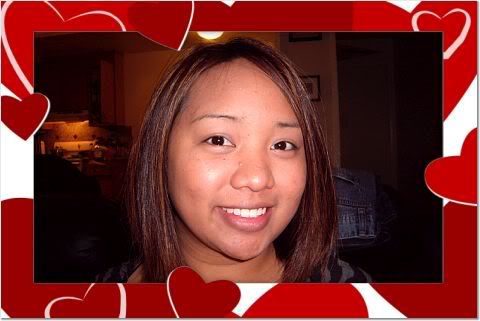
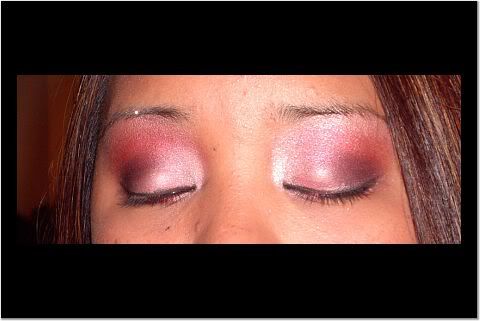
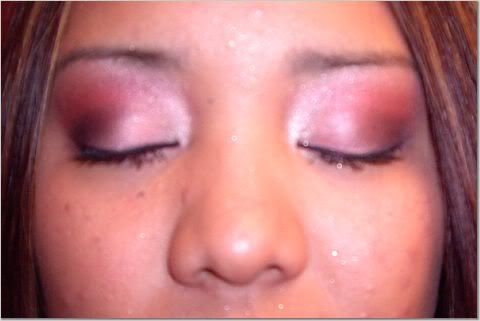
Here's my Vday look... hope you all N*joY!
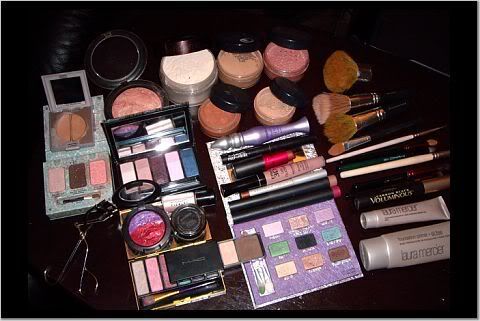
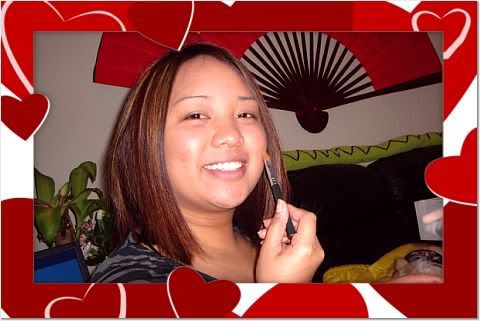
Here's the Goods:
Step One: Moisturize & Prime: entire face... I just used my fingers for this

(Laura Mercier Oil Free Foundation Primer & L.M. Tinted Moisturizer in Sand)
Step Two: Buff Foundation: using the B.E. Large Kabuki brush buff away.. I start with my forehead & work my way down to my neck... I buff A LOT!
(BareMinerals in Tan)
Step Three: Conceal: using the B.E.Max Coverage Concealer brush conceal all the lil' imperfections...

(BareMinerals in Tan & B.M. Honey Bisque)
Step Four: Contour: using the B.E. Flawless Face brush take some B.M. Warmth & put some right under your cheek bones, across your forehead, & on the sides of your nose...
(BareMinerals Warmth)
Step Five: Blush & Hi-Lite: using the same brush as Step 4, apply blush to the apples of your cheeks... then apply a little hi-lite to your high cheek bone taking it up near the side of your eyes using the B.E. Feather Light brush
(the Balm blush in Hot Mama & MAC M.S.F. in Glissade)
Step Six: Finish & Set: take a lil' B.M. True using the B.E. Feather Light brush & brush all over face for a lil' extra sparkle


(B.M. All Over Face Color in True & L.M. Loose Setting Powder in Translucent)
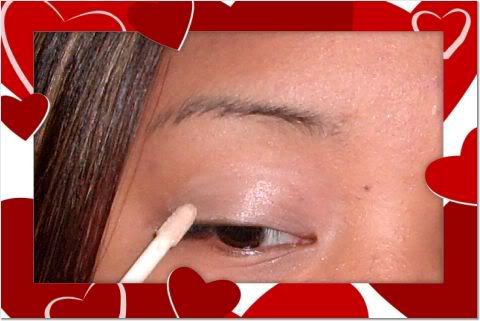
Step Seven: Prime the Eye: using the applicator to apply & your finger to smooth the entire eye...
(Urban Decay Primer Potion)
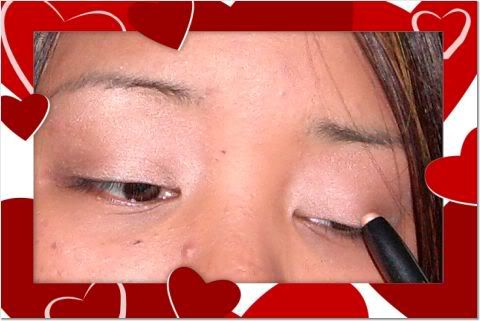
Step Eight: Prime the Eye 2: apply Shadestick all over the entire eye all the way up to the brow bone... use your finger to smooth...
(MAC Shadestick in Shimmersand)
Step Nine: Prime the Eye 3: apply Shadestick to the corner V of the eye & use your finger to smooth...
(MAC Shadestick in Fuschia... not positive if that's the name anymore... it sudged off sorry.. but that's the color


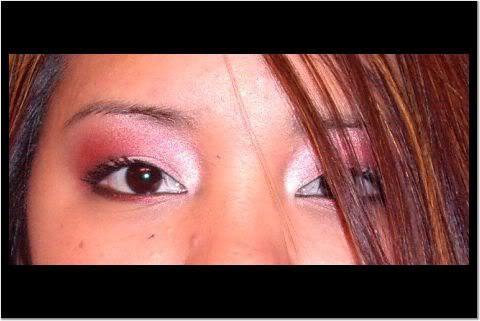
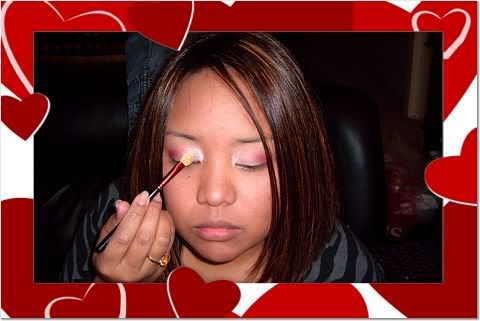
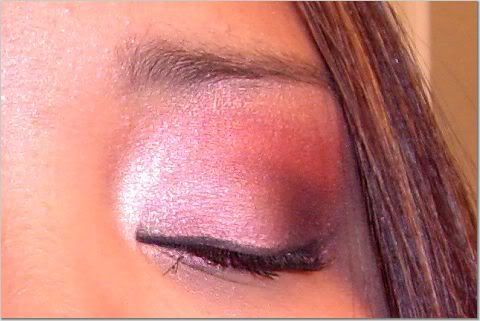
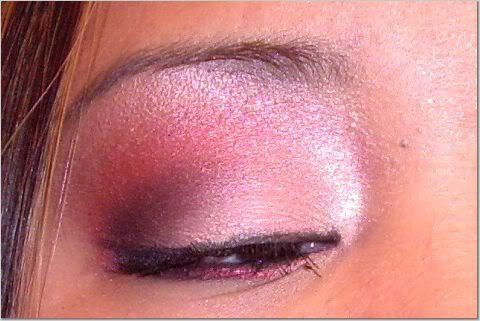
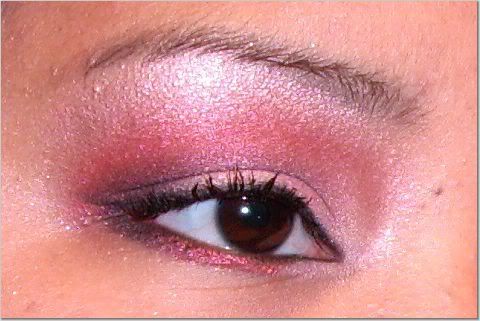
Step Ten: Color - inner lid: pack on Lily White pig. on the inner corner of your eye with 242 brush...
(MAC Pigment in Lily White)

Step Eleven: Color - crease: using the 224 brush sweep red eyeshadow from the bottom corners of your eye to mid crease...
(MAC Mineralize Eyeshadow in Mi' Lady - red shadow ONLY)
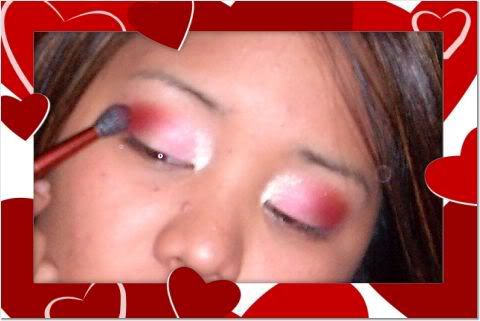
Step Twelve: Color - deepen crease: using the 224 brush blend a lil' purplish eyeshadow from outer to the inner crease...
(MAC Eyeshadow in Star Violet)
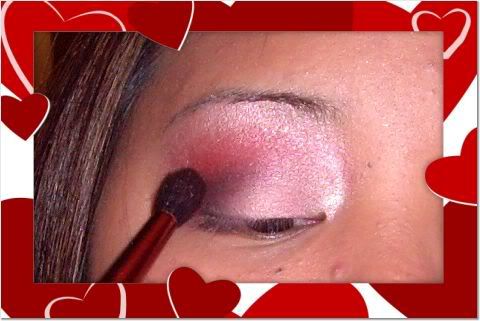
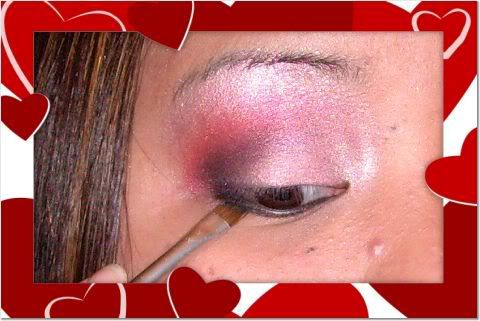
Step Thirteen: Color - V: using the 219 brush add depth with a dark burgandy eyeshadow to the V...
(MAC Eyeshadow in Beauty Marked)
Step Fourteen: Color - Lid: using the 242 brush pack light pink eyeshadow onto the lid...
(MAC Eyeshadow in Circularity)
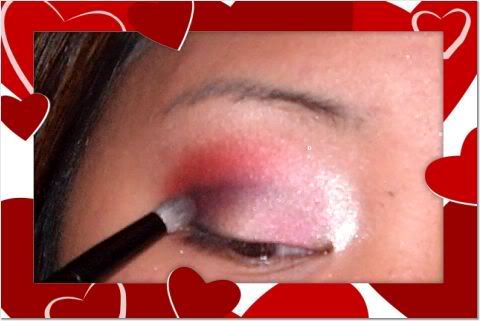
Step Fifteen: Color - Hi-Lite Browbone: using Bourjois eyeshadow brush dab silvery gold eyeshadow onto your browbone...
(UD Eyeshadow in Midnight Cowboy Rides Again)
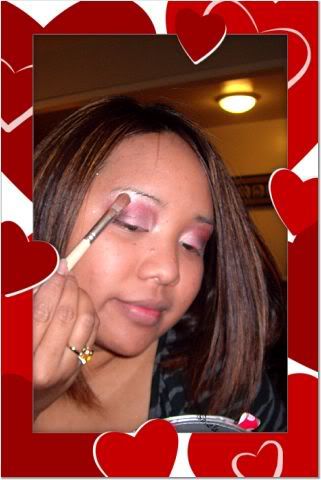
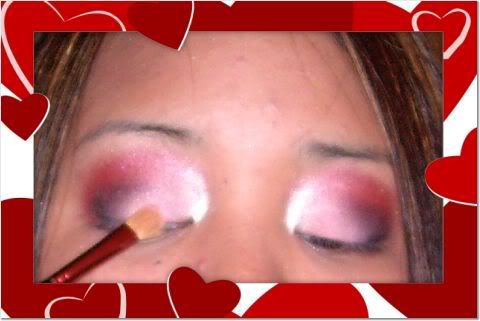
Step Sixteen: Blend, Blend, Blend!: using 224 brush blend the heck outta your eyes

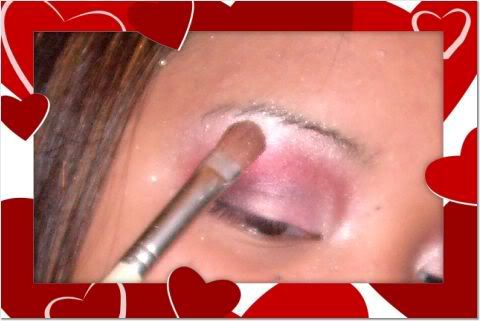
Step Seventeen: Do Brows: using the 266 brush shape & define your brows...
(MAC Brow Shader in Ivoire/Walnut - walnut ONLY)
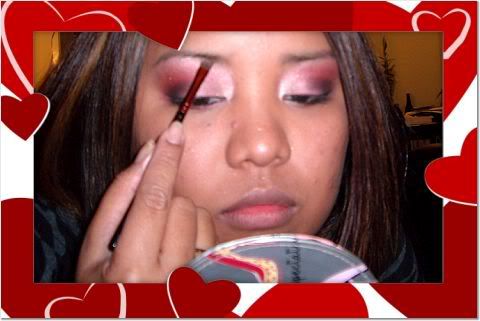
Step Eighteen: Line the Eye: using the Bourjois angle brush line your top & bottom lashlines... add a lil' wing to the top for a touch of drama...
(MAC Fluidline in Blacktrack)
Step Nineteen: Add Drama to Lower Line: by using the Bourjois angle brush line the bottom lashlines with a splash of 3 eyeshadows gradiently - Lily White pig. for inner, Mi' Lady for mid, & Beauty Marked for outer...
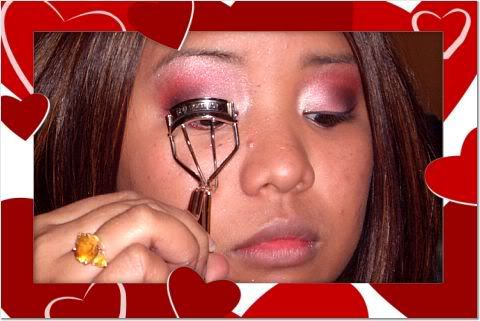
Step Twenty: Flirt your Lashes: curl your lashes with Shu Uemura eyelash curler...
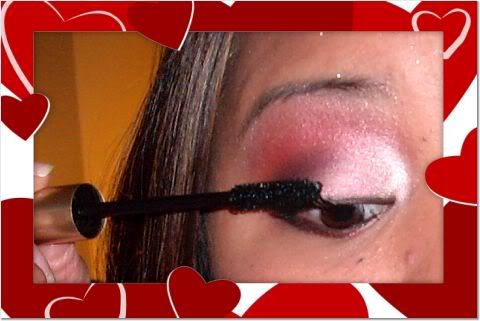
Step Twenty One: Flirt your Lashes 2: apply 2-3 coats of black mascara... I <3 MASCARA!!!
(L' Oreal Voluminous Mascara in Carbon Black)
Step Twenty Two: Flirt your Lashes some more!: curl your lashes More More More!!!
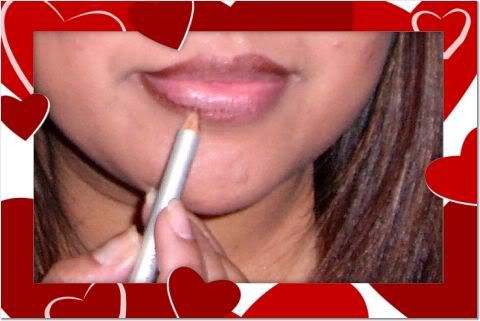
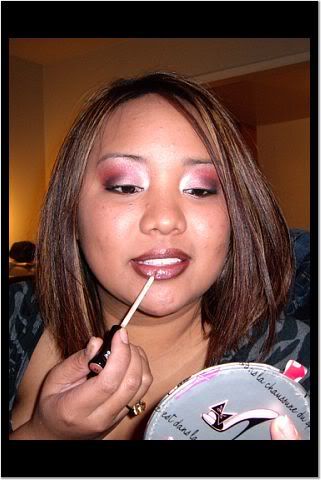
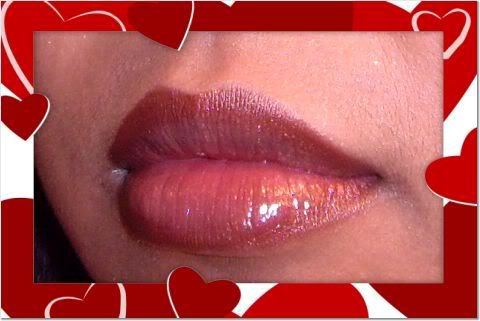
Step Twenty Three: Make Kissable Lips!: apply primer & line your luscious lips
(MAC Prep & Prim Lip & Prestige in Satin Bronze)
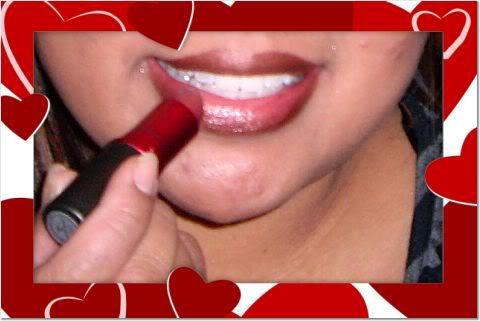
Step Twenty Four: Make Kissable Lips 2!: apply your fave reddish lipstick...
(MAC Lipstick in Viva Glam VI)
Step Twenty Five: Make Kissable Lips 3!: add some shine with a lil' pinkish gloss... this one has a hint of sparkle in it!!
(Bourjois Effect 3D gloss in #33)
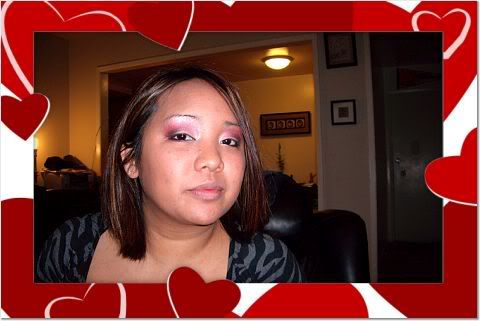
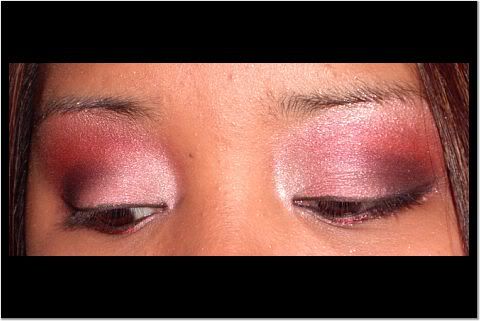
TADA.... Your look is NOW complete!!!
Now strut your stuff & enjoy your V-day!!!

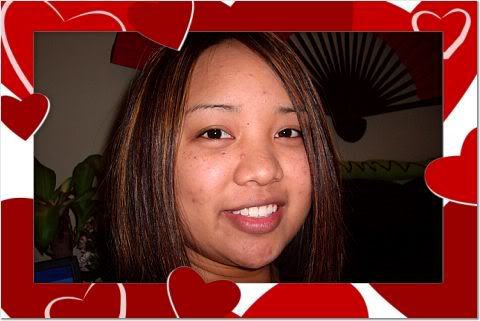
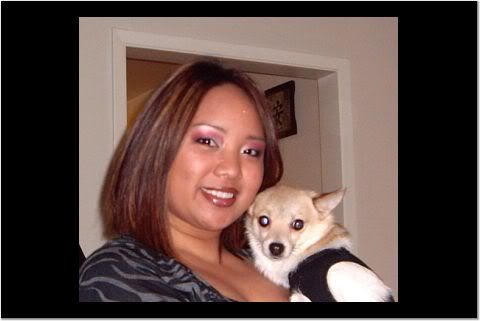
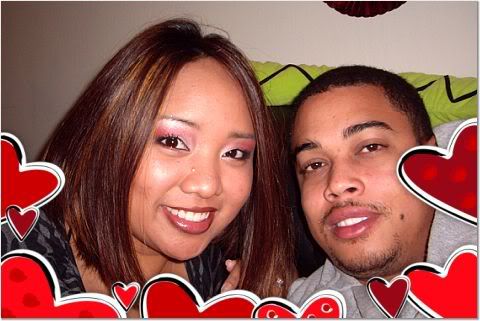
take pic with the babies....
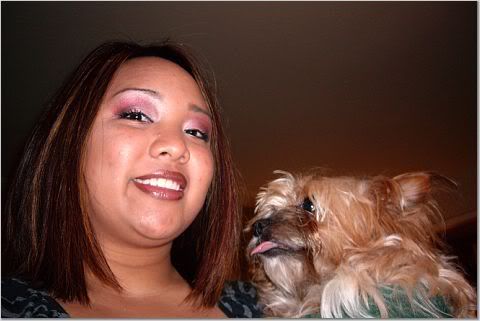
me & my love...
THANKS so Much for stopping by... till next tut...