ChoRadcliffe
Member
EDIT: Sorry this disappeared before. It's back now. =D
Hey girls! So I've been a long-time lurker here, learning from you all, but I figured it's about time I post something. I know this is a MAC forum, which excites me and intimidates me at the same time because although I'm learning soooo much about the godliness that is MAC Cosmetics, I also can't really afford any of it. I am the most frugal person you'll ever meet so most of my makeup consists of the cheapest of drugstore makeup (read: E.L.F.)
But I'm here today to show you that you CAN achieve intense, dramatic makeup looks even with the cheapest of makeup. This is my first tutorial ever and I'm by no means a makeup expert so... play nice.

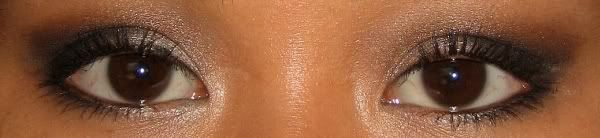
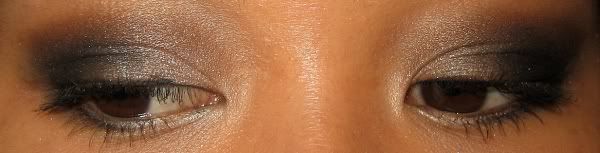
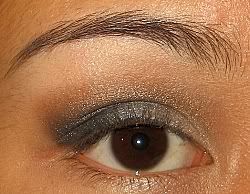
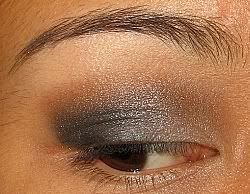
See this? I spent less than $7 on this look. Intrigued now, aren't ya?
 Keep on reading...
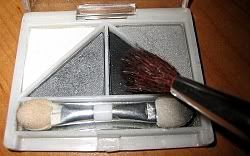
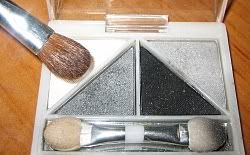
~*MY WEAPONS*~
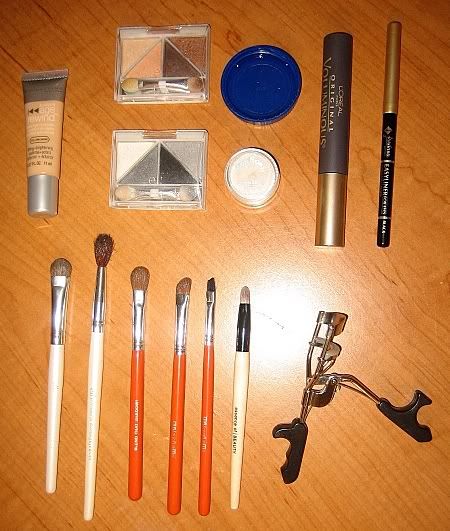
- Maybelline Age Rewind Concealer Instant Age Rewind Concealer in Yellow ($1)
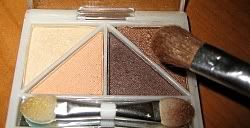
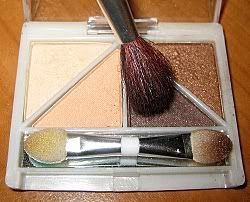
- E.L.F. Brightening Eye Color quad in Butternut ($1, free)
- E.L.F. Brightening Eye Color quad in Drama ($1, free)
- Capful of water
- Bon Bons Eye Shadow Powder in White ($0.88)
- L’Oreal Voluminous Mascara in Black ($7.49, free)
- Jordana Easy Eyeliner in Black ($1.50, free)
- E.L.F. Eye Shadow Brush ($1, free)
- E.L.F. Blending Eye Brush ($1, free)
- emergency girl Blend That Shadow! Brush ($2.99, $1)
- emergency girl Drama Queen! Brush ($2.99, $1)
- emergency girl Line 'Em Up! ($2.99, $1)
- Essence of Beauty Fine Conceal Brush ($4.99 in duo pack, $2.50 for duo pack)
- E.L.F. Mechanical Eyelash Curler ($1, free)
[I listed the prices of all the items I used and the prices I got the items at, if different from the original price.]
LET'S GET STARTED...
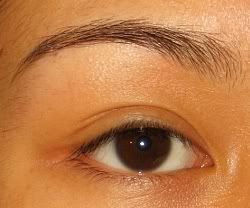
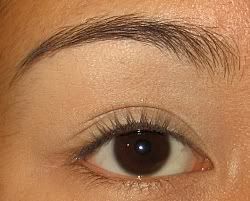
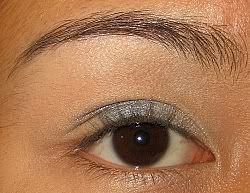
1. My naked eye.
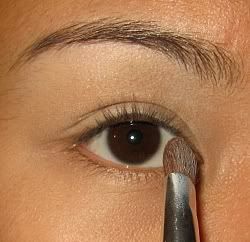
2. Use Maybelline Instant Age Rewind Concealer as a base from lid to brow bone, as well as under eye to conceal dark circles. Curl lashes.
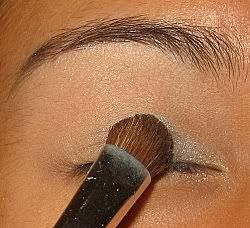
3. Use E.L.F. Eye Shadow Brush to apply white shadow from E.L.F. Drama quad from lid to brow bone. (It doesn’t seem very obvious here.)

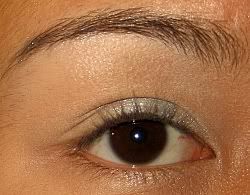
4. Use the same brush to apply Bon Bons white shadow to inner corner.
5. Use the same brush to apply the light gray shadow from the E.L.F. Drama quad to the inner middle lid. For the shadows on the lid, I wet the brush by dipping it in the cap of water and wiping off the excess just so the colors would show up better on camera.
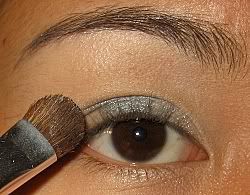
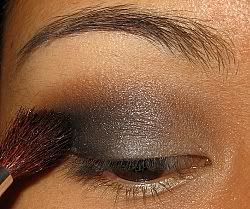
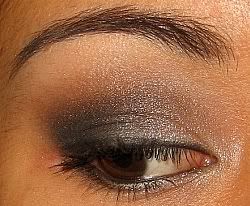
6. Use the same brush to apply the dark gray shadow from the same quad to the outer part of the eye.
7. Use the same brush to apply the black shadow from the same quad to the very outer corner of the lid. You don’t have to blend yet.
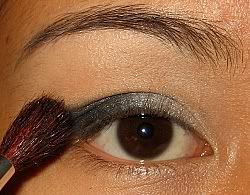
8. Use the E.L.F. Blending Eye Brush to apply the black shadow to the crease. Place the tip of the brush in the crease at the end of the lid and make tiny circles inward. Use windshield wiper motions to blend slightly.
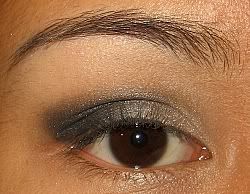
9. Use the emergency girl Blend That Shadow! Brush to apply the medium brown shadow from the E.L.F. Eye Brightening Eye Color quad in Butternut above the crease. You don’t necessarily need to use this brush; the E.L.F. Blending Eye Brush will do.
10. Use the Blending Eye Brush to define the brown using the dark brown shadow. Apply between the upper crease and the top of where the medium brown shadow ended.

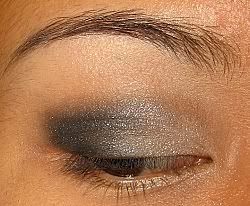
11. Go back with the same brush and the black shadow to further define the outer corner of the lid and the outer crease.
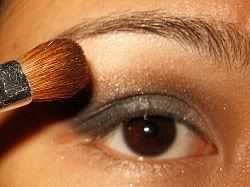
12. Use the Blend That Shadow! brush (or really any brush) to apply the white shadow to the brow bone as a highlight and to blend the dark shadow upward.
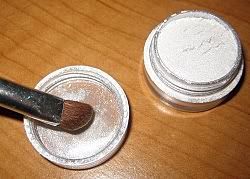
13. With the emergency girl Drama Queen! brush (or any brush) to apply the shimmery white powder shadow to the inner corner of the eye.
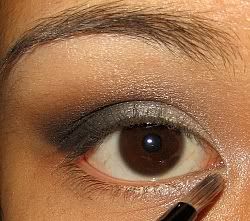
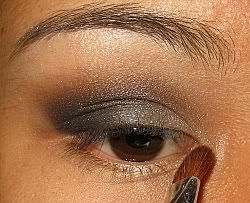
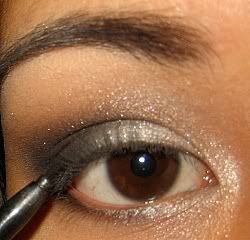
14. Use the Essence of Beauty Fine Conceal Brush wet to apply the shimmery white shadow to the inner 1/3 of the lower lid. (I use this brush kind of like a pencil brush even though I know Essence of Beauty has a brush for this purpose. Use what you’ve got, right?)
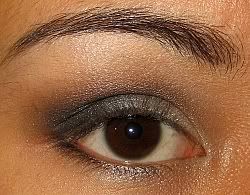
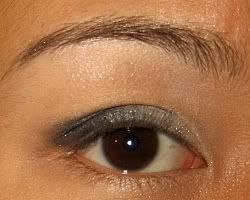
15. Continue using the brush wet to apply the dark gray shadow from the Drama quad to the middle 1/3 of the lower lid. Apply the black shadow to the outer 1/3. (Somewhere between this step and the last one, I apparently decided to fill in my brows with a combo of the dark brown and black shadow with the liner brush.)
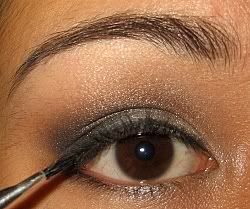
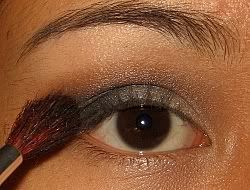
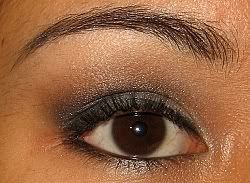
16. Thinly line the top lid and lower waterline with Jordana Easy Eyeliner in Black. Go over top lashline with a wet liner brush and black shadow in you choose. (Feel free to line your eyes as dramatically as you wish. It’s hard for me to maneuver using an automatic pencil so I just stuck to a thin, natural line.)
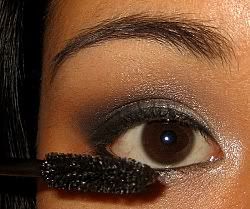
17. Apply mascara to upper and lower lashes. (I only apply one coat because I didn’t want to bother with washing too much off afterward. But of course mascara and even false lashes are key to a smoky look so feel free to do as your
 desires.)
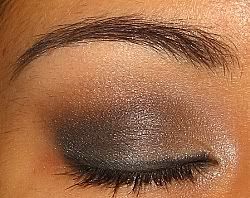
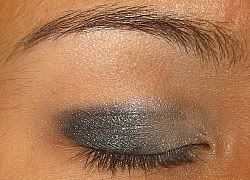
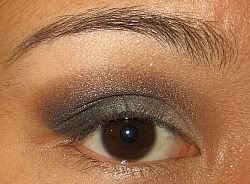
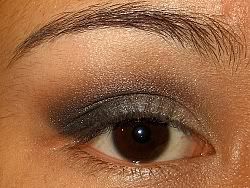
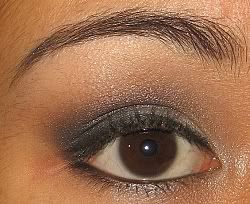
18. VOILA! DONE.
 (I forgot to apply concealer to the redness on the outer corner of my eye. Whoopsies.)
Hopefully that was helpful and I wasn’t all over the place or too long-winded. Any feedback is certainly welcome (both on the makeup and on the tutorial.) This look is a recreation of the original EOTD, but I don’t think there are any drastic differences. You really only need half the brushes I used to create this look. Just the ELF brushes and the EOB brushe or just the orange brushes would do.
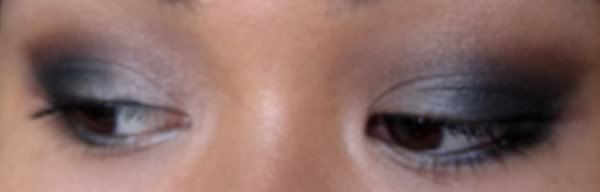
Thanks for sitting through and reading the entire thing. Ciao!

Hey girls! So I've been a long-time lurker here, learning from you all, but I figured it's about time I post something. I know this is a MAC forum, which excites me and intimidates me at the same time because although I'm learning soooo much about the godliness that is MAC Cosmetics, I also can't really afford any of it. I am the most frugal person you'll ever meet so most of my makeup consists of the cheapest of drugstore makeup (read: E.L.F.)
But I'm here today to show you that you CAN achieve intense, dramatic makeup looks even with the cheapest of makeup. This is my first tutorial ever and I'm by no means a makeup expert so... play nice.
See this? I spent less than $7 on this look. Intrigued now, aren't ya?
~*MY WEAPONS*~
- Maybelline Age Rewind Concealer Instant Age Rewind Concealer in Yellow ($1)
- E.L.F. Brightening Eye Color quad in Butternut ($1, free)
- E.L.F. Brightening Eye Color quad in Drama ($1, free)
- Capful of water
- Bon Bons Eye Shadow Powder in White ($0.88)
- L’Oreal Voluminous Mascara in Black ($7.49, free)
- Jordana Easy Eyeliner in Black ($1.50, free)
- E.L.F. Eye Shadow Brush ($1, free)
- E.L.F. Blending Eye Brush ($1, free)
- emergency girl Blend That Shadow! Brush ($2.99, $1)
- emergency girl Drama Queen! Brush ($2.99, $1)
- emergency girl Line 'Em Up! ($2.99, $1)
- Essence of Beauty Fine Conceal Brush ($4.99 in duo pack, $2.50 for duo pack)
- E.L.F. Mechanical Eyelash Curler ($1, free)
[I listed the prices of all the items I used and the prices I got the items at, if different from the original price.]
LET'S GET STARTED...
1. My naked eye.
2. Use Maybelline Instant Age Rewind Concealer as a base from lid to brow bone, as well as under eye to conceal dark circles. Curl lashes.
3. Use E.L.F. Eye Shadow Brush to apply white shadow from E.L.F. Drama quad from lid to brow bone. (It doesn’t seem very obvious here.)
4. Use the same brush to apply Bon Bons white shadow to inner corner.
5. Use the same brush to apply the light gray shadow from the E.L.F. Drama quad to the inner middle lid. For the shadows on the lid, I wet the brush by dipping it in the cap of water and wiping off the excess just so the colors would show up better on camera.
6. Use the same brush to apply the dark gray shadow from the same quad to the outer part of the eye.
7. Use the same brush to apply the black shadow from the same quad to the very outer corner of the lid. You don’t have to blend yet.
8. Use the E.L.F. Blending Eye Brush to apply the black shadow to the crease. Place the tip of the brush in the crease at the end of the lid and make tiny circles inward. Use windshield wiper motions to blend slightly.
9. Use the emergency girl Blend That Shadow! Brush to apply the medium brown shadow from the E.L.F. Eye Brightening Eye Color quad in Butternut above the crease. You don’t necessarily need to use this brush; the E.L.F. Blending Eye Brush will do.
10. Use the Blending Eye Brush to define the brown using the dark brown shadow. Apply between the upper crease and the top of where the medium brown shadow ended.
11. Go back with the same brush and the black shadow to further define the outer corner of the lid and the outer crease.
12. Use the Blend That Shadow! brush (or really any brush) to apply the white shadow to the brow bone as a highlight and to blend the dark shadow upward.
13. With the emergency girl Drama Queen! brush (or any brush) to apply the shimmery white powder shadow to the inner corner of the eye.
14. Use the Essence of Beauty Fine Conceal Brush wet to apply the shimmery white shadow to the inner 1/3 of the lower lid. (I use this brush kind of like a pencil brush even though I know Essence of Beauty has a brush for this purpose. Use what you’ve got, right?)
15. Continue using the brush wet to apply the dark gray shadow from the Drama quad to the middle 1/3 of the lower lid. Apply the black shadow to the outer 1/3. (Somewhere between this step and the last one, I apparently decided to fill in my brows with a combo of the dark brown and black shadow with the liner brush.)
16. Thinly line the top lid and lower waterline with Jordana Easy Eyeliner in Black. Go over top lashline with a wet liner brush and black shadow in you choose. (Feel free to line your eyes as dramatically as you wish. It’s hard for me to maneuver using an automatic pencil so I just stuck to a thin, natural line.)
17. Apply mascara to upper and lower lashes. (I only apply one coat because I didn’t want to bother with washing too much off afterward. But of course mascara and even false lashes are key to a smoky look so feel free to do as your
18. VOILA! DONE.
Hopefully that was helpful and I wasn’t all over the place or too long-winded. Any feedback is certainly welcome (both on the makeup and on the tutorial.) This look is a recreation of the original EOTD, but I don’t think there are any drastic differences. You really only need half the brushes I used to create this look. Just the ELF brushes and the EOB brushe or just the orange brushes would do.
Thanks for sitting through and reading the entire thing. Ciao!


