Amaranth
Well-known member
Baah! Sorry for the extreme amount of photos, but I sort of do things weird and I wanted to make a really in-depth tutorial so that a) you awesome folks could understand my weird methods and b) anyone new to make-up or MAC can try out my look and understand perfectly how to do it. So hopefully this is easy to understand and do, I tried hard!! I have new respect for the people who make tutorials, this took like 3 hours from beginning to the point where I posted this topic.
I've always wanted to make a tutorial, but I was waiting for the right look. Someone on the FOTD board asked me to make a tutorial for my Flamespot look, so I figured the time was right
 . This isn't EXACTLY the same, I improved upon it a bit (at least I think so), which is why I gave it a different title. Also, people are always asking for ideas on how to use Flammable paint, so here you go!! Highly necessary for this look!
Also, a variety of brief thunderstorms rolled through while I was taking pictures, so that explains why some pictures are darker than others.
This tutorial is so long I have to do it over a few posts, so please bear with me and wait until I'm done posting everything before replying. Thanks!
So here we go! You ready to get sexy?
What you'll need:
Eyeshadows in Pots and Palette:
MAC Firespot
MAC Orb
MAC Carbon
MAC Rummy
MAC Phloof!
MAC Goldmine
MAC Gorgeous Gold
Eyeliner:
MAC Fluidline in Blitz & Glitz
MAC Fluidline in Brassy
Mascara:
L'Oreal Paris Telescopic Mascara
Paints:
MAC Bare Canvas
MAC Flammable
Lips:
MAC Viva Glam V Lipstick
MAC Snowgirl Lipglass
Face:
MAC Studio Fix Powder Foundation (Mine is C3)
Revlon Skinlights in Bare Light
Revlon Powder Blush in Smoky Rose
CoverGirl Bronzer
MAC Select Moisturecover Concealer (Mine is NC20)
Brushes:
MAC 187
MAC 219
MAC 217
MAC 180
MAC 239
MAC 208
Estee Lauder Blush Brush
Some crappy no name brush I use exclusively for Paints
All of which can be seen here:

Now start with a bare face...because you know that if I hadn't included this step, I'm SURE you would have done this look right over top of whatever make-up your already wearing, haha.
And OH NOES, it's blurry...that wasn't intentional...mwahhaa

Dab on some concealer wherever you may need it, likely under the eyes, around the nose. I then use my handy-dandy finger to blend it in. This is also likely the point where most people would apply their liquid foundation, but I don't wear that (my skin is decent, Studio Fix gives me enough coverage). So if you're a foundation kind of person, apply that now if you wish.

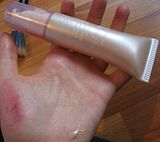
Get your Bare Canvas Paint and jam a TINY little bit onto your hand

Then use your finger to apply to to the entire eye area, from the lashline to your eyebrow, it's gonna be your base to help everything stick and keep it from creasing.

Next, put some Carbon eyeshadow onto your hand (I used the 219 to tap a bunch on, but you can use whatever), and add a wee bit of Flammable Paint right next to it...

Then mix those bad boys together until you get something that resembles this (you should make it a teeny bit darker than you would like it to be in the end, we're going to put more Flammable Paint on top so it won't look quite as dark as it does now):

Just use your finger to place it in the outer corner of both eyes. Doesn't really matter if it looks crappy at this point. If your Flammable/Carbon is not dark enough for your liking, just jam some more Carbon on top like I did in this picture. More Flammable will be going on top soon anyway.

Get your crappy brush that you don't care about killing and load it up with straight up Flammable Paint (from the tube, not the one mixed with Carbon).

Apply it to the outer V of your eye, and into the crease. It's hard to see on me, since I have no eye crease, so I guess you'll have to use your imagination. Place it over the stuff with the Carbon on it we just applied, and once your brush starts running out of Paint, really squish the brush around the edges to "fade" it out. Paint are hard to blend, and once they're on there, they ain't moving. So do this before it dries.

Now since I made such a mess (purposely, it's no biggie), use a Q-Tip to a) create a sharp line at the outer edge going up toward the eyebrow (where you would make a cat-eye with liner) and b) blend in the Paint some more. For once, it's a good thing that Flammable stains the skin red, because you can use the Q-Tip to really rub it around. You can remove some of the Paint, but it'll leave a red stain on your skin that makes it look all fade-y and that's what we want! Once again, works best if you do this before the Paint dries.

Should look something like this...doesn't look too awesome, but trust me!! See what I meant by the sharp edge at the outer corner?

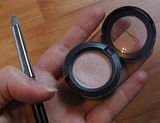
Now get your 239 and Firespot eyeshadow. This is from the LE Moonbathe collection, so you may not be able to get it if you don't have it already. Just use any midtoned orange shadow if you dont have it.

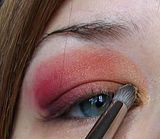
Use the shader brush to really pat the Firespot onto the lid, applying it all the way from the inner corner to about midway through the Flammable Paint.

Should look like this:

Now load up your 219 pencil brush with Goldmine eyeshadow.

Apply it over the Firespot in the inner corner, and stop about halfway into the Firespot. This applying halfway into another colour trick will make the shadow look more blended right away; less blending with the 217 later


Like this (kinda hard to see):

And now some Gorgeous Gold with the same brush:

I've always wanted to make a tutorial, but I was waiting for the right look. Someone on the FOTD board asked me to make a tutorial for my Flamespot look, so I figured the time was right

Also, a variety of brief thunderstorms rolled through while I was taking pictures, so that explains why some pictures are darker than others.
This tutorial is so long I have to do it over a few posts, so please bear with me and wait until I'm done posting everything before replying. Thanks!
So here we go! You ready to get sexy?
What you'll need:
Eyeshadows in Pots and Palette:
MAC Firespot
MAC Orb
MAC Carbon
MAC Rummy
MAC Phloof!
MAC Goldmine
MAC Gorgeous Gold
Eyeliner:
MAC Fluidline in Blitz & Glitz
MAC Fluidline in Brassy
Mascara:
L'Oreal Paris Telescopic Mascara
Paints:
MAC Bare Canvas
MAC Flammable
Lips:
MAC Viva Glam V Lipstick
MAC Snowgirl Lipglass
Face:
MAC Studio Fix Powder Foundation (Mine is C3)
Revlon Skinlights in Bare Light
Revlon Powder Blush in Smoky Rose
CoverGirl Bronzer
MAC Select Moisturecover Concealer (Mine is NC20)
Brushes:
MAC 187
MAC 219
MAC 217
MAC 180
MAC 239
MAC 208
Estee Lauder Blush Brush
Some crappy no name brush I use exclusively for Paints
All of which can be seen here:

Now start with a bare face...because you know that if I hadn't included this step, I'm SURE you would have done this look right over top of whatever make-up your already wearing, haha.
And OH NOES, it's blurry...that wasn't intentional...mwahhaa

Dab on some concealer wherever you may need it, likely under the eyes, around the nose. I then use my handy-dandy finger to blend it in. This is also likely the point where most people would apply their liquid foundation, but I don't wear that (my skin is decent, Studio Fix gives me enough coverage). So if you're a foundation kind of person, apply that now if you wish.

Get your Bare Canvas Paint and jam a TINY little bit onto your hand

Then use your finger to apply to to the entire eye area, from the lashline to your eyebrow, it's gonna be your base to help everything stick and keep it from creasing.

Next, put some Carbon eyeshadow onto your hand (I used the 219 to tap a bunch on, but you can use whatever), and add a wee bit of Flammable Paint right next to it...

Then mix those bad boys together until you get something that resembles this (you should make it a teeny bit darker than you would like it to be in the end, we're going to put more Flammable Paint on top so it won't look quite as dark as it does now):

Just use your finger to place it in the outer corner of both eyes. Doesn't really matter if it looks crappy at this point. If your Flammable/Carbon is not dark enough for your liking, just jam some more Carbon on top like I did in this picture. More Flammable will be going on top soon anyway.

Get your crappy brush that you don't care about killing and load it up with straight up Flammable Paint (from the tube, not the one mixed with Carbon).

Apply it to the outer V of your eye, and into the crease. It's hard to see on me, since I have no eye crease, so I guess you'll have to use your imagination. Place it over the stuff with the Carbon on it we just applied, and once your brush starts running out of Paint, really squish the brush around the edges to "fade" it out. Paint are hard to blend, and once they're on there, they ain't moving. So do this before it dries.

Now since I made such a mess (purposely, it's no biggie), use a Q-Tip to a) create a sharp line at the outer edge going up toward the eyebrow (where you would make a cat-eye with liner) and b) blend in the Paint some more. For once, it's a good thing that Flammable stains the skin red, because you can use the Q-Tip to really rub it around. You can remove some of the Paint, but it'll leave a red stain on your skin that makes it look all fade-y and that's what we want! Once again, works best if you do this before the Paint dries.

Should look something like this...doesn't look too awesome, but trust me!! See what I meant by the sharp edge at the outer corner?

Now get your 239 and Firespot eyeshadow. This is from the LE Moonbathe collection, so you may not be able to get it if you don't have it already. Just use any midtoned orange shadow if you dont have it.

Use the shader brush to really pat the Firespot onto the lid, applying it all the way from the inner corner to about midway through the Flammable Paint.

Should look like this:

Now load up your 219 pencil brush with Goldmine eyeshadow.

Apply it over the Firespot in the inner corner, and stop about halfway into the Firespot. This applying halfway into another colour trick will make the shadow look more blended right away; less blending with the 217 later


Like this (kinda hard to see):

And now some Gorgeous Gold with the same brush:


