kitten
Well-known member
hai guise! this is actually my first tutorial! i decided to make one after i created a rather cute look when i was being adventurous with my makeup. the second time around, when i did this tutorial it came out differently. it was inspired by this, but the look in this tutorial is brighter and much more dramatic:
so lets begin!
here are the ingredients i used...
//shadows

[top to bottom; left to right] mac - swimming, loreal h.i.p showy duo (parrot look-a-like), same but the matte royal blue shade, mac - naked lunch, rimmel - moonstone, urban decay - midnight cowboy rides again, mac - peachy beige tone, annabelle "haute chocolat" trio - light taupe, same but darkest shimmery brown, same but the lighter brown, mac - freshwater, and mac - contrast.
//face

cover girl - clear complexions concealer in natural beige, bare escentuals - mineral veil, bare escentuals mineral foundation - medium beige, bare escentuals mf - medium, mac blush - desert rose, and marcelle tinted moisturizer - creamy beige.
//misc. eyes
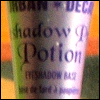
urban decay - primer potion, annabelle eye pencil - lapis, and rimmel lash maxxx mascara - extreme black.
//tools

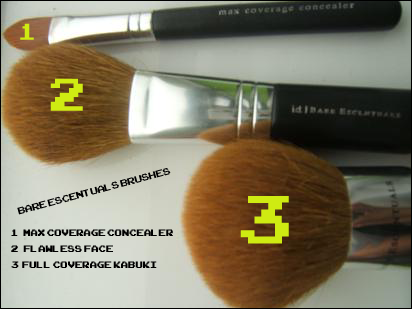
--- now that we know what we're using... ---
start with a bare canvas. cleanse, tone, moisturize. just your daily skincare regimen. also, tweeze spares if needed.
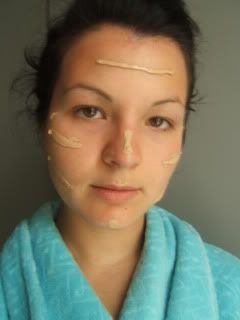
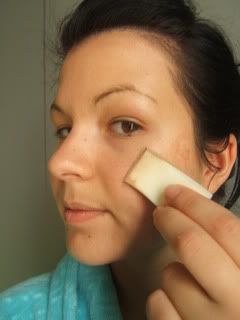
after that, i applied marcelle's tinted moisturizer in cream beige. i placed blobs on key areas of my face so that distribution would be even, and smoothed it out onto my face and neck with a sponge applicator.
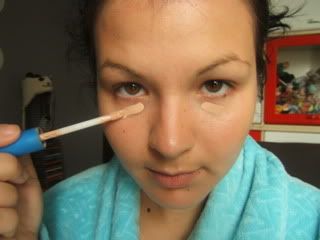
next, i applied cover girl concealer under my eyes, on areas with blemishes, and areas with other imperfections using the wand, but then blending them in with my BE concealer brush. its slightly pinky for my skin tone, but after the next step, this won't matter.
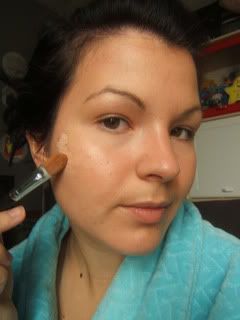
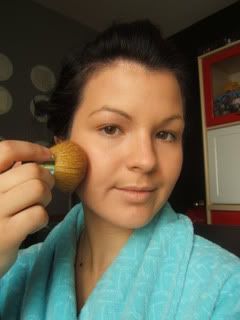
then i got started with my BE mineral foundation. starting with medium beige (darker tone) and lightening it up with medium on top of that, and buffing it up. i applied the foundation using the BE flawless face brush.
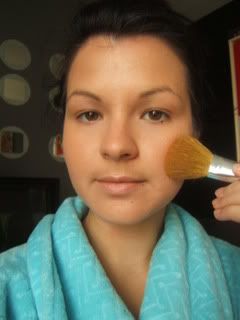
using the mineral foundation still, i once again covered up problem areas that the CG concealer couldn't quite take care of, such as a birthmark on my temple. i packed it on with the concealer brush and then blended/buffed it in using the BE kabuki brush.
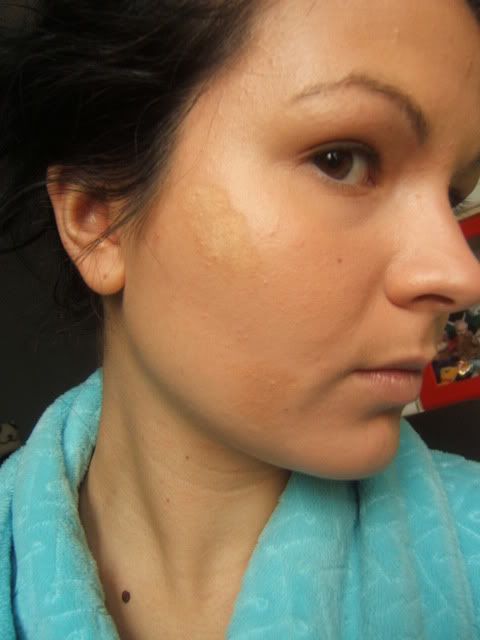
i added finishing touches to the foundation by adding a bit more of the medium and buffing everything nicely and evenly with the kabuki.
i have no picture for this, but the next step is to apply a base which will serve the purpose to prevent creasing. some people use paint pots or shadesticks, but i used the almighty urban decay primer potion! then, i loosely applied BE mineral veil under my eyes and on my nose to catch fallout particles (i don't have loose powder - use loose powder if you own some).

now, onto the eyeshadow! i used a matte light beige shadow from mac (don't even know the name, bought it as part of a quad i made up and didn't remember it) under my brow, sweeping it from the inner side to the outer lightly with my large fluffy brush. i used this here because i will add a highlight colour later on, but this will make it easier to blend the other colours in the meantime.
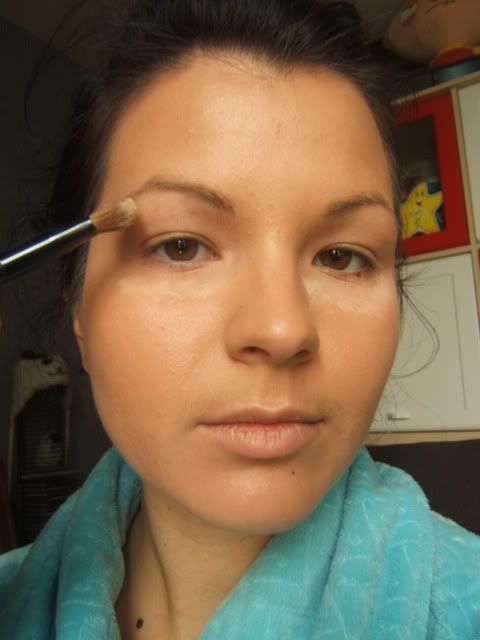
next, i used naked lunch (mac), a shimmery peachy beige shadow, as a base and applied it under the browbone all over the lid with my small fluffy brush. using this shadow helps blend some matte shadows i will be using and unifies the entire look.
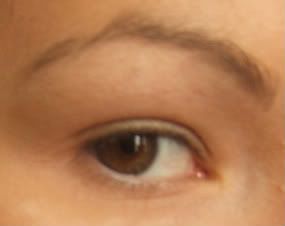
then, with my smudge brush and the darker shade from loreal h.i.p.'s "showy" duo (which is kind of a matte royal blue), i drew a line slightly above my crease starting from the outer corner, and slightly inside the upper outer corner of my eye upwards towards the crease. if you have larger eyes, draw the top line in the crease. i have small eyes, so it helps define them more to draw above the crease. also, neatness isn't a huge issue here. try to pack on as much colour as you can get.
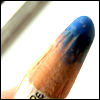
apply your primary blue-coloured eye pencil on the waterline. mine was annabelle's "lapis" shade. it is a very bold colour! i did this step now, just to get it out of the way.
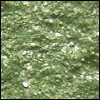
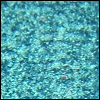
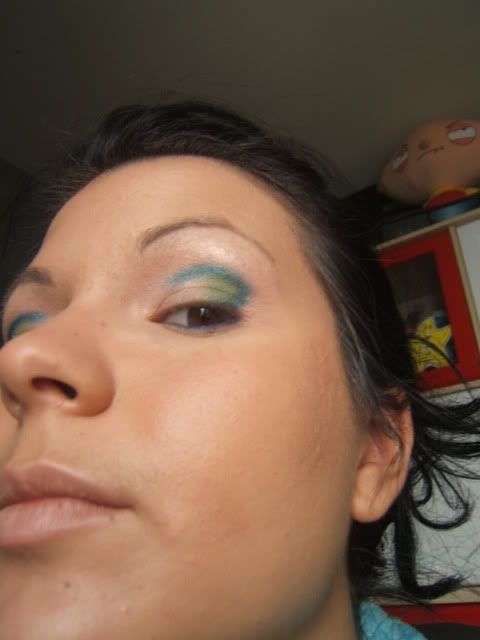
this next photo shows two steps. one is to apply the parrot dupe from the "showy" duo previously used, right over where you applied the royal blue. this adds a dimension of shimmer and colour. then, apply swimming (mac) right on the outer corner of the eye, staying within the royal blue line. i used a small rounded brush for this. paint slightly inwards.
using swimming again, paint over and above your crease using the crease blending brush. i blended a little here, but you don't necessarily have to. just make it look satisfactory.
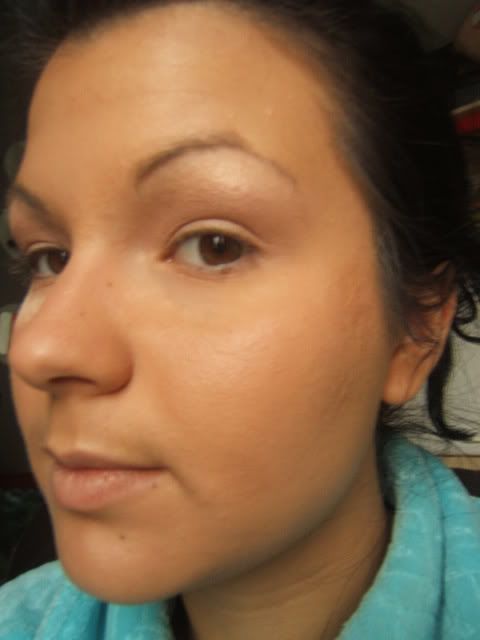
on to highlighting. i applied rimmel's moonstone which is a shimmery and sheer white shadow under my brow over my brow bone using my large fluffy brush. then with my large rounded brush i just blended it in with swimming. add more of the shimmery green shadow if the initial blending dulls the appearance of the shade and blend it with moonstone. for blending, i used the "windshield wiper" technique, slightly going upwards.

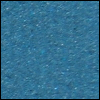
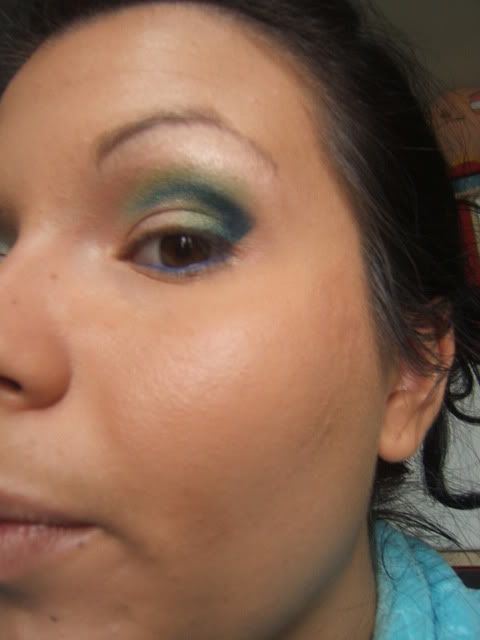
afterwards, i applied contrast (mac), a shimmery navy blue over swimming right inside the space where i initially drew a line with the royal blue shadow. blend it together with swimming using your blending brush.
next, i took midnight cowboy rides again (urban decay) - a shimmery mix of beige and white with heavy glitter - and applied it to 2/3 of the lid using my medium rounded brush, blending it in with swimming. after this step, just blend all the shadows used, adding more colour where needed. it is optional, but if you're not satisfied with the depth of colour in the crease, apply a dark shimmery brown (such as the darkest shade from annabelle's "haute chocolat" trio) with a crease blending brush, and blend away! (sorry, i can't remember if i did this or not). don't use black! this entire look still appears somewhat soft because i avoided the use of a black shadow.

the last thing i did with the shadows was apply freshwater (mac), a shimmery sky blue shade under my waterline all along the lower lash line. i used my smudge brush. don't go overboard with the thickness of the line, and make sure to smooth it out wherever there appears to be a harshness to the line.
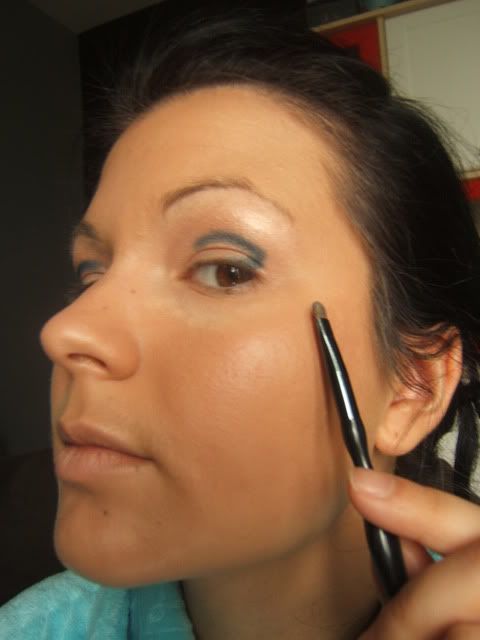
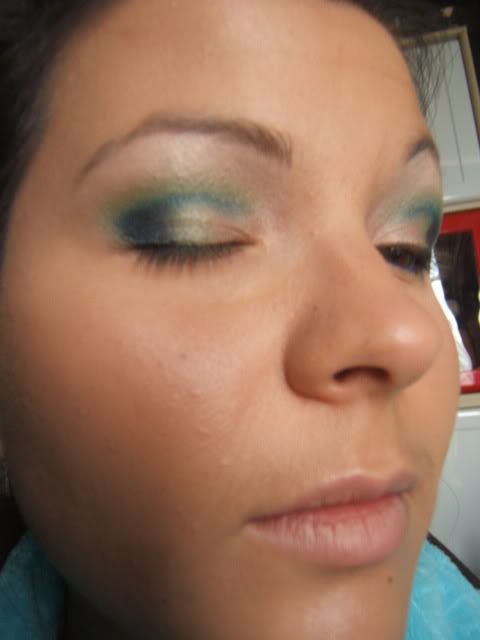
as you can tell in the previous picture, i filled in my brows - using two shades from the "haute chocolat" trio from annabelle. i used the light taupe and the lighter brown together, applying them with my angle brush. i don't use wax, but you can use whatever suits you for this step. don't forget mascara! i applied a couple of coats on my top lashes only using rimmel's mascara in extreme black. if you have small eyes like me, i find it more flattering to apply mascara to the upper lashes only.
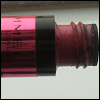
and for the grande finale (not really very grand of me...its actually very subtle), i applied blush - namely desert rose (mac) on the apples of my cheeks using a 187 brush (which allows for a nice sheer and natural finish). blend outwards to the cheekbones. keep it soft and barely noticeable. this is only needed for a subtle flush of colour, not avoid making the skin look lifeless.
and we're done!
--- post-game ---
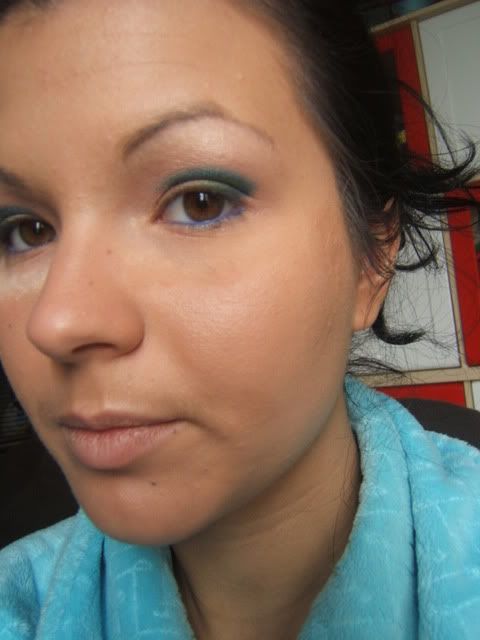
i usually get dressed before doing my makeup but in this case i did afterwards. so get dressed, do your hair, or spritz some perfume or something.
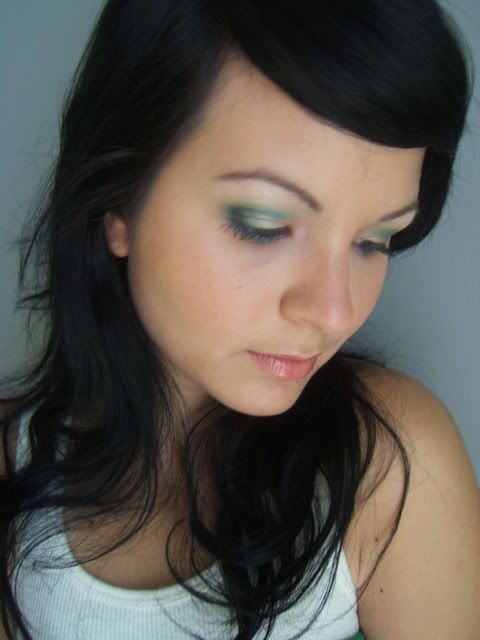
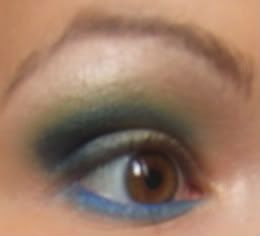
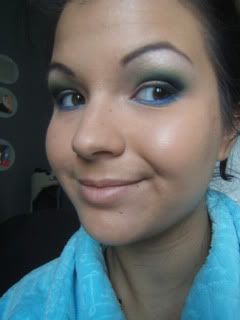
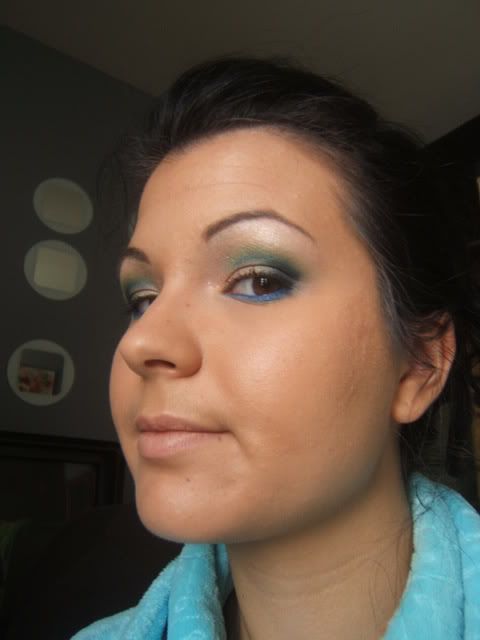
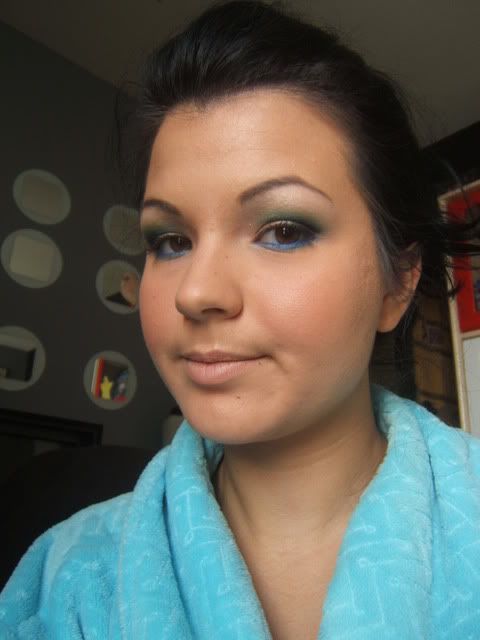
the finished look, (stupid faces are optional):
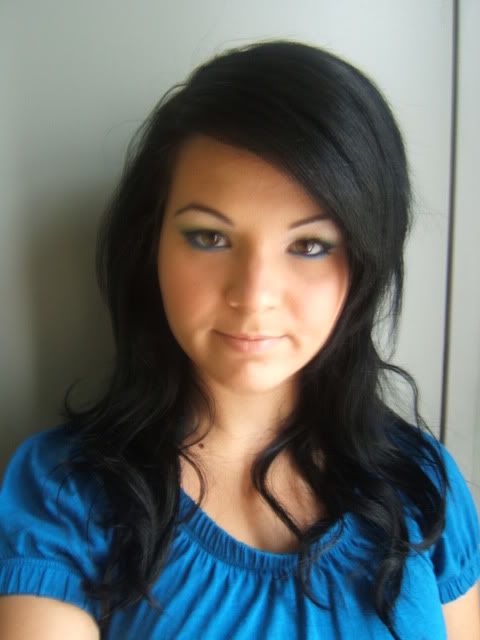
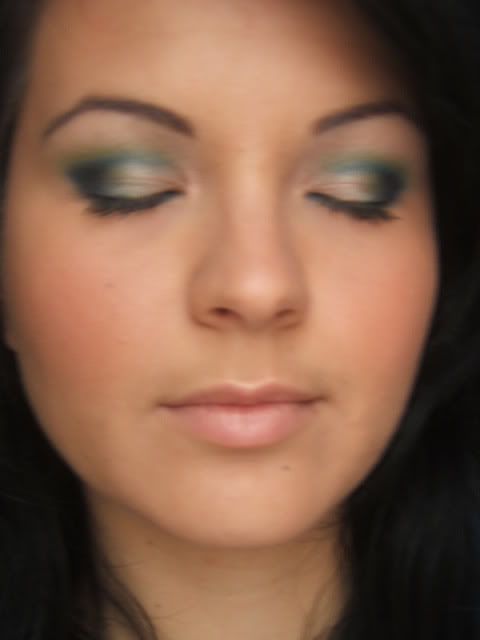
close-up ^
thanks for looking everybody! i'm a noob at tutorials so any pointers are more than welcome! and if anyone has advice on how i can better any techniques, please mention that as well!
p.s. this tutorial would've been a heck of a lot better if my camera's batteries weren't total crap and constantly failing on me. i couldn't take great close-up pictures of my eyes, so i had to make due with these pictures. i'm sooo sorry!
so lets begin!
here are the ingredients i used...
//shadows
[top to bottom; left to right] mac - swimming, loreal h.i.p showy duo (parrot look-a-like), same but the matte royal blue shade, mac - naked lunch, rimmel - moonstone, urban decay - midnight cowboy rides again, mac - peachy beige tone, annabelle "haute chocolat" trio - light taupe, same but darkest shimmery brown, same but the lighter brown, mac - freshwater, and mac - contrast.
//face
cover girl - clear complexions concealer in natural beige, bare escentuals - mineral veil, bare escentuals mineral foundation - medium beige, bare escentuals mf - medium, mac blush - desert rose, and marcelle tinted moisturizer - creamy beige.
//misc. eyes
urban decay - primer potion, annabelle eye pencil - lapis, and rimmel lash maxxx mascara - extreme black.
//tools
--- now that we know what we're using... ---
start with a bare canvas. cleanse, tone, moisturize. just your daily skincare regimen. also, tweeze spares if needed.
after that, i applied marcelle's tinted moisturizer in cream beige. i placed blobs on key areas of my face so that distribution would be even, and smoothed it out onto my face and neck with a sponge applicator.
next, i applied cover girl concealer under my eyes, on areas with blemishes, and areas with other imperfections using the wand, but then blending them in with my BE concealer brush. its slightly pinky for my skin tone, but after the next step, this won't matter.
then i got started with my BE mineral foundation. starting with medium beige (darker tone) and lightening it up with medium on top of that, and buffing it up. i applied the foundation using the BE flawless face brush.
using the mineral foundation still, i once again covered up problem areas that the CG concealer couldn't quite take care of, such as a birthmark on my temple. i packed it on with the concealer brush and then blended/buffed it in using the BE kabuki brush.
i added finishing touches to the foundation by adding a bit more of the medium and buffing everything nicely and evenly with the kabuki.
i have no picture for this, but the next step is to apply a base which will serve the purpose to prevent creasing. some people use paint pots or shadesticks, but i used the almighty urban decay primer potion! then, i loosely applied BE mineral veil under my eyes and on my nose to catch fallout particles (i don't have loose powder - use loose powder if you own some).
now, onto the eyeshadow! i used a matte light beige shadow from mac (don't even know the name, bought it as part of a quad i made up and didn't remember it) under my brow, sweeping it from the inner side to the outer lightly with my large fluffy brush. i used this here because i will add a highlight colour later on, but this will make it easier to blend the other colours in the meantime.
next, i used naked lunch (mac), a shimmery peachy beige shadow, as a base and applied it under the browbone all over the lid with my small fluffy brush. using this shadow helps blend some matte shadows i will be using and unifies the entire look.
then, with my smudge brush and the darker shade from loreal h.i.p.'s "showy" duo (which is kind of a matte royal blue), i drew a line slightly above my crease starting from the outer corner, and slightly inside the upper outer corner of my eye upwards towards the crease. if you have larger eyes, draw the top line in the crease. i have small eyes, so it helps define them more to draw above the crease. also, neatness isn't a huge issue here. try to pack on as much colour as you can get.
apply your primary blue-coloured eye pencil on the waterline. mine was annabelle's "lapis" shade. it is a very bold colour! i did this step now, just to get it out of the way.
this next photo shows two steps. one is to apply the parrot dupe from the "showy" duo previously used, right over where you applied the royal blue. this adds a dimension of shimmer and colour. then, apply swimming (mac) right on the outer corner of the eye, staying within the royal blue line. i used a small rounded brush for this. paint slightly inwards.
using swimming again, paint over and above your crease using the crease blending brush. i blended a little here, but you don't necessarily have to. just make it look satisfactory.
on to highlighting. i applied rimmel's moonstone which is a shimmery and sheer white shadow under my brow over my brow bone using my large fluffy brush. then with my large rounded brush i just blended it in with swimming. add more of the shimmery green shadow if the initial blending dulls the appearance of the shade and blend it with moonstone. for blending, i used the "windshield wiper" technique, slightly going upwards.
afterwards, i applied contrast (mac), a shimmery navy blue over swimming right inside the space where i initially drew a line with the royal blue shadow. blend it together with swimming using your blending brush.
next, i took midnight cowboy rides again (urban decay) - a shimmery mix of beige and white with heavy glitter - and applied it to 2/3 of the lid using my medium rounded brush, blending it in with swimming. after this step, just blend all the shadows used, adding more colour where needed. it is optional, but if you're not satisfied with the depth of colour in the crease, apply a dark shimmery brown (such as the darkest shade from annabelle's "haute chocolat" trio) with a crease blending brush, and blend away! (sorry, i can't remember if i did this or not). don't use black! this entire look still appears somewhat soft because i avoided the use of a black shadow.
the last thing i did with the shadows was apply freshwater (mac), a shimmery sky blue shade under my waterline all along the lower lash line. i used my smudge brush. don't go overboard with the thickness of the line, and make sure to smooth it out wherever there appears to be a harshness to the line.
as you can tell in the previous picture, i filled in my brows - using two shades from the "haute chocolat" trio from annabelle. i used the light taupe and the lighter brown together, applying them with my angle brush. i don't use wax, but you can use whatever suits you for this step. don't forget mascara! i applied a couple of coats on my top lashes only using rimmel's mascara in extreme black. if you have small eyes like me, i find it more flattering to apply mascara to the upper lashes only.
and for the grande finale (not really very grand of me...its actually very subtle), i applied blush - namely desert rose (mac) on the apples of my cheeks using a 187 brush (which allows for a nice sheer and natural finish). blend outwards to the cheekbones. keep it soft and barely noticeable. this is only needed for a subtle flush of colour, not avoid making the skin look lifeless.
and we're done!
--- post-game ---
i usually get dressed before doing my makeup but in this case i did afterwards. so get dressed, do your hair, or spritz some perfume or something.
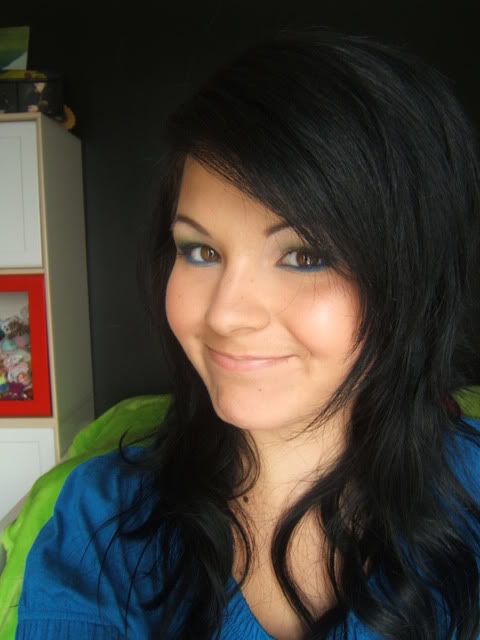
the finished look, (stupid faces are optional):
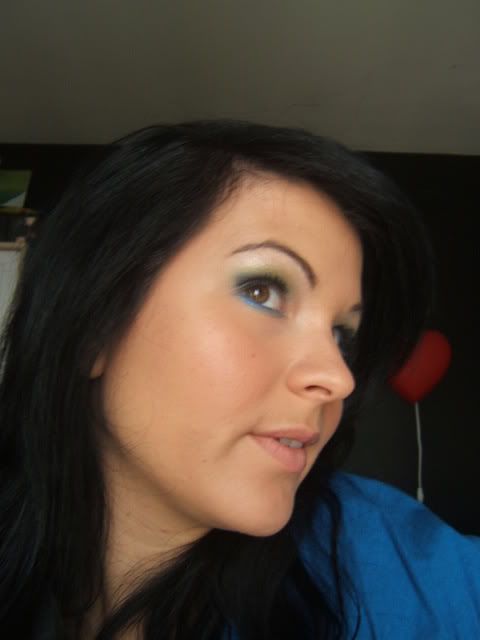
close-up ^
thanks for looking everybody! i'm a noob at tutorials so any pointers are more than welcome! and if anyone has advice on how i can better any techniques, please mention that as well!
p.s. this tutorial would've been a heck of a lot better if my camera's batteries weren't total crap and constantly failing on me. i couldn't take great close-up pictures of my eyes, so i had to make due with these pictures. i'm sooo sorry!

