faifai
Well-known member
There aren't too many pictures of me applying products because I always use my fingers. If you use your fingers too, you'll be able to get the same effect. I think this is a good thing, since most people have fingers, but not all people have brushes!
Most of the products I use are super affordable, easy to find, and in very basic colors, so anyone could redo this look.
Anyways, on to the pics--clickable thumbnails!

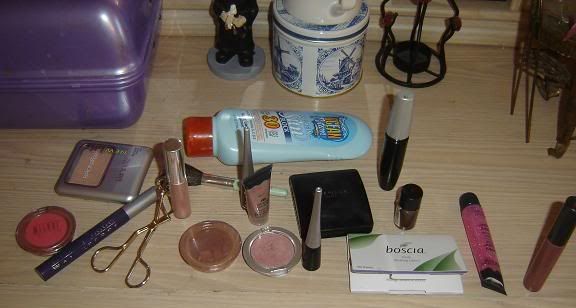
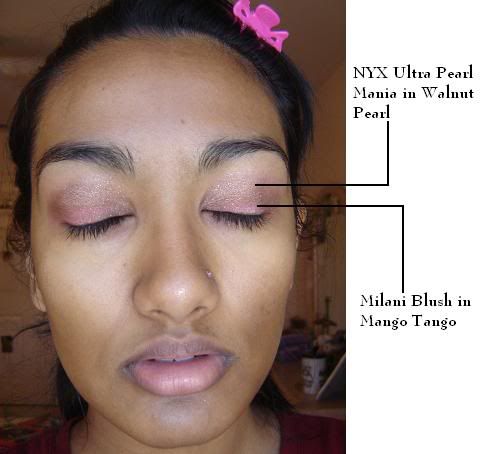
This is what we will use.
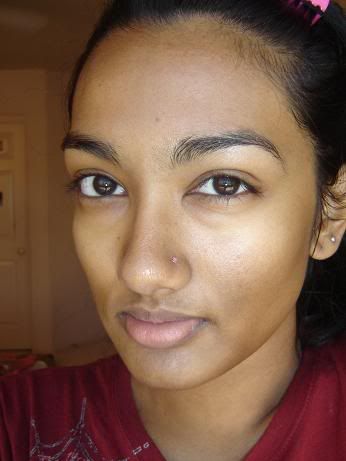
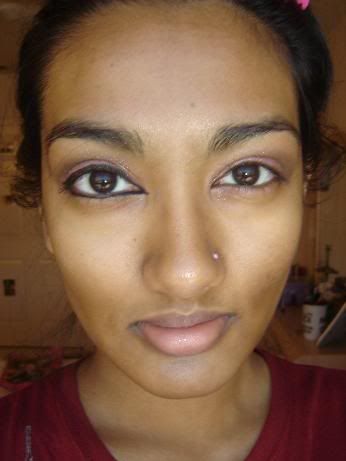
I'm wearing tons of sunscreen in this, it's what I use instead of foundation.
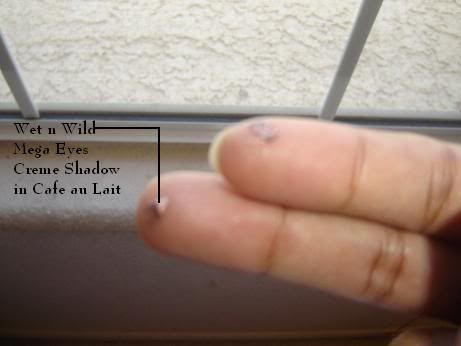
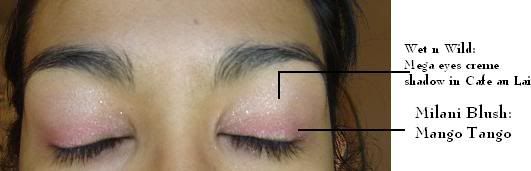
Apply eye base. I use Wet n Wild creme eyeshadow in Cafe au Lait, a shimmery nude color that matches my skin tone.
Apply it all over the lid and crease.
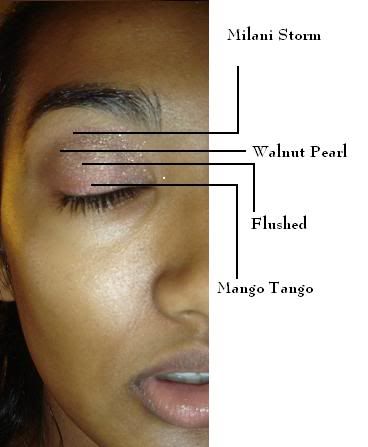
Rub your fingertip over Milani Blush in Mango Tango (hot pink). Apply it across the bottom of your lid.

It will look like this.

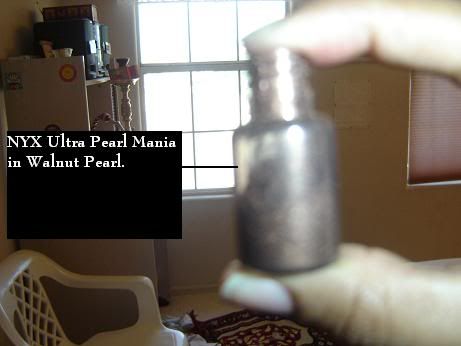
Grab your NYX Ultra Pearl Mania in Walnut Pearl (or any other shimmery dark brown shadow) and put your fingertip over the opening. Turn it upside down.
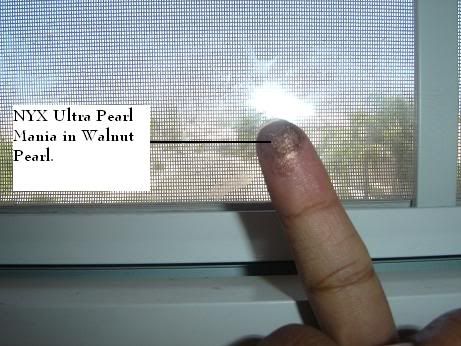
You should have about this much on your fingertip.

Apply in your crease. It should be obviously unblended.

It will look like this.
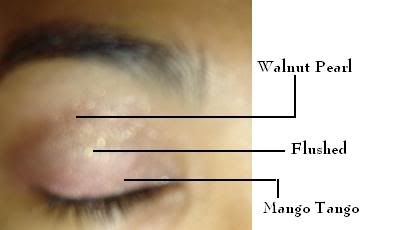
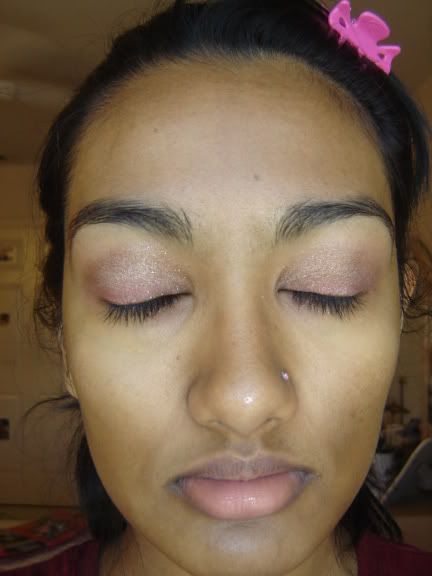
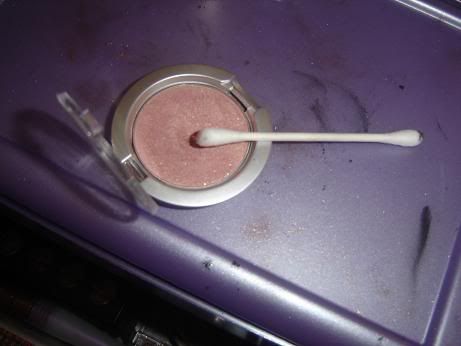
Now get your Prestige Flushed eyeshadow (a glittery rosey-champagne) on your fingetip. Apply it in between the Mango Tango and the Walnut Pearl.

It will look like this.

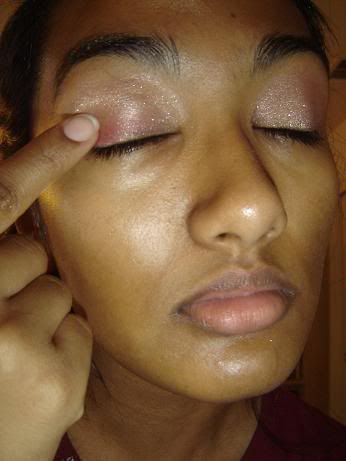
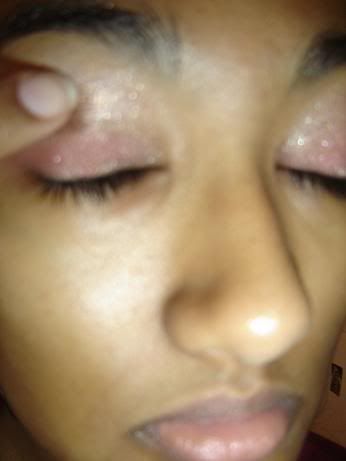
Now apply a tiny bit of Milani Storm above the Walnut Pearl. It should extend beyond your crease. Also grab some nude browbone highlighter and apply it to your browbone. Blend so that it all looks nice and smooth.

It will look like this.

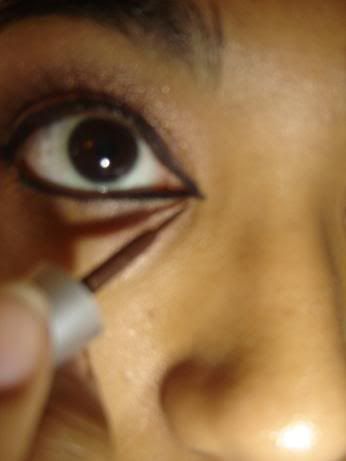
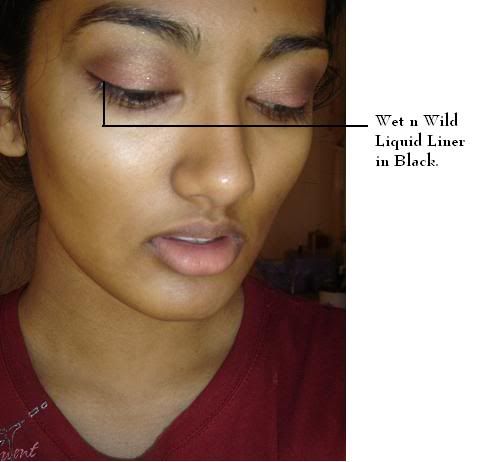
Now apply a bit of Wet n Wild black liquid eyeliner to the outside of your eye. I do the outer part, then the inner part.

Now extend the liner outwards and wing it. Also line outside the bottom lower rim (NOT the waterline, the liner will melt).

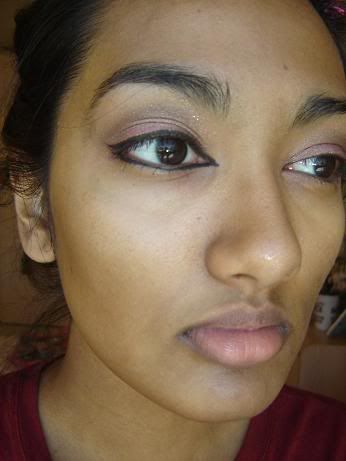
It will look like this.
And like this. If you make any mistakes, just wet a q-tip and "erase" the part you messed up on. It makes correcting it very easy. Also, go over it with Milani Storm if you like glittery black liner.
Now apply Wet n Wild's shimmery brown liquid eyeliner below the black liner you have already applied.
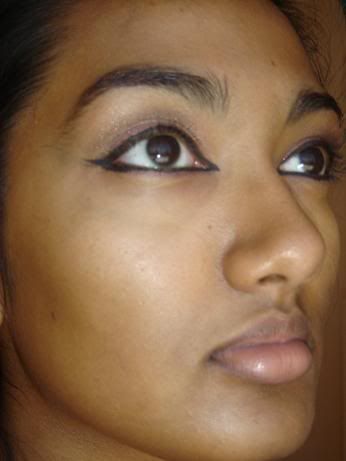
Since it matches my skintone, it's very difficult to see, but it catches the light nicely outside.

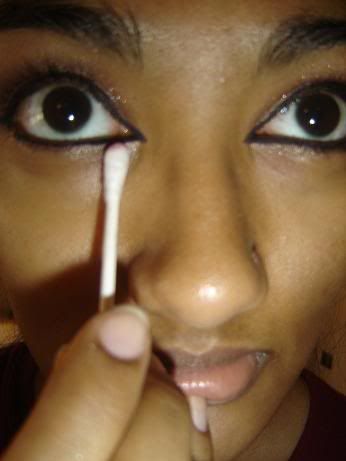
Now get a q-tip or a brush and load it up with a bit of Prestige Flushed eyeshadow.

Apply the Flushed eyeshadow below the inner corner.
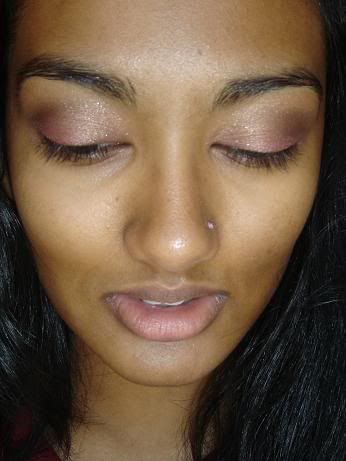
Now at this point my camera and computer screwed up, so there aren't any pics. But in the next couple of mins I did my skin, my mascara and lips.
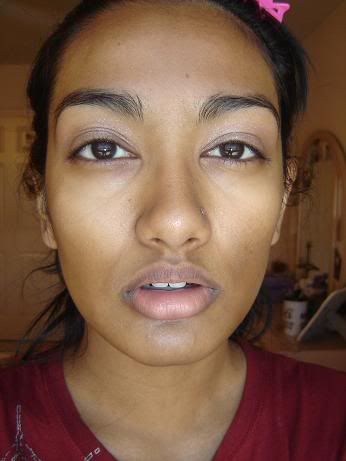
For my skin, I blotted off the grease from the sunscreen with a Boscia blotting sheet. I then buffed colorless powder (Sally Hansen Cornsilk) over my skin to make it matte.
For mascara, curl your eyelashes (important! "walk" the curler out, so you get a gentle curve in your lashes), apply black lengthening mascara, wait for it to set, and apply black volumizing mascara over it. I also used the mascara to set my eyebrows--obviously this will only work if your mascara matches your brow color.
For the lips, I used Wet n Wild's Glassy Gloss lipgloss in Tropic Glaze (an almost-clear shimmery pink). I applied some Bonne Bell Lip Lites in Mocha Mousse over it (a pink-brown color). The goal was to have a glossy nude lip, without looking washed out.

Now grab some Mango Tango blush on your brush. Tap it to get the excess off.
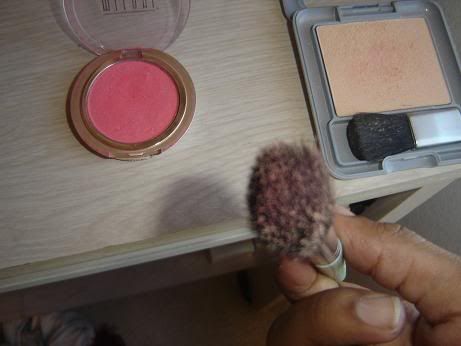
Swirl the same brush, already loaded with Mango Tango, over Wet n Wild's Acapulco Glow highlighter.

Make your favorite blush face and apply. Just do whatever flatters you.

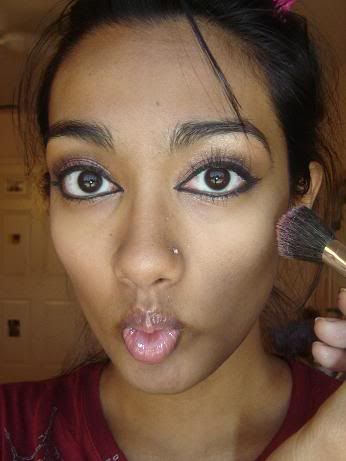
After you're done applying blush, swirl your brush over your favorite bronzer. I used Milani Double Impact blush in Bronze Beauties. Apply it in the hollows of your cheeks and blend upwards and out in the directions of the black lines.
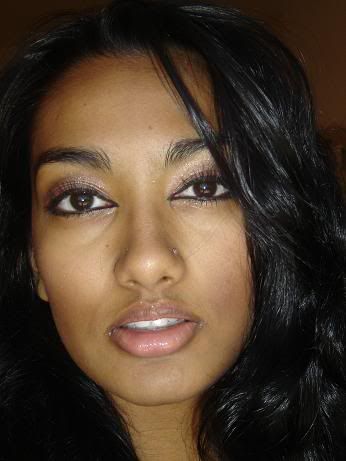
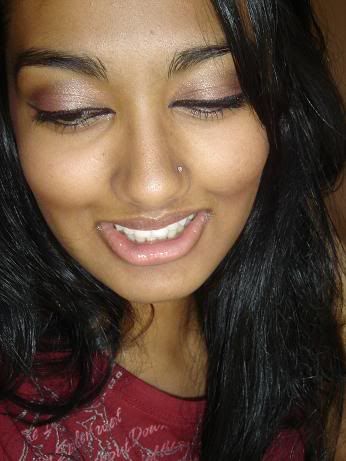
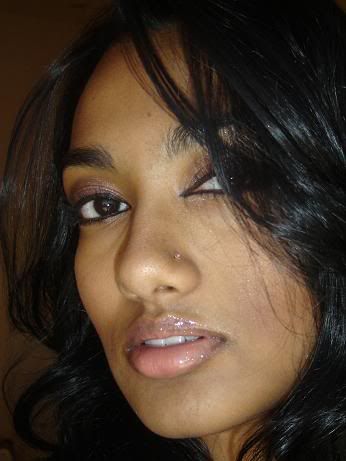
And you're done!


Comments/constructive criticism are appreciated.
Most of the products I use are super affordable, easy to find, and in very basic colors, so anyone could redo this look.
Anyways, on to the pics--clickable thumbnails!
This is what we will use.

I'm wearing tons of sunscreen in this, it's what I use instead of foundation.

Apply eye base. I use Wet n Wild creme eyeshadow in Cafe au Lait, a shimmery nude color that matches my skin tone.

Apply it all over the lid and crease.

Rub your fingertip over Milani Blush in Mango Tango (hot pink). Apply it across the bottom of your lid.
It will look like this.
Grab your NYX Ultra Pearl Mania in Walnut Pearl (or any other shimmery dark brown shadow) and put your fingertip over the opening. Turn it upside down.

You should have about this much on your fingertip.
Apply in your crease. It should be obviously unblended.
It will look like this.

Now get your Prestige Flushed eyeshadow (a glittery rosey-champagne) on your fingetip. Apply it in between the Mango Tango and the Walnut Pearl.
It will look like this.
Now apply a tiny bit of Milani Storm above the Walnut Pearl. It should extend beyond your crease. Also grab some nude browbone highlighter and apply it to your browbone. Blend so that it all looks nice and smooth.
It will look like this.
Now apply a bit of Wet n Wild black liquid eyeliner to the outside of your eye. I do the outer part, then the inner part.

Now extend the liner outwards and wing it. Also line outside the bottom lower rim (NOT the waterline, the liner will melt).
It will look like this.

And like this. If you make any mistakes, just wet a q-tip and "erase" the part you messed up on. It makes correcting it very easy. Also, go over it with Milani Storm if you like glittery black liner.

Now apply Wet n Wild's shimmery brown liquid eyeliner below the black liner you have already applied.

Since it matches my skintone, it's very difficult to see, but it catches the light nicely outside.
Now get a q-tip or a brush and load it up with a bit of Prestige Flushed eyeshadow.
Apply the Flushed eyeshadow below the inner corner.
Now at this point my camera and computer screwed up, so there aren't any pics. But in the next couple of mins I did my skin, my mascara and lips.
For my skin, I blotted off the grease from the sunscreen with a Boscia blotting sheet. I then buffed colorless powder (Sally Hansen Cornsilk) over my skin to make it matte.
For mascara, curl your eyelashes (important! "walk" the curler out, so you get a gentle curve in your lashes), apply black lengthening mascara, wait for it to set, and apply black volumizing mascara over it. I also used the mascara to set my eyebrows--obviously this will only work if your mascara matches your brow color.
For the lips, I used Wet n Wild's Glassy Gloss lipgloss in Tropic Glaze (an almost-clear shimmery pink). I applied some Bonne Bell Lip Lites in Mocha Mousse over it (a pink-brown color). The goal was to have a glossy nude lip, without looking washed out.

Now grab some Mango Tango blush on your brush. Tap it to get the excess off.

Swirl the same brush, already loaded with Mango Tango, over Wet n Wild's Acapulco Glow highlighter.
Make your favorite blush face and apply. Just do whatever flatters you.
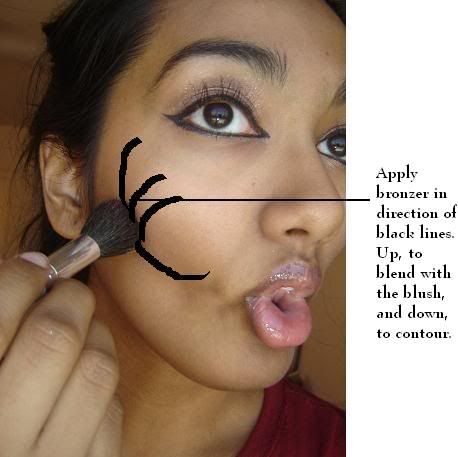
After you're done applying blush, swirl your brush over your favorite bronzer. I used Milani Double Impact blush in Bronze Beauties. Apply it in the hollows of your cheeks and blend upwards and out in the directions of the black lines.

And you're done!
Comments/constructive criticism are appreciated.

