uh_oh_disco
Well-known member
Mainly focusing on the eyes, as I'm sure most of you ladies already have a face makeup routine which you love.
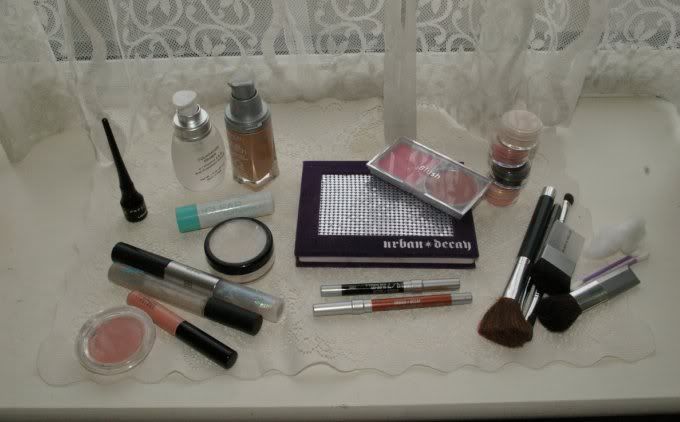
YOU WILL NEED
UDPP
UD "Lucky" pencil eyeliner
UD "Honey" eyeshadow
UD "Zero" eyeshadow
Fyrinnae "Harlequin" eyeshadow
Fyrinnae "Finnegan's Wake" eyeshadow (Vanilla pig. is very similar!)
Fyrinnae "Rapunzel Had Extensions" eyeshadow (Melon pig. = dupe)
Prestige black liquid eyeliner
UD "Zero" pencil eyeliner
Mascara of your choice.
Eyeshadow brush
Small angle brush.
Whatever face products you use.
METHOD
1 - Apply your UDPP to your lids/ up to your brow.
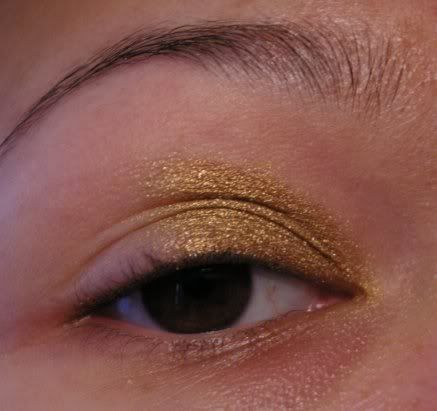
2 - Use your UD "Lucky" pencil liner to cover half your lid and just a little towards your browbone.
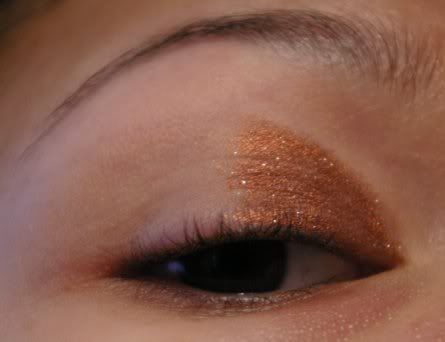
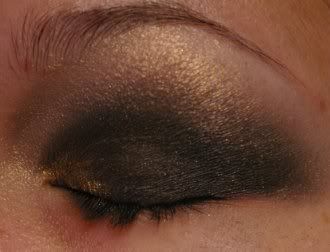
3 - Cover with your UD "Honey" eyeshadow.
4 - Draw a curved shape up to just below your browbone using your eyeshadow brush and UD "Zero" eyeshadow. Make it pronounced but don't worry about them being super neat or mega symetrical.

5 - Fill it in and blend into "Lucky"/ "Honey" combo.
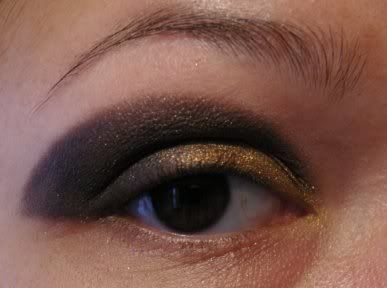
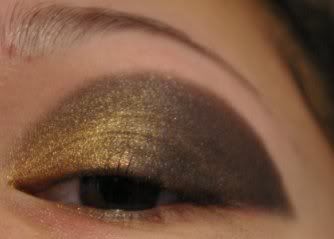
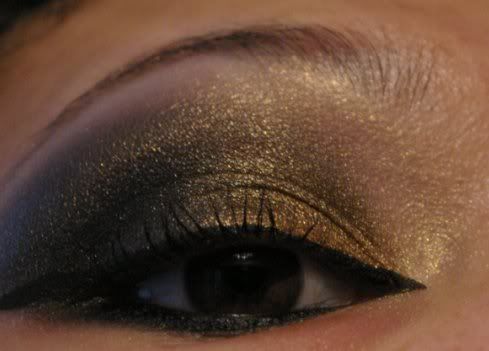
6 - Using your "Harlequin" eyeshadow, define your crease and blend upwards into the "Zero" eyeshadow shape. This adds depth and a little drama.
7 - Apply your highlight ("Finnegan's Wake") and lighly buff away the harsh edge of the black shape, just taking off some of the harshness, but not too much. Use your "Rapunzel Had Extensions" to further buff out the shape.
(If the shape refuses to blend, lightly apply a little more "Zero" to the edge and buff that into the highlight).
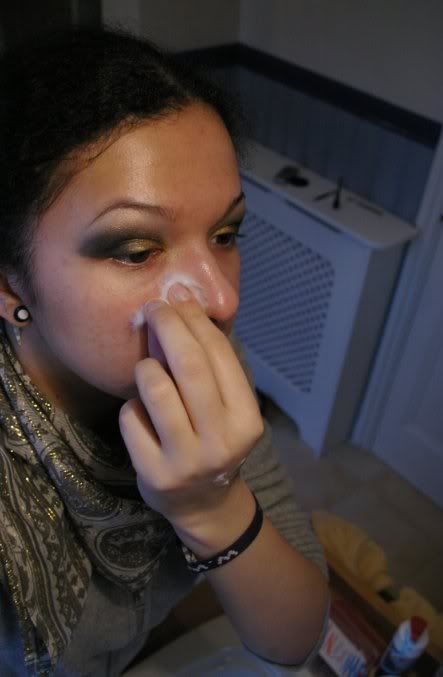
8 - Take off your fall-out with either a large soft brush or cotton wool ball with some cleanser/ moisturiser on it.
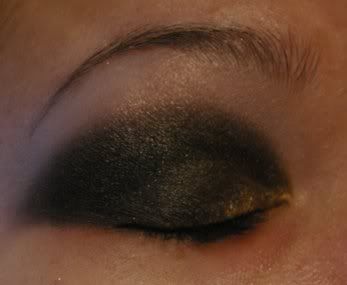
9 - Use your Prestige liquid liner to define your upper lashes/ eyeshape. The flick is optional, but it really helps "open up" and elongate your eyes if they're tiny.
10 - Apply "Zero" pencil 'liner to the lower lashline. Don't worry if it looks patchy/ streaky...
11 - ...because you're going to make it stand out and look a whole lot sharper using your small angle brush and "Harlequin" eyeshadow!
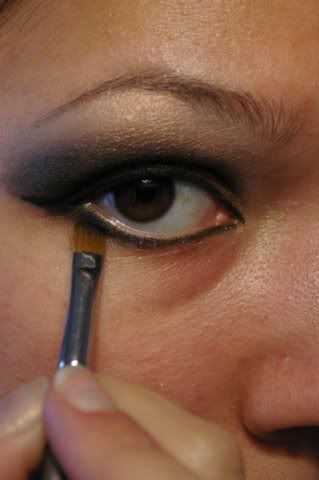
12 - Now apply your "Zero" pencil 'liner to your waterline, put on some mascara and add an inner flick if you fancy.
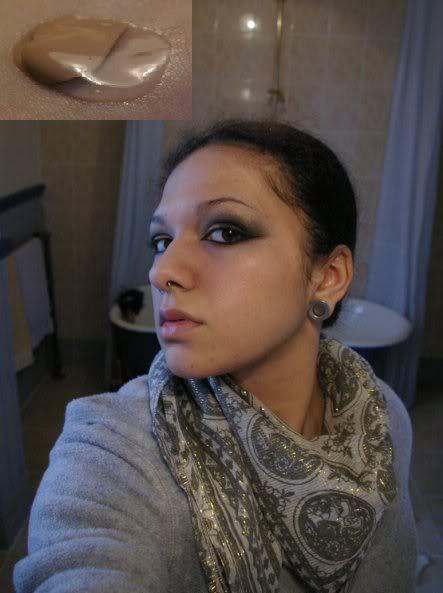
13 - Sort out your face makeup. I wont go into much detail.

Primer + foundation (yep, I mix mine together). This is L'Oreal true match foundation and MAD minerals primer.
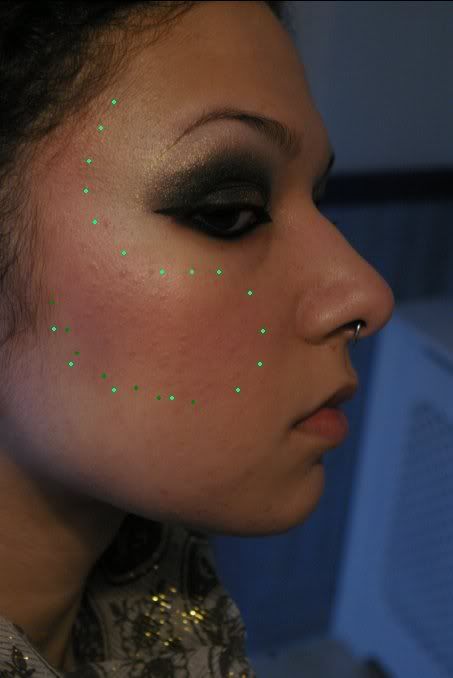
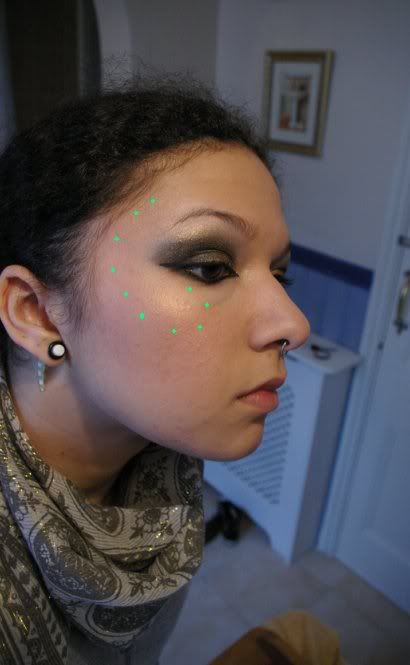
and blush - I'm using Fyrinnae's "Enrapture" blush (light green dots show basic shape) and contour - random cheapo dark red (dark creen dots show basic shape). Picture shows them unblended.
highlight (I used "Rapunzel Had Extensions") and set all of this with a translucent powder (I used MAD minerals transparent powder with Vanilla pigment mixed in)...
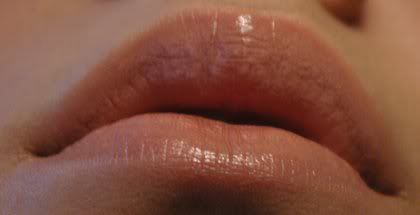
Then add your concealer and lippy/ gloss - I used my custom lip compact.1 and MAC "Florabundance" gloss (nudes look best).
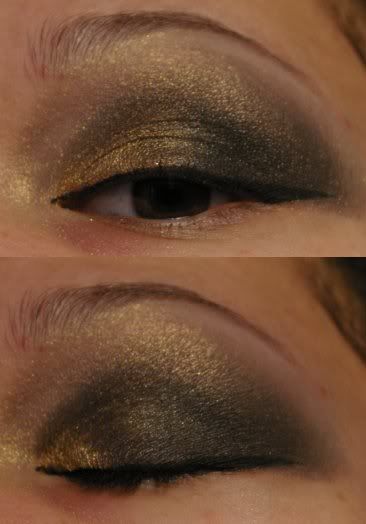
FINNE!
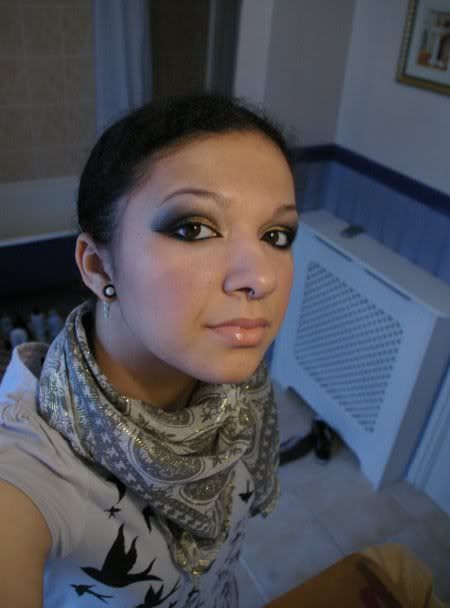
This looks particularly glam with a little black dress and gold/ silver jewellery. Enjoy!
YOU WILL NEED
UDPP
UD "Lucky" pencil eyeliner
UD "Honey" eyeshadow
UD "Zero" eyeshadow
Fyrinnae "Harlequin" eyeshadow
Fyrinnae "Finnegan's Wake" eyeshadow (Vanilla pig. is very similar!)
Fyrinnae "Rapunzel Had Extensions" eyeshadow (Melon pig. = dupe)
Prestige black liquid eyeliner
UD "Zero" pencil eyeliner
Mascara of your choice.
Eyeshadow brush
Small angle brush.
Whatever face products you use.
METHOD
1 - Apply your UDPP to your lids/ up to your brow.
2 - Use your UD "Lucky" pencil liner to cover half your lid and just a little towards your browbone.
3 - Cover with your UD "Honey" eyeshadow.
4 - Draw a curved shape up to just below your browbone using your eyeshadow brush and UD "Zero" eyeshadow. Make it pronounced but don't worry about them being super neat or mega symetrical.
5 - Fill it in and blend into "Lucky"/ "Honey" combo.
6 - Using your "Harlequin" eyeshadow, define your crease and blend upwards into the "Zero" eyeshadow shape. This adds depth and a little drama.
7 - Apply your highlight ("Finnegan's Wake") and lighly buff away the harsh edge of the black shape, just taking off some of the harshness, but not too much. Use your "Rapunzel Had Extensions" to further buff out the shape.
(If the shape refuses to blend, lightly apply a little more "Zero" to the edge and buff that into the highlight).
8 - Take off your fall-out with either a large soft brush or cotton wool ball with some cleanser/ moisturiser on it.
9 - Use your Prestige liquid liner to define your upper lashes/ eyeshape. The flick is optional, but it really helps "open up" and elongate your eyes if they're tiny.
10 - Apply "Zero" pencil 'liner to the lower lashline. Don't worry if it looks patchy/ streaky...
11 - ...because you're going to make it stand out and look a whole lot sharper using your small angle brush and "Harlequin" eyeshadow!
12 - Now apply your "Zero" pencil 'liner to your waterline, put on some mascara and add an inner flick if you fancy.
13 - Sort out your face makeup. I wont go into much detail.
Primer + foundation (yep, I mix mine together). This is L'Oreal true match foundation and MAD minerals primer.
and blush - I'm using Fyrinnae's "Enrapture" blush (light green dots show basic shape) and contour - random cheapo dark red (dark creen dots show basic shape). Picture shows them unblended.
highlight (I used "Rapunzel Had Extensions") and set all of this with a translucent powder (I used MAD minerals transparent powder with Vanilla pigment mixed in)...
Then add your concealer and lippy/ gloss - I used my custom lip compact.1 and MAC "Florabundance" gloss (nudes look best).
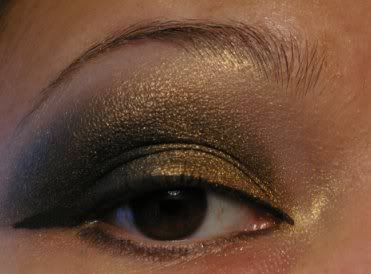
FINNE!
This looks particularly glam with a little black dress and gold/ silver jewellery. Enjoy!


