Ang9000
Well-known member
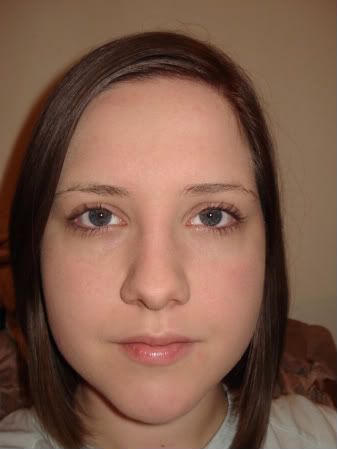
Ok ladies, here's my tutorial. It was actually alot harder to do than I thought & took a long time! This is my 1st tutorial so all feedback is welcome.
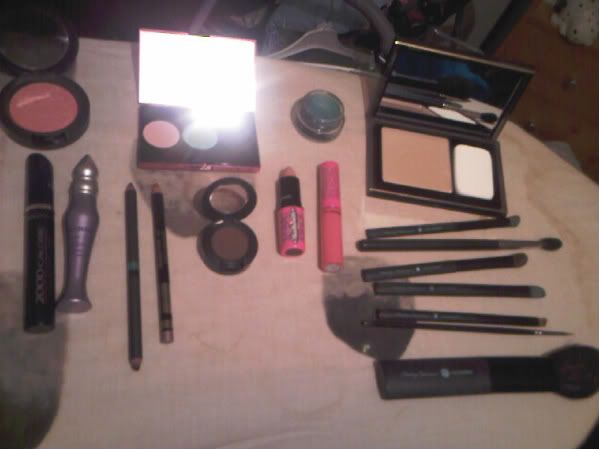
So, here is what you'll need. Sorry about the pic quality, had to use my phone because my camera battery died.
L-R:
MAC Style Blusher, MAC Heatherette Trio 1, MAC Rollickin' Paint Pot, Elizabeth Arden Flawless Finish Sponge on Cream Makeup, Max Factor 2000 Calorie Black Mascara, Urban Decay Primer Potion, MAC Black Funk/Pop Blue Dual Edge Eye Pencil, Miners Call a Copper Lipliner Pencil, MAC Espresso Eyeshadow, MAC Fleshpot Lipstick, MAC Sock Hop Lipglass, Brush like MAC 272, MAC 224, brush like MAC 275, Brush like MAC 242, brush like MAC 266, brush like MAC 311 & a blush brush.
Start with a clean moisturised face (sorry no pic of this)
Apply your foundation in your preferred way. I use the sponge from my compact. You should work from the inside of you face outwards. Apply any concealer & powder that you use now.
Put a little Primer potion on your lid & rub in with your finger
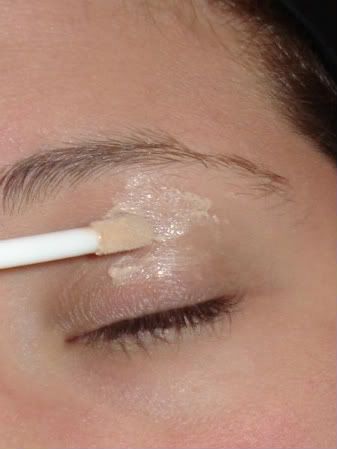
I also put a little under my eye & rub in with my finger
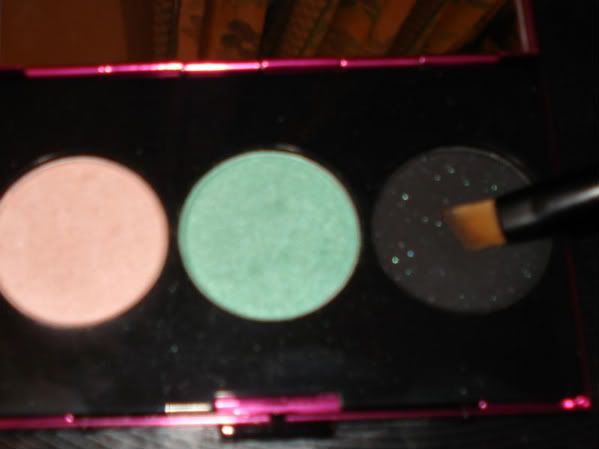
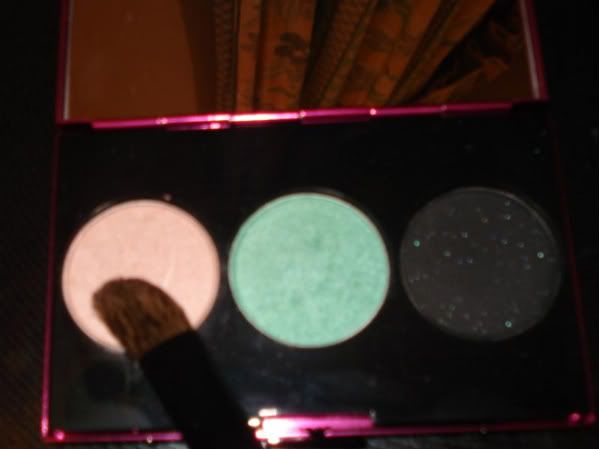
Using a brush like the 242 swirl it in the Rollickin' Paint pot
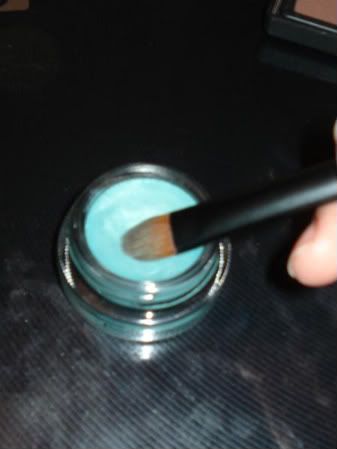
Apply it to roughly the inner 2 thirds of your lids. Ive still not got the hang of paint pots, but it doesn't need to be perfect.
Using the brush like the 272 swirl it in Moodring from the trio
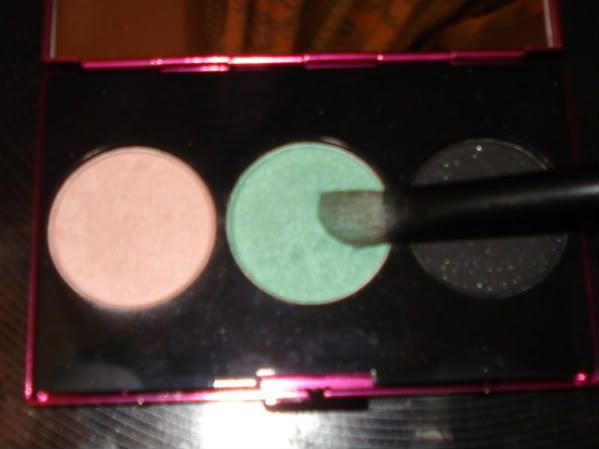
Cover the paint pot on the lid with the moodring
Using the brush like the 266, very gently dab it in the cloudburst from the trio
Lightly draw a line from the corner of the eye, lining it up with the end of your brow. I like to go about 2 thirds up. Then draw an arched line across to around the middle of the eye. Should look something like this
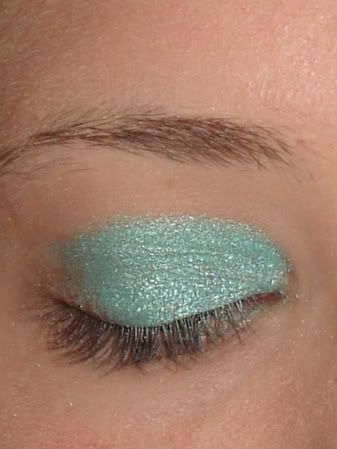
Gently dab the 224 brush in Cloudburst & fill in the gap following your lines. Only use a little as you can always add more, but can't take it off.

Dab the brush again in the Cloudburst & add more colour, blending it in with the Moodring. I like to use a circular motion in the corner & sweeping motion along the crease.
Keep building up the colour & blending in. When adding more colour, always start at the corner as thats where you want it to be darkest. Eventually you should get something like this
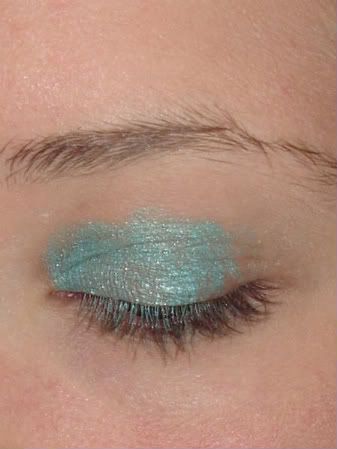
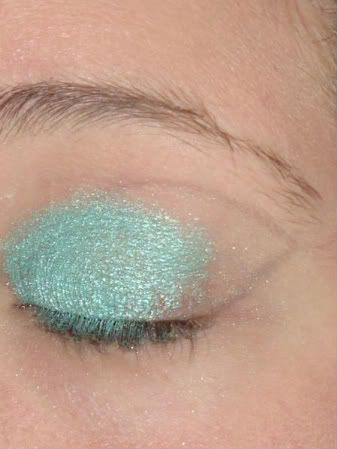
Take the brush like the 275 & swirl it in Hoppin' from the Trio
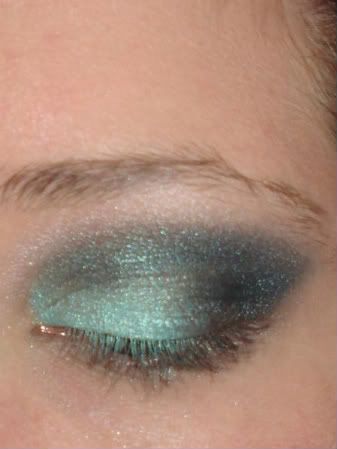
Add the Hoppin' to the brow bone, blending in with the colour along the crease. Should look like this
Take the black side of the pencil & line the upper lash line from the inside of the eye to the outside corner. I do it while stretching the skin out a little.
Should now look like this
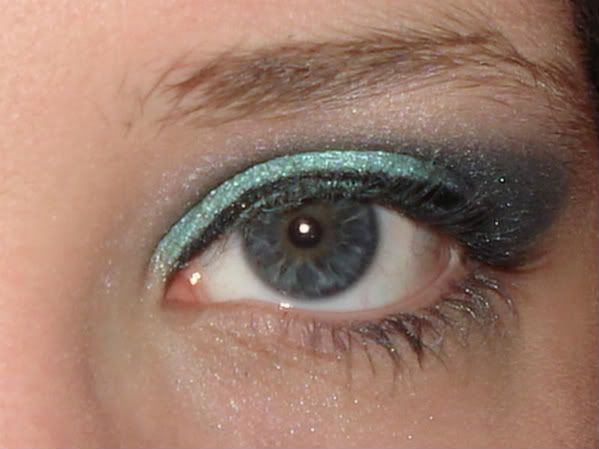
Take the blue side of the pencil & line the lower lashine. Again you may want to gently stretch the skin a little
Should now look like this

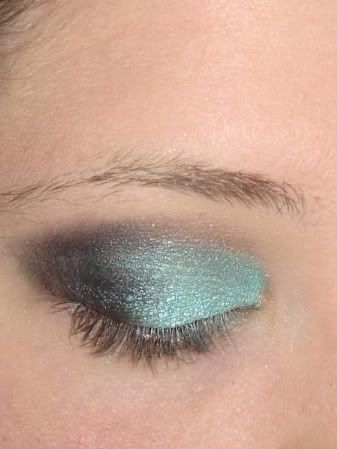
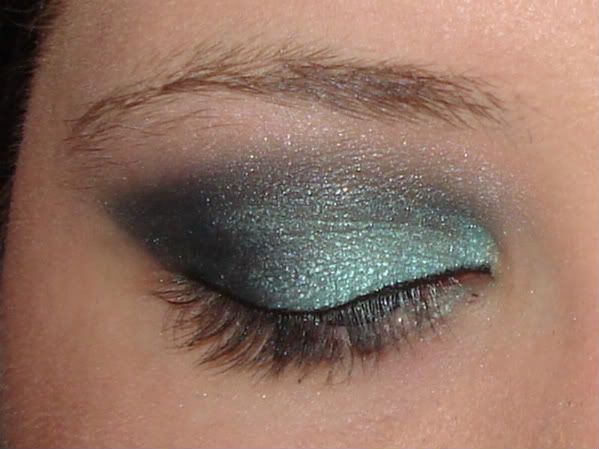
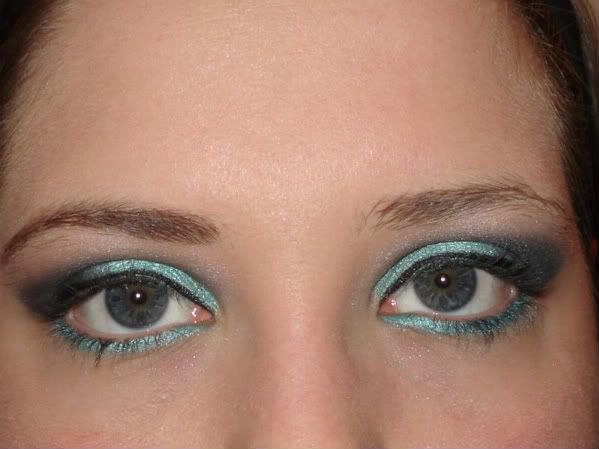
This step is not necessary but I like to do it to make the lower lash line colour more vibrant. Using the flat angled brush (like 266) take a little Moodring from the trio & go over the blue liner
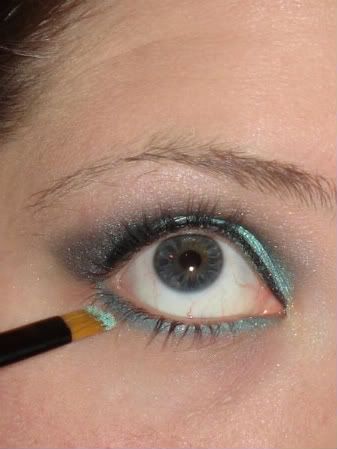
Should now look like this
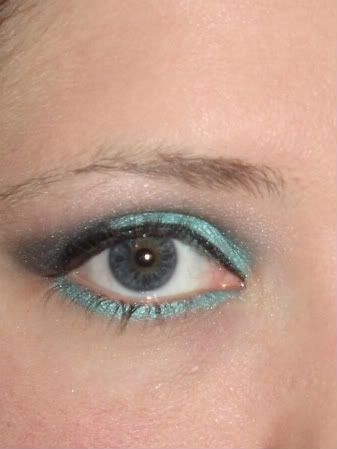
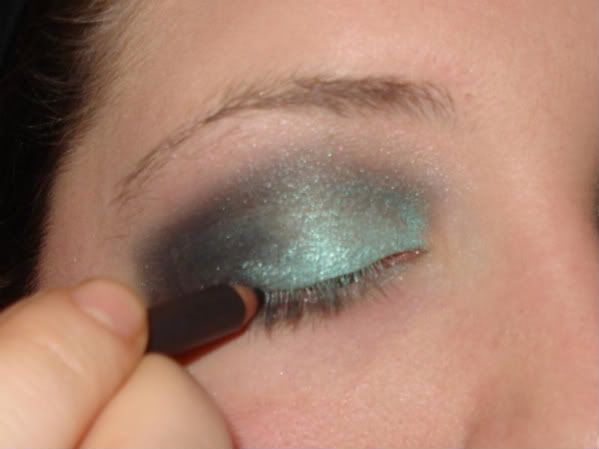
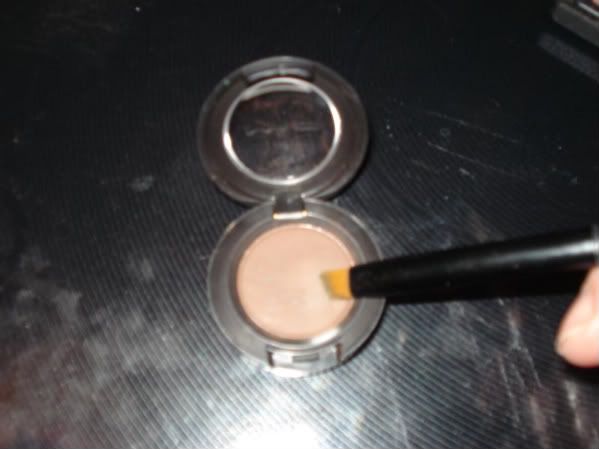
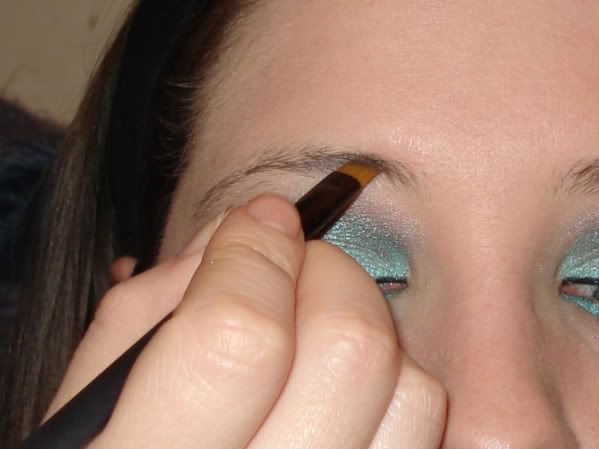
Wipe off the flat angled brush & take a little Espresso eyeshadow
Fill in those brows following the natural shape if possible
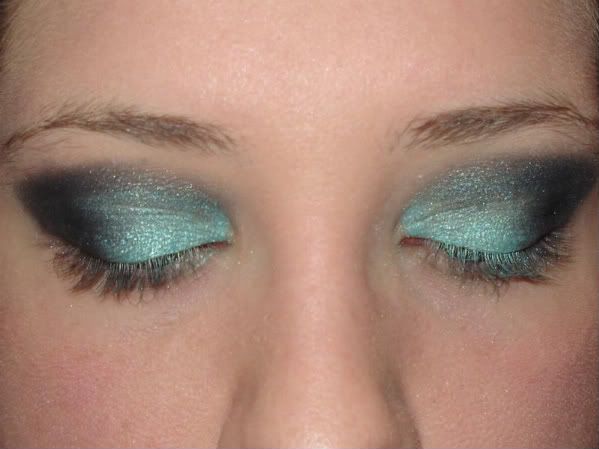
Just to show the difference it makes...the brow on the left is filled in, the right isn't
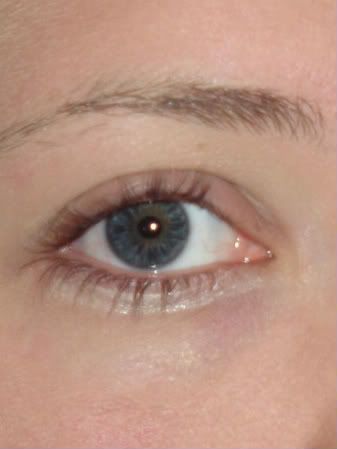
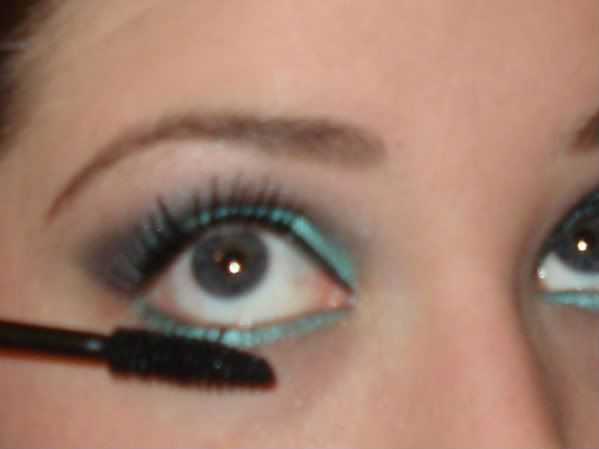
Apply your mascara. I do this while looking down into the mirror, otherwise I get mascara all over my lids
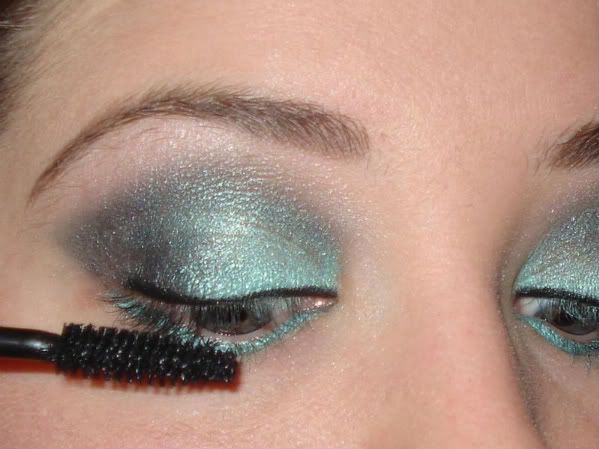
Apply mascara to the lower lashes
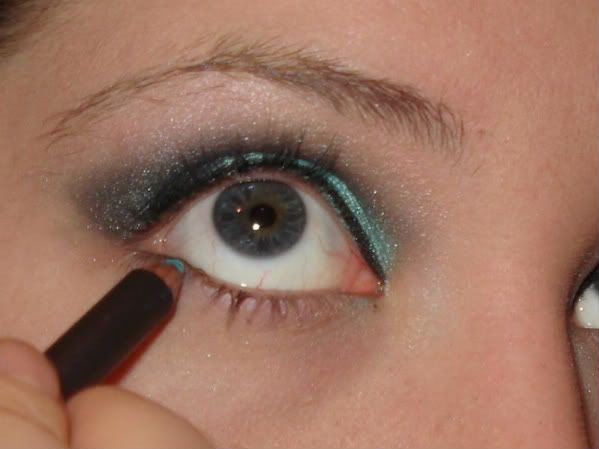
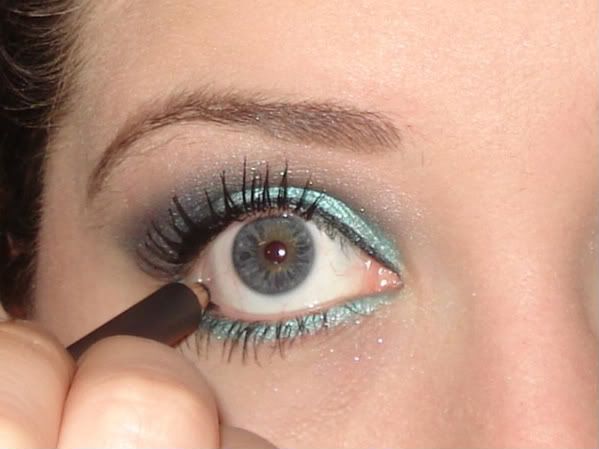
Line the lower waterline with the black side of the pencil. I often pull my eye down so I don't poke myself in the eye but that wasn't an attractive pic

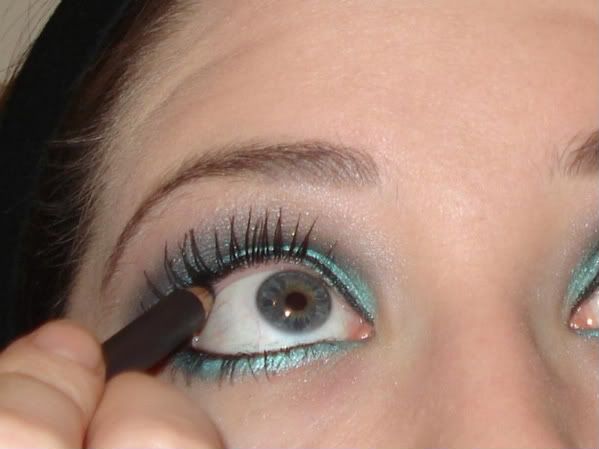
Line the upper waterline with the black pencil. I don't do any pulling of the eye here.
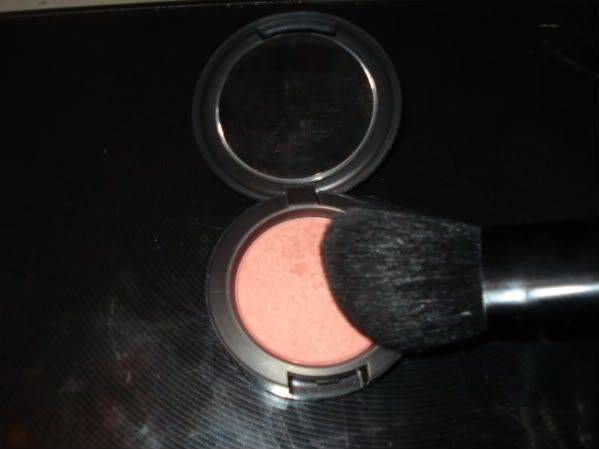
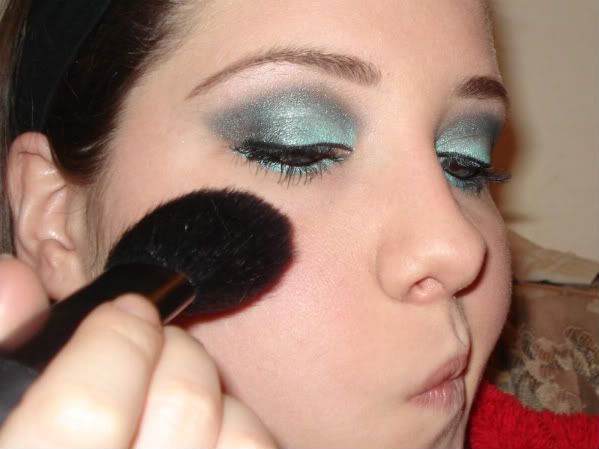
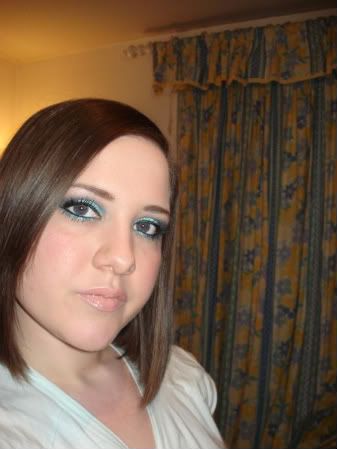
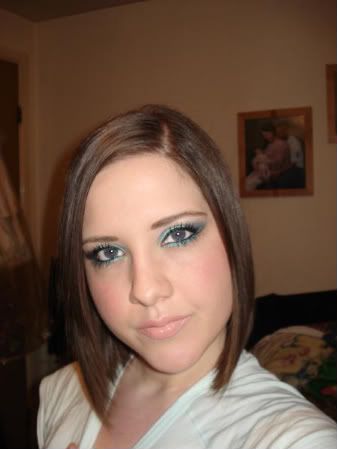
Eyes are now done! Now take your blush brush & swirl it in the blusher
Make a funny face & sweep the blush on your cheekbones & apples of the cheeks
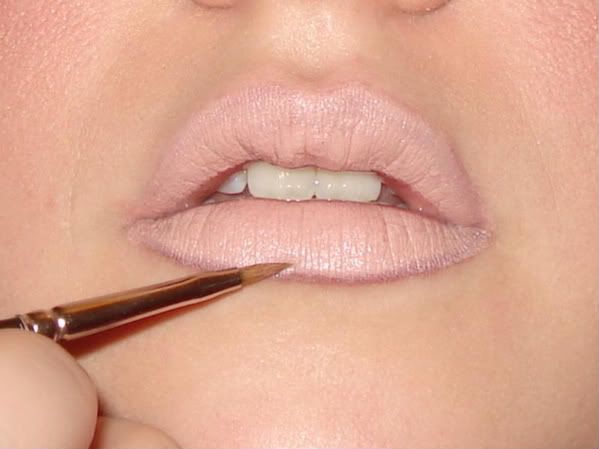
Now take your liipliner & line the edge of your lips
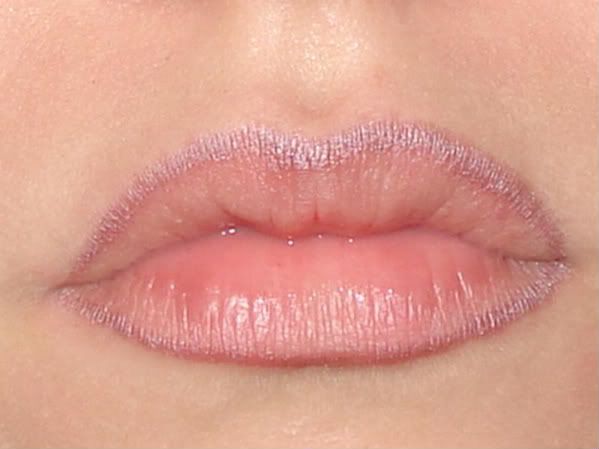
Apply the lipstick
Should now look like this
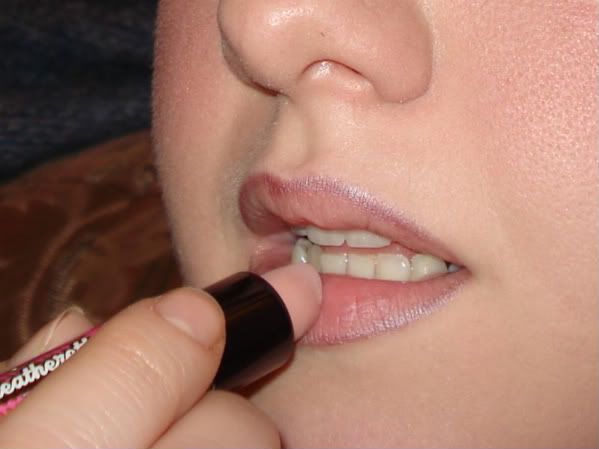
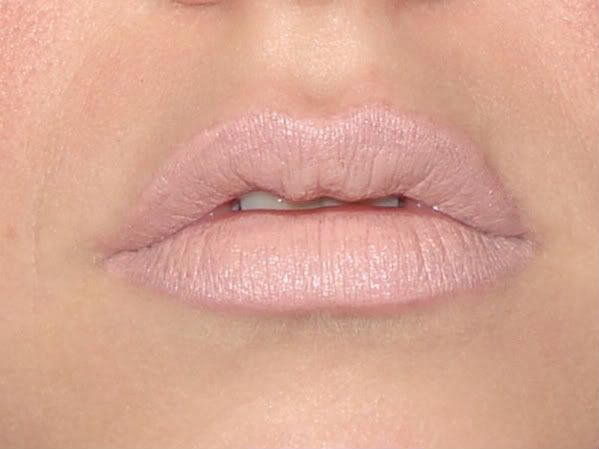
I like to use a thin brush (like 311) to blend the lipstick with the liner
Should now look like this
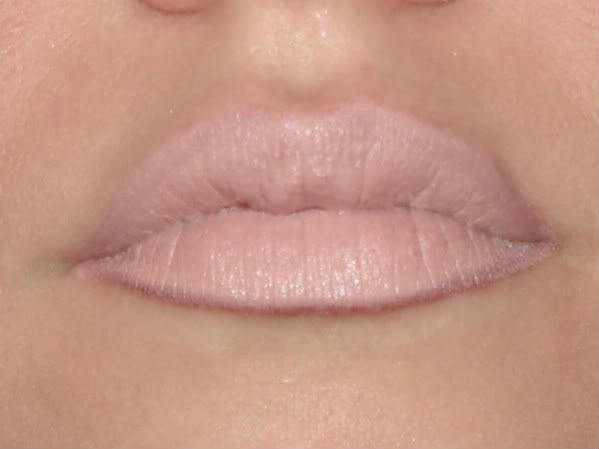
Add the Sock Hop gloss over the lipstick

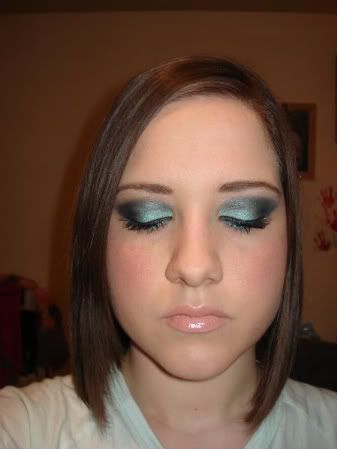
We're now done! Let your hair loose & pose for the camera!!
So, here is what you'll need. Sorry about the pic quality, had to use my phone because my camera battery died.
L-R:
MAC Style Blusher, MAC Heatherette Trio 1, MAC Rollickin' Paint Pot, Elizabeth Arden Flawless Finish Sponge on Cream Makeup, Max Factor 2000 Calorie Black Mascara, Urban Decay Primer Potion, MAC Black Funk/Pop Blue Dual Edge Eye Pencil, Miners Call a Copper Lipliner Pencil, MAC Espresso Eyeshadow, MAC Fleshpot Lipstick, MAC Sock Hop Lipglass, Brush like MAC 272, MAC 224, brush like MAC 275, Brush like MAC 242, brush like MAC 266, brush like MAC 311 & a blush brush.
Start with a clean moisturised face (sorry no pic of this)
Apply your foundation in your preferred way. I use the sponge from my compact. You should work from the inside of you face outwards. Apply any concealer & powder that you use now.
Put a little Primer potion on your lid & rub in with your finger
I also put a little under my eye & rub in with my finger
Using a brush like the 242 swirl it in the Rollickin' Paint pot
Apply it to roughly the inner 2 thirds of your lids. Ive still not got the hang of paint pots, but it doesn't need to be perfect.
Using the brush like the 272 swirl it in Moodring from the trio
Cover the paint pot on the lid with the moodring
Using the brush like the 266, very gently dab it in the cloudburst from the trio
Lightly draw a line from the corner of the eye, lining it up with the end of your brow. I like to go about 2 thirds up. Then draw an arched line across to around the middle of the eye. Should look something like this
Gently dab the 224 brush in Cloudburst & fill in the gap following your lines. Only use a little as you can always add more, but can't take it off.
Dab the brush again in the Cloudburst & add more colour, blending it in with the Moodring. I like to use a circular motion in the corner & sweeping motion along the crease.
Keep building up the colour & blending in. When adding more colour, always start at the corner as thats where you want it to be darkest. Eventually you should get something like this
Take the brush like the 275 & swirl it in Hoppin' from the Trio
Add the Hoppin' to the brow bone, blending in with the colour along the crease. Should look like this
Take the black side of the pencil & line the upper lash line from the inside of the eye to the outside corner. I do it while stretching the skin out a little.
Should now look like this
Take the blue side of the pencil & line the lower lashine. Again you may want to gently stretch the skin a little
Should now look like this
This step is not necessary but I like to do it to make the lower lash line colour more vibrant. Using the flat angled brush (like 266) take a little Moodring from the trio & go over the blue liner
Should now look like this
Wipe off the flat angled brush & take a little Espresso eyeshadow
Fill in those brows following the natural shape if possible
Just to show the difference it makes...the brow on the left is filled in, the right isn't
Apply your mascara. I do this while looking down into the mirror, otherwise I get mascara all over my lids
Apply mascara to the lower lashes
Line the lower waterline with the black side of the pencil. I often pull my eye down so I don't poke myself in the eye but that wasn't an attractive pic
Line the upper waterline with the black pencil. I don't do any pulling of the eye here.
Eyes are now done! Now take your blush brush & swirl it in the blusher
Make a funny face & sweep the blush on your cheekbones & apples of the cheeks
Now take your liipliner & line the edge of your lips
Apply the lipstick
Should now look like this
I like to use a thin brush (like 311) to blend the lipstick with the liner
Should now look like this
Add the Sock Hop gloss over the lipstick
We're now done! Let your hair loose & pose for the camera!!


