This is going to be the dopest tutorial EVER!! Well, not really, but it's should be good for kicks.
 And yes, I know NO ONE uses the word "dope" anymore, but it was just too much fun.
How To Make TLC Sticks
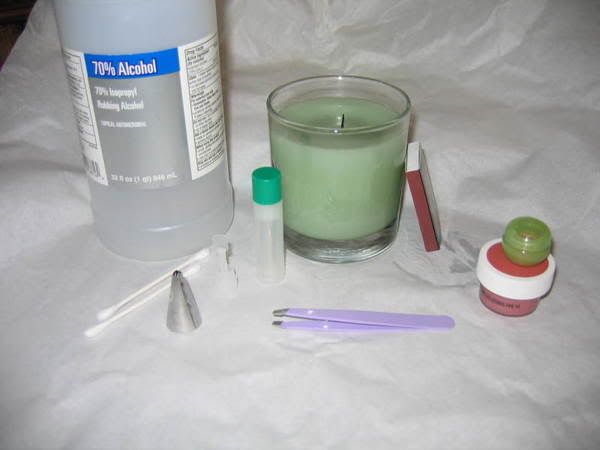
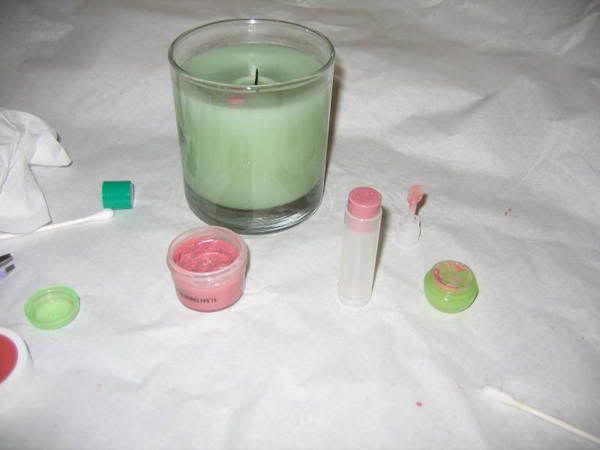
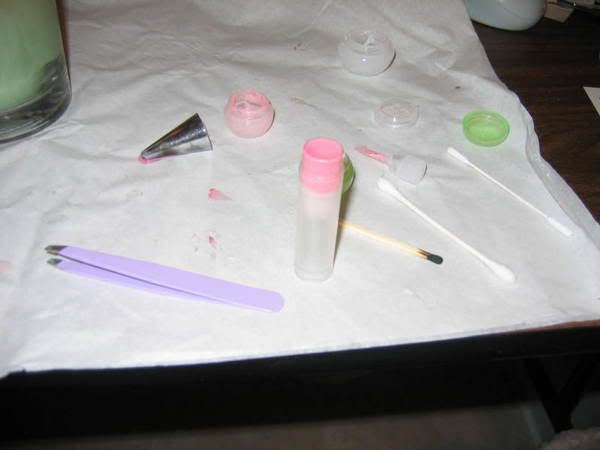
Step 1: Gather all the stuff you need. Tinted Lip Conditioner, Rubbing Alcohol, Tiny Spatula, Metal Piping Tip (for decotrating cakes), Tweezers, Tissue, Empty Lip Balm Tube, Candle, and Matches.
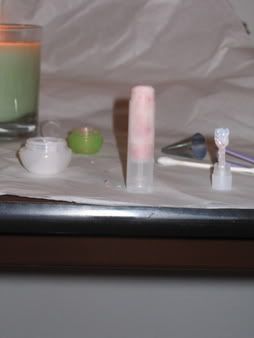
Step 1a: Sanitize anything you can. Tweezers, Metal Piping Tip, etc.
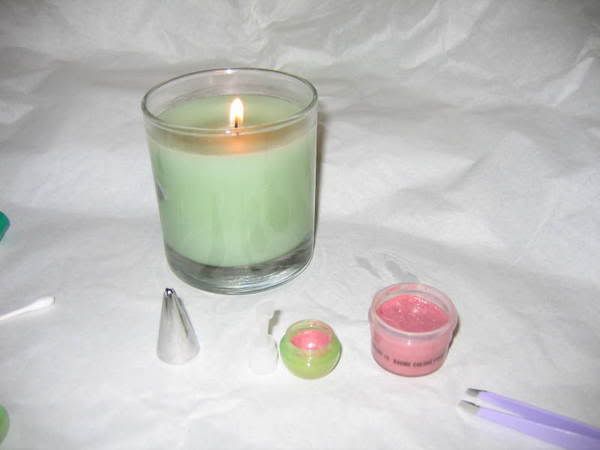
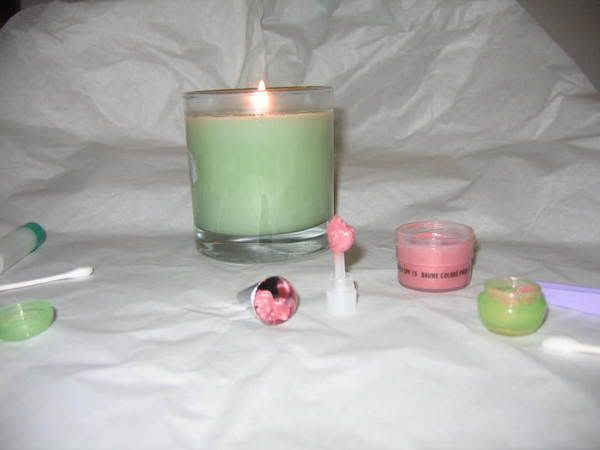
Step 1b: Scoop out a good amount of TLC and put it into the piping tip.
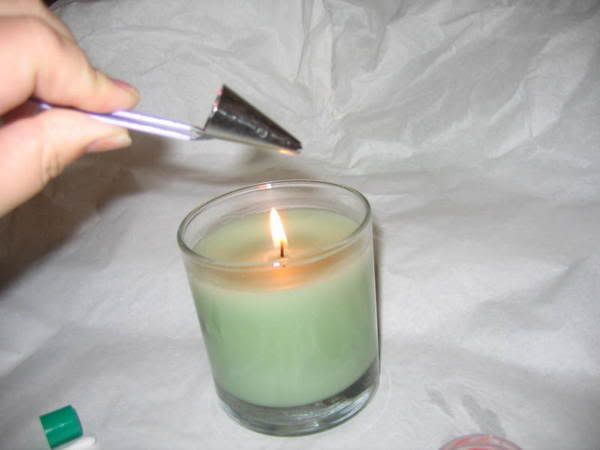
Step 3: Holding the piping tip by the tip of the tweezers tightly, hold the upper part of the tip over the flame tilting downwards so the TLC doesn't spill out the back (happened to me). It melts QUICK, so peep over and check as it's melting. Once it starts to slide down the tip, hold the lip balm tube underneath to start catching it. (You can also hold it simultaneously as you are heating it, not too close to the flame though!) You're going to have to go back and do this a few times to fill the tube but since this was my first run, I didn't want to botch up a whole jar so I screwed the lip balm to pretty close to the top so I wouldn't have to fill the whole thing.
I couldn't take a picutre of me filling the tubes because it required both hands.
Step 4: Voila! Done.
Extra Photos!
TLC SPF 15: This was the second one I did. I didn't bother cleaning out the Summerfete from the first time because I don't mind the swirls. Doesn't look as clean/neat, but I like the Summerfete so no matter.
I accidentally melted too much and couldn't screw the lip balm tube to accomodate more so it ended up in a nice dome shape.
I tried screwing it down while it was drying (again) and the dome caved. . .then I screwed it back up into a dome again.
Pink Pink to Make the Boys Wink TLC: WOOT! This one I filled the well with the SPF 15 TLC first so you can see a white band and then the pink on top of it.
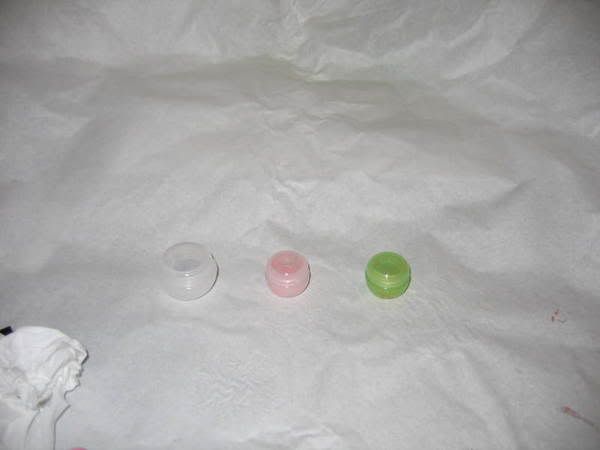
"Originals": I originally had the TLCs in the little jars pictured below because I thought they would be easier to use, tote around, etc. It ended up being a pain in the tookas as my nails got longer and it was just hard to reach for and use them.
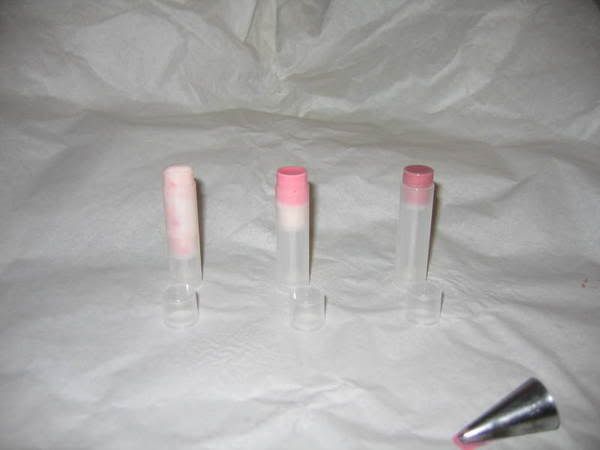
Finished TLC Lip Balm Tubes with Caps Off:
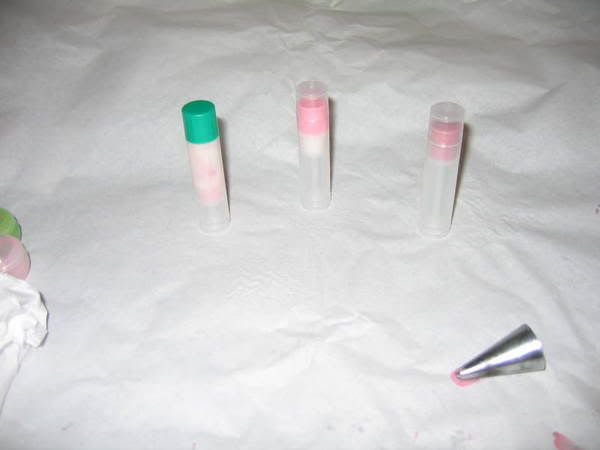
Finished TLC Lip Balm Tubes with Caps On: I have lots (think in the k) of these so I have many different colored caps. I was going to do different colors but the clear lets them show through real nice.
I popped a green cap on the SPF 15 one because I like green.
(I know they all have SPF 15)
Hope you guys liked everything!

Tips:
1. Gather everything you need first.
2. The TLC slides out of the tube pretty slowly if it isn't overheated, it kind of oozes out and then plops out as the hotter part from the top comes down. Remember, the tip is metal so it will still be hot after you remove it from the flame so you can wait a couple seconds holding the tip over the tube and it will slide out at a good rate.
3. Screw the lip balm up if you don't want to fill a whole tube. I think they hold .15ml so obviously you can't put a whole tub in there.
4. If you don't want to waste any of your precious ----insert name of LE/LC TLC here-----, fill the little well in the lip balm tube with the clear as I did with the Pink Pink to Make the Boys Wink TLC.
(If you don't get what I mean, PM me or leave a comment.)
5. Tiny Q-Tips are good for cleaning the sides if you do the above step. The TLC tends to get on the sides first so it doesn't matter if you are doing all one color but if you are doing multiple, it is best to clean off the sides so the part you can actually use is the right color.
6. When in doubt screw the tube LOWER than you think it will fill. That is because you can always move it up without much ugliness, but since you are pouring/filling it in layers, if you find out you have more than can fill it is hard to screw it DOWN without leaving a huge airbubble or gap in the middle. If you don't fill it to the top, you can always screw it up. Remember: Harder to screw DOWN than UP. Learned the hard way.
7. Definitely put a paper/magazine down first so it is easy to clean up later. Just roll it up and throw it away.
*SUGGESTION* You can mix up a batch of the TLC and food coloring to create your OWN!! Or better yet, mix in some pigments for some really outrageous and seriously cool personalized TLC tubes.
 Yes, the pigment idea sounds better. But make sure to check the precautions to make sure your pigment is lipsafe.
How To Make TLC Sticks
Step 1: Gather all the stuff you need. Tinted Lip Conditioner, Rubbing Alcohol, Tiny Spatula, Metal Piping Tip (for decotrating cakes), Tweezers, Tissue, Empty Lip Balm Tube, Candle, and Matches.
Step 1a: Sanitize anything you can. Tweezers, Metal Piping Tip, etc.
Step 1b: Scoop out a good amount of TLC and put it into the piping tip.
Step 3: Holding the piping tip by the tip of the tweezers tightly, hold the upper part of the tip over the flame tilting downwards so the TLC doesn't spill out the back (happened to me).
It melts QUICK, so peep over and check as it's melting. Once it starts to slide down the tip, hold the lip balm tube underneath to start catching it. (You can also hold it simultaneously as you are heating it, not too close to the flame though!) You're going to have to go back and do this a few times to fill the tube but since this was my first run, I didn't want to botch up a whole jar so I screwed the lip balm to pretty close to the top so I wouldn't have to fill the whole thing.I couldn't take a picutre of me filling the tubes because it required both hands.
Step 4: Voila! Done.
Extra Photos!
TLC SPF 15: This was the second one I did. I didn't bother cleaning out the Summerfete from the first time because I don't mind the swirls. Doesn't look as clean/neat, but I like the Summerfete so no matter.
Pink Pink to Make the Boys Wink TLC: WOOT! This one I filled the well with the SPF 15 TLC first so you can see a white band and then the pink on top of it.
"Originals": I originally had the TLCs in the little jars pictured below because I thought they would be easier to use, tote around, etc. It ended up being a pain in the tookas as my nails got longer and it was just hard to reach for and use them.
Finished TLC Lip Balm Tubes with Caps Off:
Finished TLC Lip Balm Tubes with Caps On: I have lots (think in the k) of these so I have many different colored caps. I was going to do different colors but the clear lets them show through real nice.
Hope you guys liked everything!
Tips:
1. Gather everything you need first.
2. The TLC slides out of the tube pretty slowly if it isn't overheated, it kind of oozes out and then plops out as the hotter part from the top comes down. Remember, the tip is metal so it will still be hot after you remove it from the flame so you can wait a couple seconds holding the tip over the tube and it will slide out at a good rate.
3. Screw the lip balm up if you don't want to fill a whole tube. I think they hold .15ml so obviously you can't put a whole tub in there.
4. If you don't want to waste any of your precious ----insert name of LE/LC TLC here-----, fill the little well in the lip balm tube with the clear as I did with the Pink Pink to Make the Boys Wink TLC.
5. Tiny Q-Tips are good for cleaning the sides if you do the above step. The TLC tends to get on the sides first so it doesn't matter if you are doing all one color but if you are doing multiple, it is best to clean off the sides so the part you can actually use is the right color.
6. When in doubt screw the tube LOWER than you think it will fill. That is because you can always move it up without much ugliness, but since you are pouring/filling it in layers, if you find out you have more than can fill it is hard to screw it DOWN without leaving a huge airbubble or gap in the middle. If you don't fill it to the top, you can always screw it up. Remember: Harder to screw DOWN than UP.
Learned the hard way.
7. Definitely put a paper/magazine down first so it is easy to clean up later. Just roll it up and throw it away.
*SUGGESTION* You can mix up a batch of the TLC and food coloring to create your OWN!! Or better yet, mix in some pigments for some really outrageous and seriously cool personalized TLC tubes.

