..kels*
Well-known member
holy moley.. this tutorial business was a LOT harder than i had anticipated. i apologize for the shit-tastic pictures. the lighting in my bathroom is horrible & makes everything look orange-y. bear with me please!

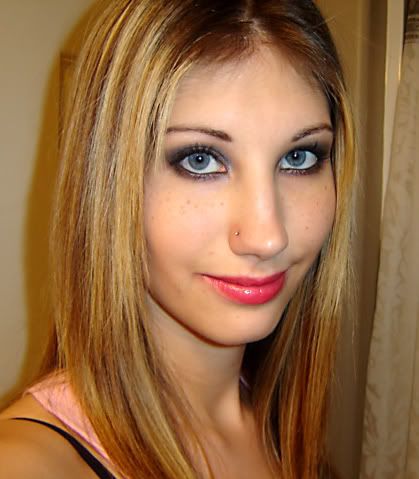
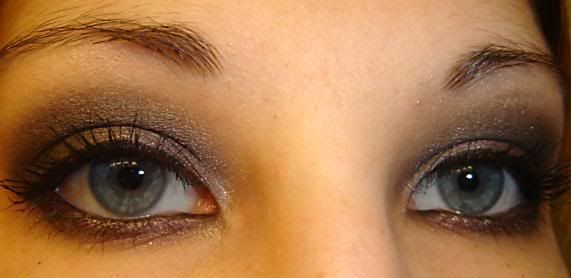
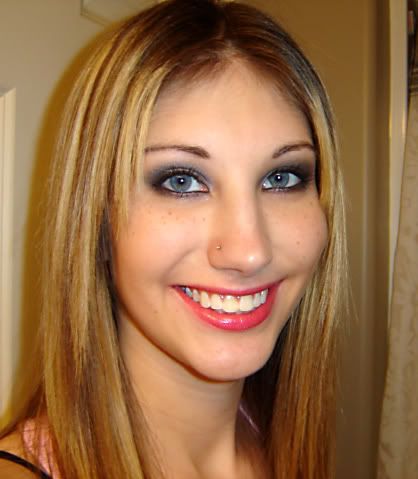
this is the look we're trying to achieve.
clickable thumbnail. clicky clicky!!
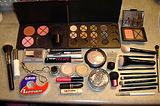
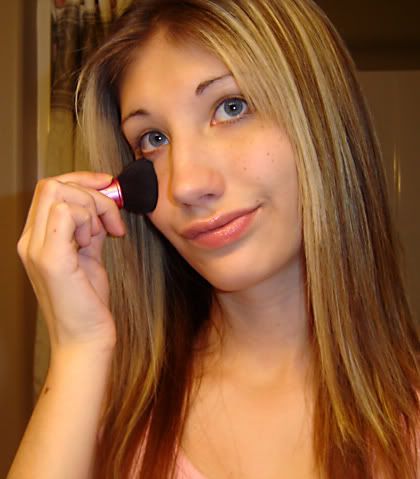
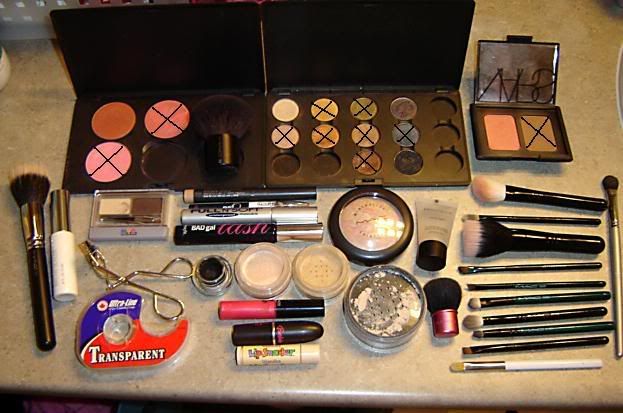
all my supplies.
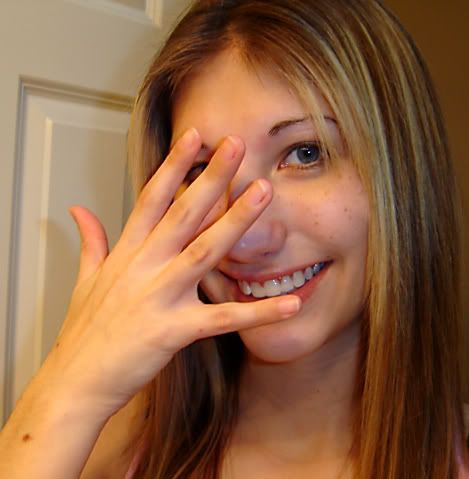
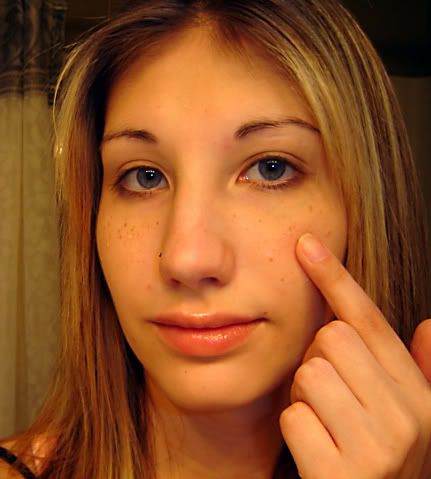
start off with a moisturized face & some chapstick. as you can see i'm a bit shy about posting my bare face.
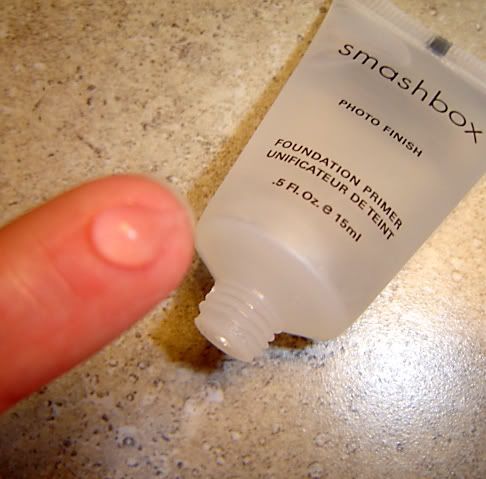
squeeze a little smidgeon of photofinish primer on your finger.
dab it all over your face & rub it in.
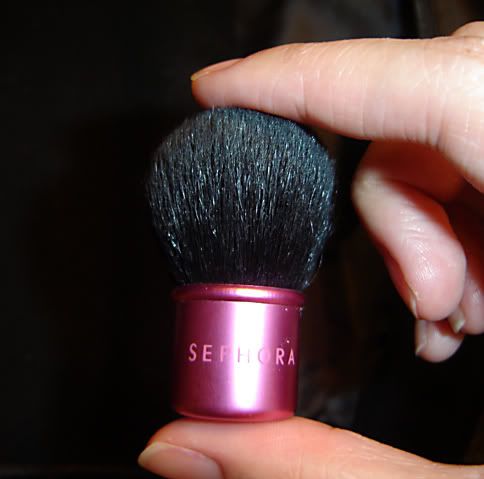
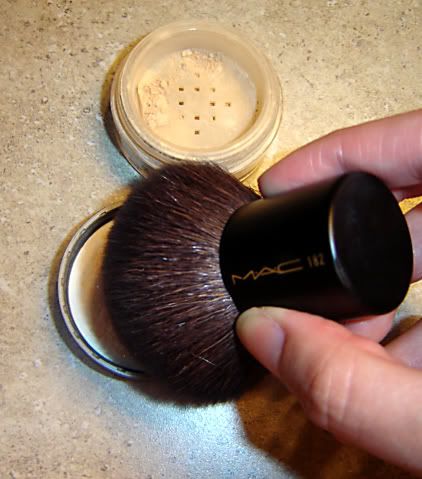
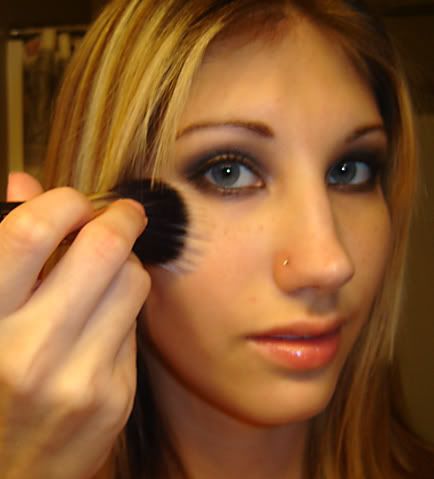
get your handy dandy mini kabuki brush. (this guy is seriously small!)
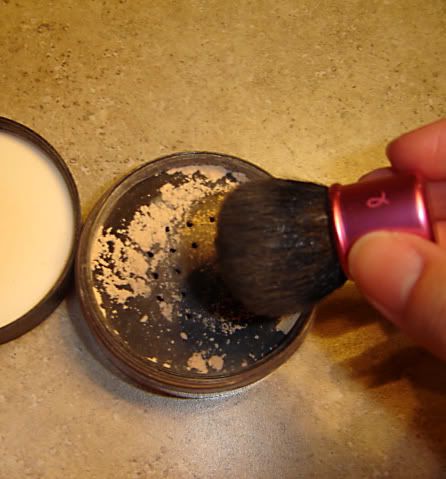
dibble dabble it in your loose blot powder.
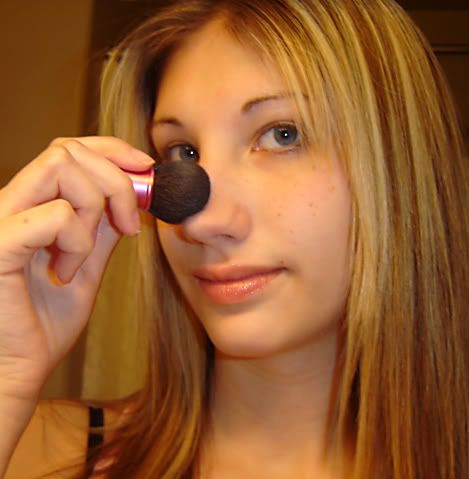
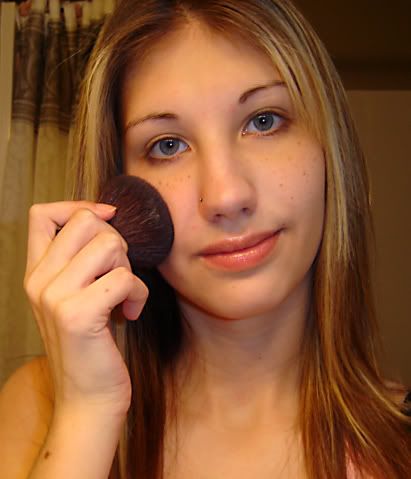
buff onto your t-zone & anywhere else that you get oilies.
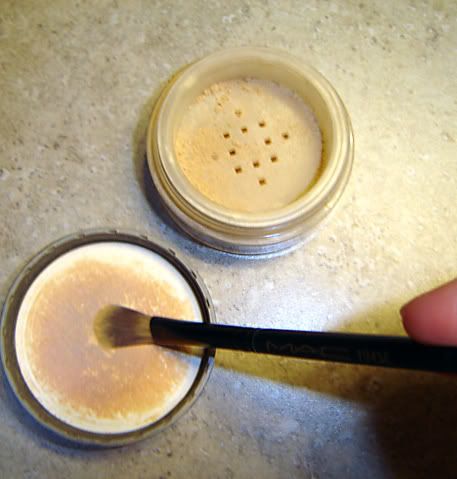
take your 182 & pick up some bare minerals. swirl, tap, buff.. you know the drill.
buff buff buff
take the 194. again.. swirl, tap.
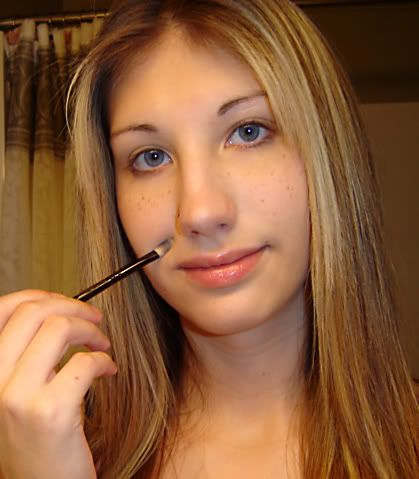
cover up any nasty pimples & eyebags.
take the mini kabuki (
 ) & buff all the spots you've concealed.

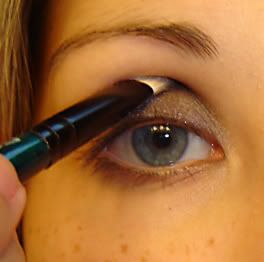
apply beige-ing s/s from the lashline to just above the crease.
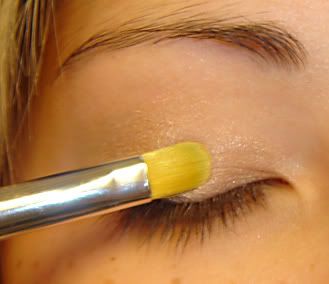
"blend" with the sonia kashuk concealer brush.
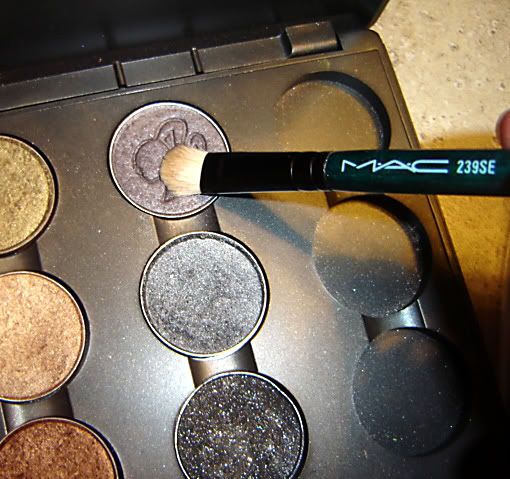
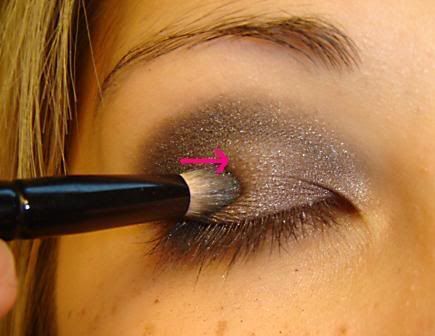
load up the 239 with moth brown e/s.
apply to the inner 2/3's of the eye.
sweep it from the inner corner up into the crease using the windshield wiper technique.
this is what it should look like.
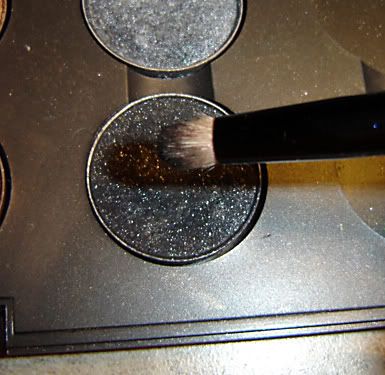
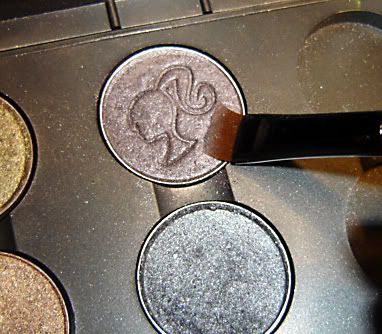
load up the 219 with some black tied e/s.
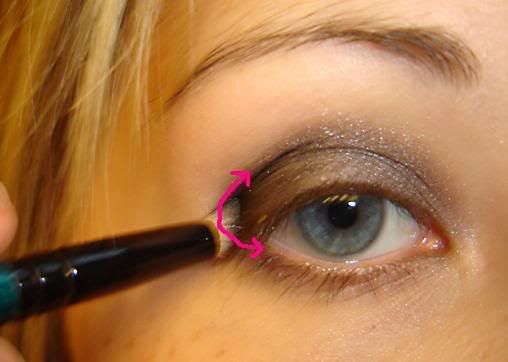
apply to outer v as demonstrated in the picture.
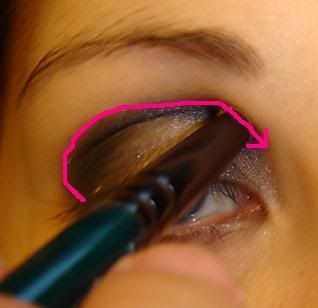
sweep from the outer corner, through the crease & out to the inner corner.
now lightly "drag" the black tied e/s into moth brown e/s to create a gradient. you can go back & forth between dragging moth brown into black tied & dragging black tied into moth brown until everything is blended.
apply your highlight to the browbone (underneath the brow). i used shroom e/s with Quo's "all over shadow" brush.

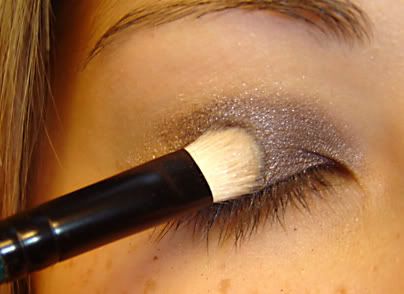
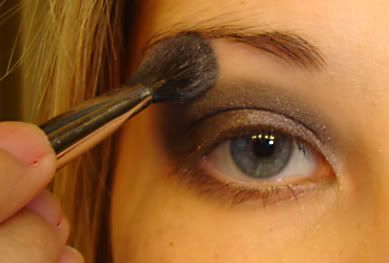
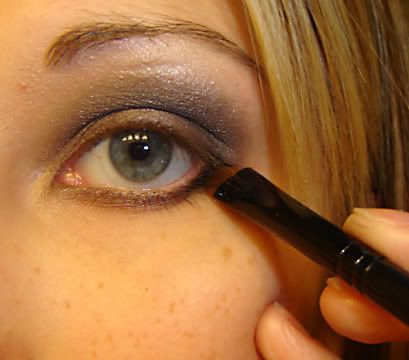
take the 217 & blend. use both the windshield wiper method & little circular motions along the crease.
i find that after i blend, the colours are too faded. so i take the 219 & apply more black tied e/s directly to the crease.
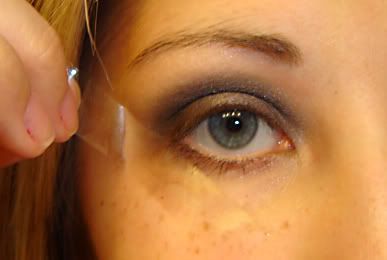
i use transparent tape to clean up the shape of my shadow & to get rid of any fallout.
take the 212 & load up on some moth brown e/s.
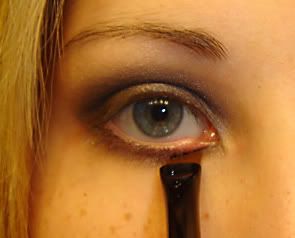
apply to the inner 2/3's of the lower lashline.

pick up some black tied with the same brush.
apply to the outer 1/3 of the lower lashline.
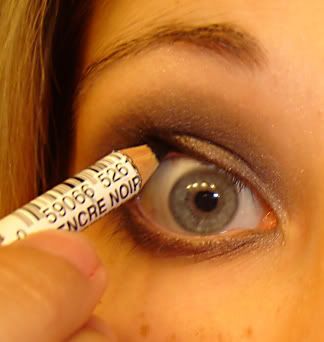
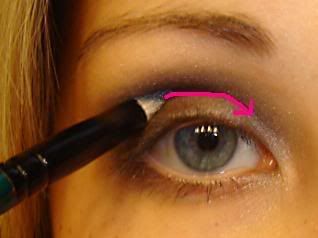
now take your cheapy eye pencil & tightline your upper lashline.
line your waterline however you like. fluidline irritates my eyes, so again i use the pencil.
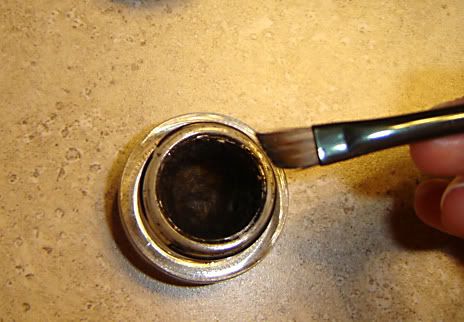
take a soft angled brush (i use annabelle's A-14 liner brush from walmart) & dip it in blacktrack f/l.
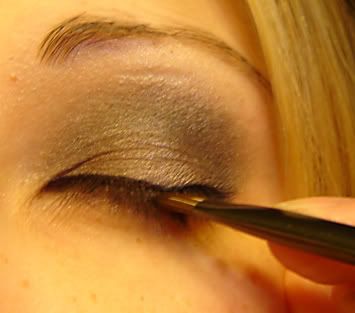
line your upper lashline keeping as close to the lashes as possible.
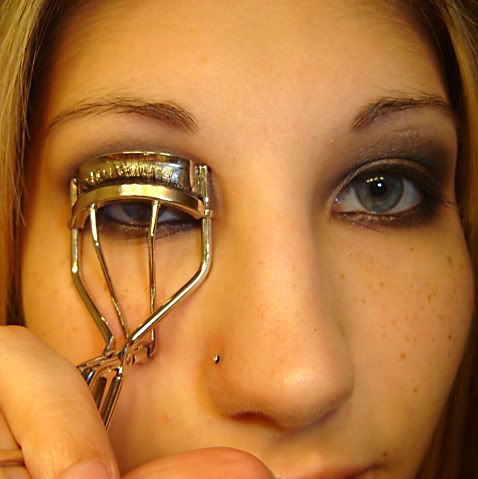
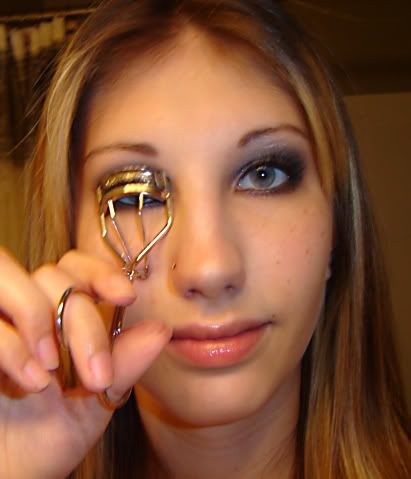
curl your lashes. i use the shu uemera curler & clamp down lightly in 3 different places along my lashes to get a softer & more natural looking curl.
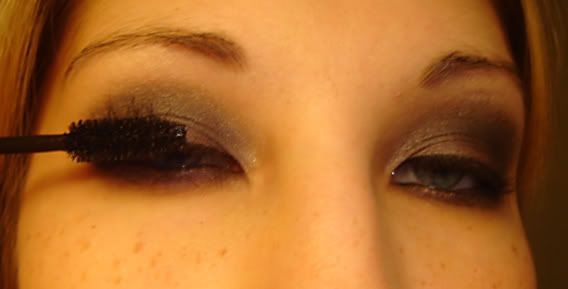
apply maybelline full & soft mascara.
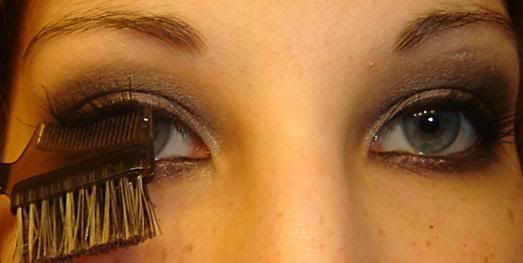
wait for it to dry & comb out any clumps.
& now for the "fake lash tut"
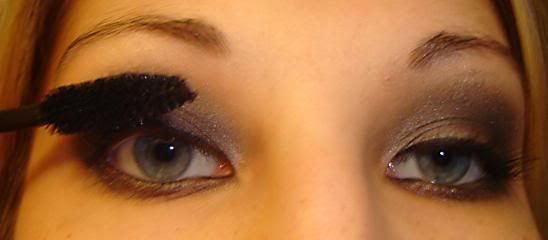
apply benefit's badgal lash.
i know a lot of people are against curling lashes after they've applied mascara (due to breakage & whatnot) but i've never had any problems, so i curl those bad boys again!
& voila! instant falsies!!

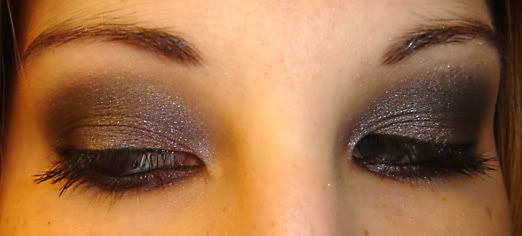
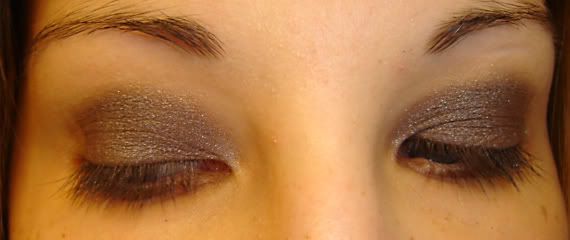
clean up & fill your brows. finished eyes.
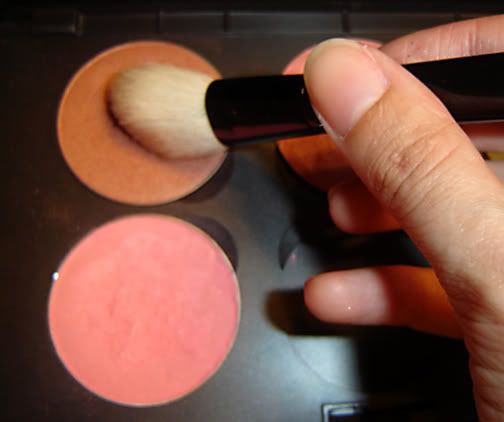
take the 168 & load up on peachtwist blush.

make the signature fishy face & apply into the hollows of your cheeks & up towards the temples.
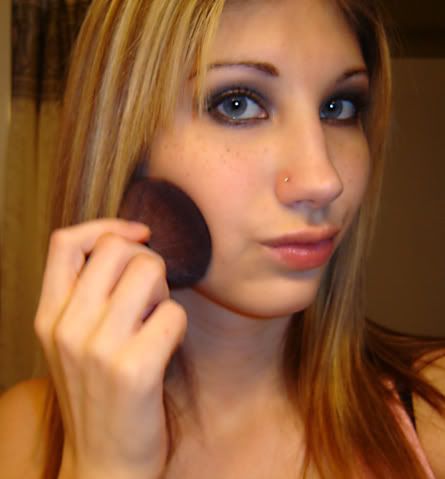
get out your trusty 182 & buff until it hurts!!! we don't want any harsh lines here..
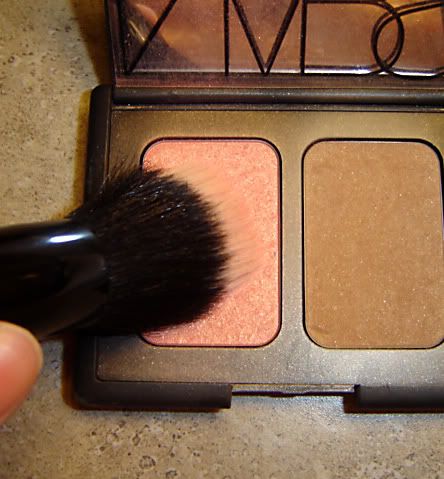
then take the 187SE (smaller than the FS 187.. or if you have the 188, use that) & get some NARS orgasm blush.
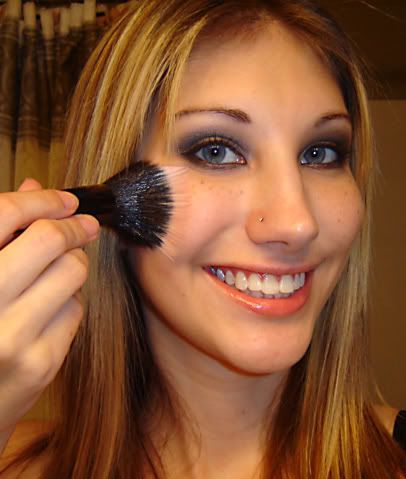
time for the cheesy grin.. smile & apply orgasm from the apples of your cheeks up towards the temples. buff it all together.
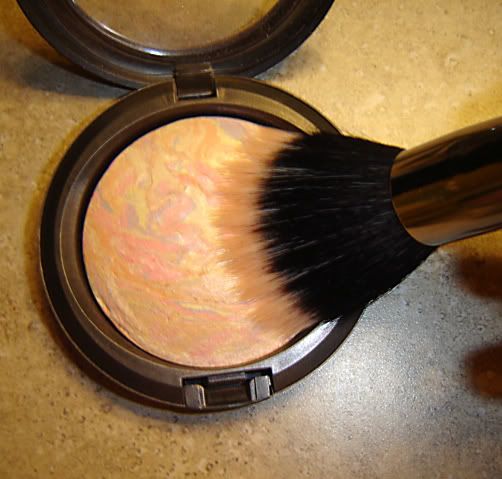
take the FS 187 & sweep up some lightscapade MSF.
apply lightly to your cheekbones.
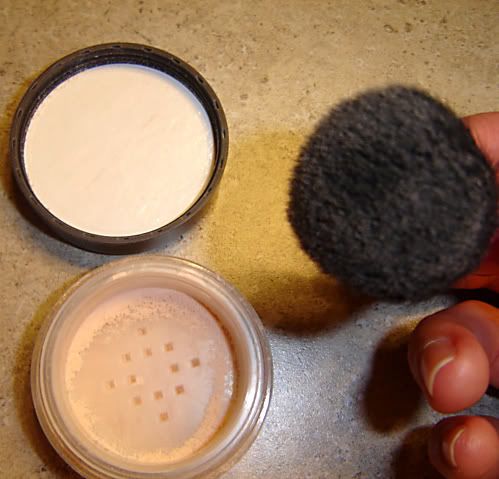
for the millionth time break out the mini kabuki (can you tell i love this brush??!) & load up on BE mineral veil. swirl, tap &.....
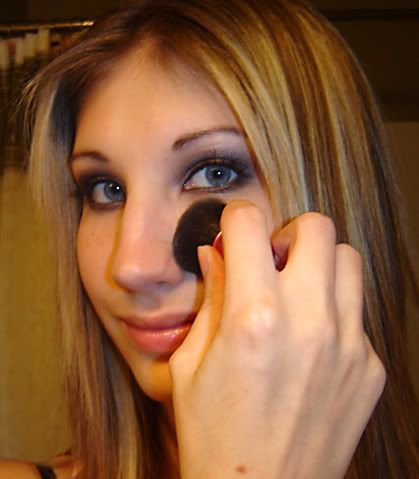
buff all over your face to set the makeup.
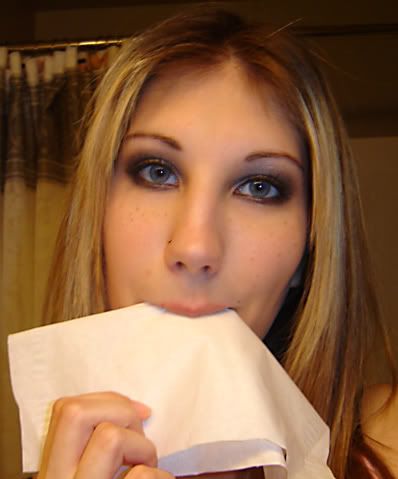
time for the lips! my chapstick is really slippery so i take a tissue & blot most of it off.
apply rocking chick l/s.
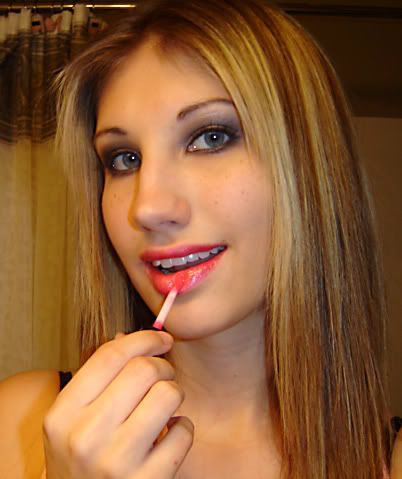
& apply malibu barbie l/g over it.
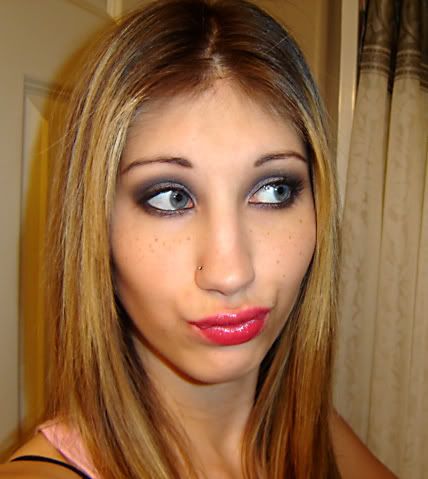
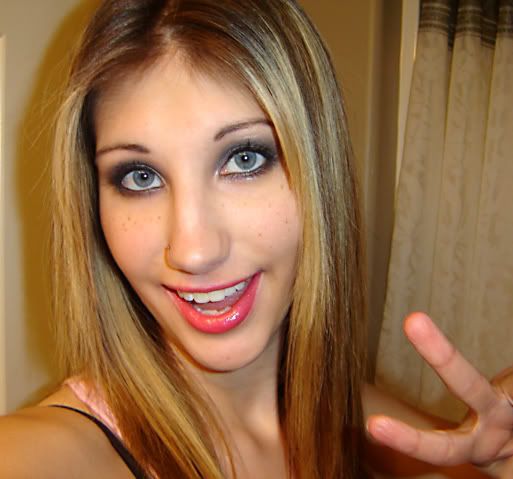
& you're all done! now strike a pose! or two.. or three..

this is the look we're trying to achieve.
clickable thumbnail. clicky clicky!!
all my supplies.
start off with a moisturized face & some chapstick. as you can see i'm a bit shy about posting my bare face.
squeeze a little smidgeon of photofinish primer on your finger.
dab it all over your face & rub it in.
get your handy dandy mini kabuki brush. (this guy is seriously small!)
dibble dabble it in your loose blot powder.
buff onto your t-zone & anywhere else that you get oilies.
take your 182 & pick up some bare minerals. swirl, tap, buff.. you know the drill.
buff buff buff
take the 194. again.. swirl, tap.
cover up any nasty pimples & eyebags.
take the mini kabuki (
apply beige-ing s/s from the lashline to just above the crease.
"blend" with the sonia kashuk concealer brush.
load up the 239 with moth brown e/s.
apply to the inner 2/3's of the eye.
sweep it from the inner corner up into the crease using the windshield wiper technique.
this is what it should look like.
load up the 219 with some black tied e/s.
apply to outer v as demonstrated in the picture.
sweep from the outer corner, through the crease & out to the inner corner.
now lightly "drag" the black tied e/s into moth brown e/s to create a gradient. you can go back & forth between dragging moth brown into black tied & dragging black tied into moth brown until everything is blended.
apply your highlight to the browbone (underneath the brow). i used shroom e/s with Quo's "all over shadow" brush.
take the 217 & blend. use both the windshield wiper method & little circular motions along the crease.
i find that after i blend, the colours are too faded. so i take the 219 & apply more black tied e/s directly to the crease.
i use transparent tape to clean up the shape of my shadow & to get rid of any fallout.
take the 212 & load up on some moth brown e/s.
apply to the inner 2/3's of the lower lashline.
pick up some black tied with the same brush.
apply to the outer 1/3 of the lower lashline.
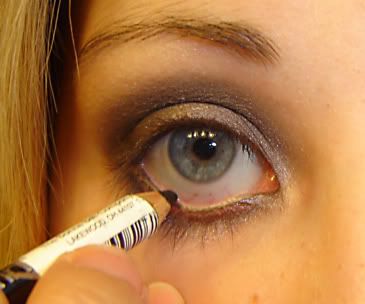
now take your cheapy eye pencil & tightline your upper lashline.
line your waterline however you like. fluidline irritates my eyes, so again i use the pencil.
take a soft angled brush (i use annabelle's A-14 liner brush from walmart) & dip it in blacktrack f/l.
line your upper lashline keeping as close to the lashes as possible.
curl your lashes. i use the shu uemera curler & clamp down lightly in 3 different places along my lashes to get a softer & more natural looking curl.
apply maybelline full & soft mascara.
wait for it to dry & comb out any clumps.
& now for the "fake lash tut"
apply benefit's badgal lash.
i know a lot of people are against curling lashes after they've applied mascara (due to breakage & whatnot) but i've never had any problems, so i curl those bad boys again!
& voila! instant falsies!!
clean up & fill your brows. finished eyes.
take the 168 & load up on peachtwist blush.
make the signature fishy face & apply into the hollows of your cheeks & up towards the temples.
get out your trusty 182 & buff until it hurts!!! we don't want any harsh lines here..
then take the 187SE (smaller than the FS 187.. or if you have the 188, use that) & get some NARS orgasm blush.
time for the cheesy grin.. smile & apply orgasm from the apples of your cheeks up towards the temples. buff it all together.
take the FS 187 & sweep up some lightscapade MSF.
apply lightly to your cheekbones.
for the millionth time break out the mini kabuki (can you tell i love this brush??!) & load up on BE mineral veil. swirl, tap &.....
buff all over your face to set the makeup.
time for the lips! my chapstick is really slippery so i take a tissue & blot most of it off.
apply rocking chick l/s.
& apply malibu barbie l/g over it.
& you're all done! now strike a pose! or two.. or three..

