m_floffy_boes
Well-known member
Okay, so I know a lot of people have some serious beef with orange, red and yellow eyeshadows in particular. In my experience, if you do it wrong, you'll end up looking like you have conjunctivitus, but if you do it right, it looks bloody ace!
SO, here is what you'll need (sorry I didn't take a picture, I did this tutorial really quickly!)
UDPP
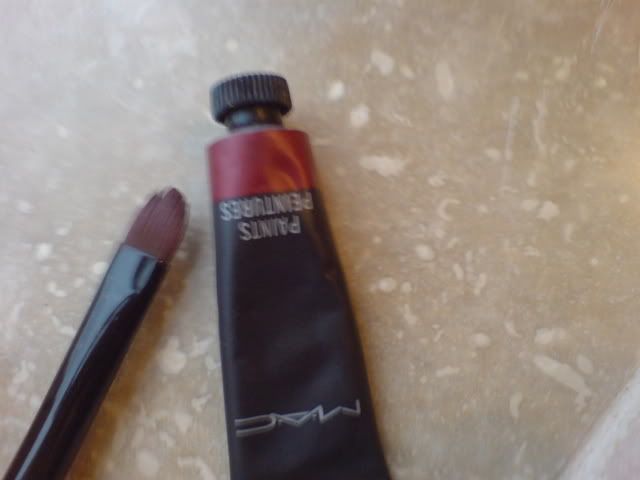
Flammable Paint
Firespot e/s (or any orangey eyeshadow)
Mi'Lady (or any red eyeshadow)
Coppering e/s (or any...well, you get the idea)
Fig 1 e/s
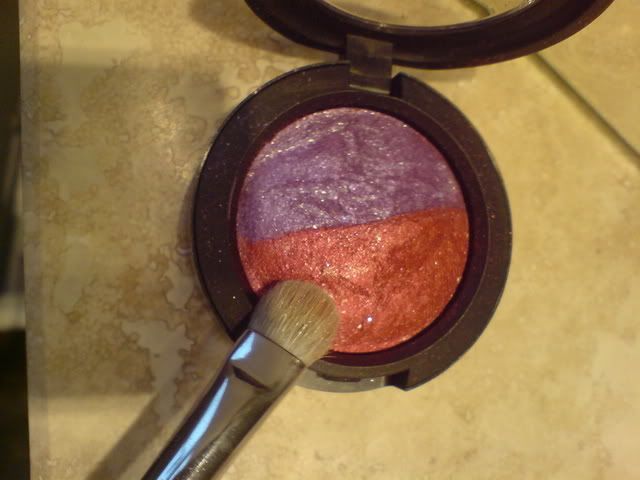
a light purple e/s that I don't have the name of. I think it's probably similar to Sattellite Dreams or Parfait Amour or something like that.
Carbon e/s
Nylon e/s
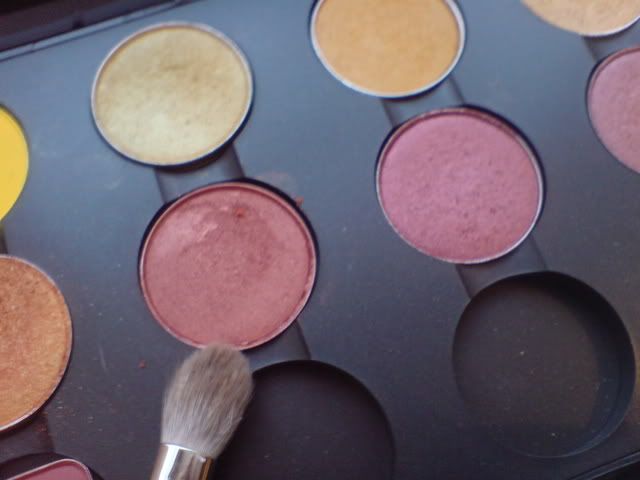
Gorgeous Gold e/s
Mascara
Forever Green powerpoint pencil
eyeliner for the top lashline (I didn't do that in this tut, as I kind of forgot, hah)
Foundation
Cheek stuff if you want it (I didn't use it, because I did this tutorial at night, and there wasn't much point)
Some form of lipstick/gloss/whatever
OKAY! Let's go.
OH, and be warned, your face will get a LOT worse, before it gets better. You will, at one point or another, look like a member of MCR. BUT DO NOT FRET. It will be fixed.
ALSO BE WARNED-The lighting is so terrible, so apologies for that. And also, my eyes started watering part way through, so that accounts for why some of the eyeshadow near my tear duct looks a lot lighter than it should be.
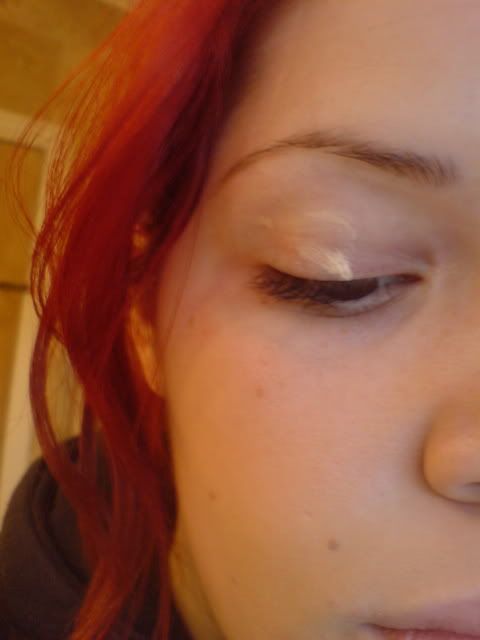
Start with a bare, clean, cleansed, toned, moisturised, etc etc face (now as it happened, mine was none of the above. I'd just taken my make-up off, so that'll have to do) :

Apply UDPP all over the lid, up to the brow bone:
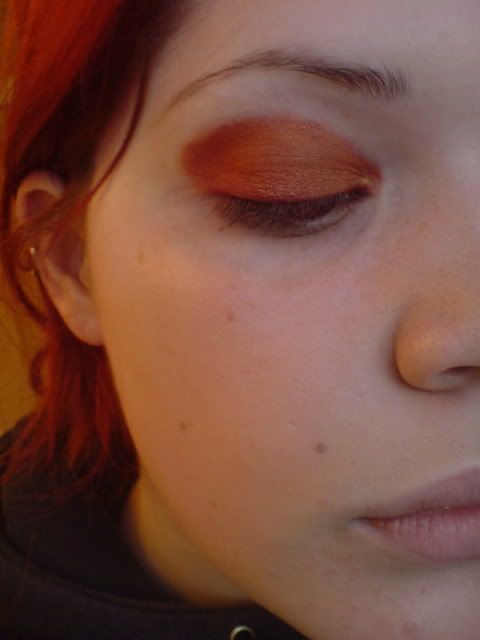
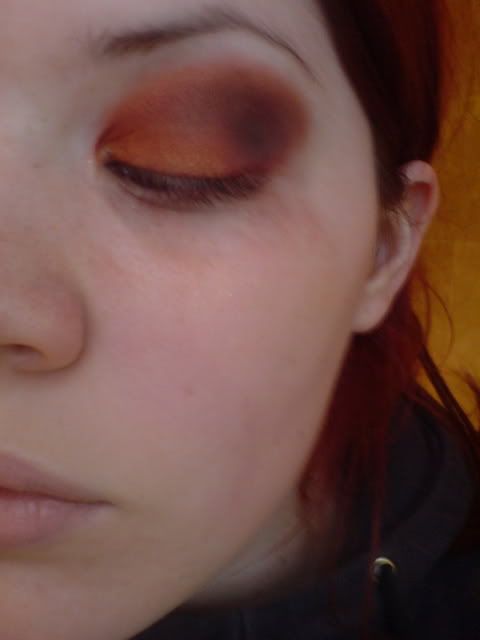
Using a stiff brush (mine just so happens to be a Bobbi Brown one, but it really doesn't matter) apply Flammable Paint all over the lid, and slightly above the crease in a kind of rounded shape, however it doesn't need to be neat (as you can see, haha):
Now, using the 239, apply Firespot all over where you just applied Flammable:

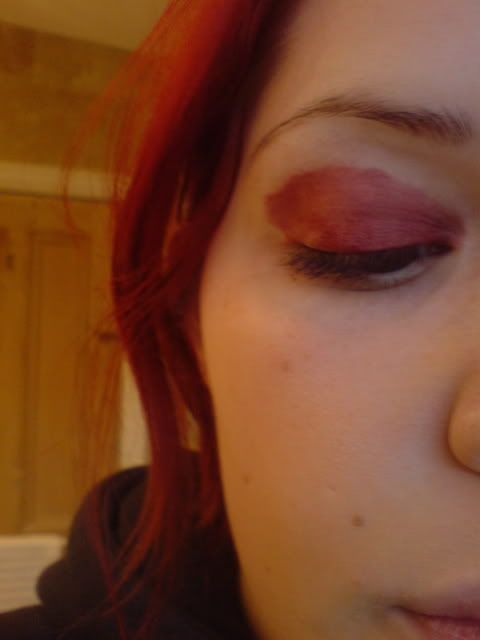
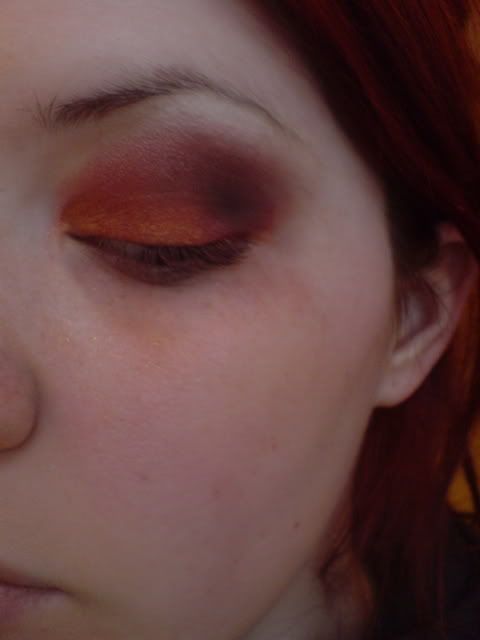
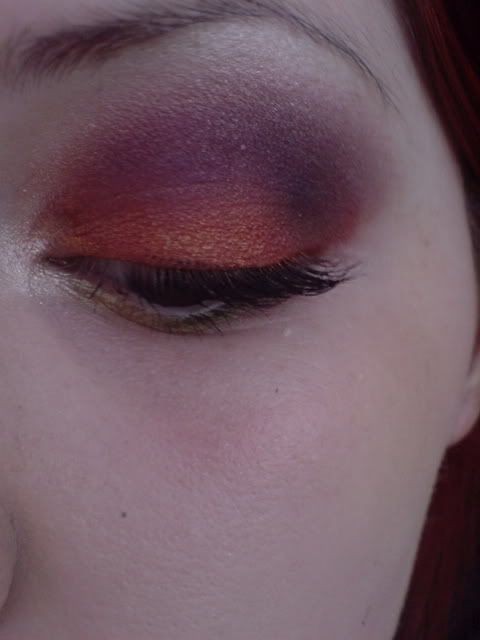
It should look something like this (please excuse the horrificness of what you are about to see, but like I said, worse before it gets better)
Now, using the same 239 (though wipe it on a tissue or something, to get rid of the remnants of Firespot), pick up some of the red side of Mi'Lady and apply to the outer crease, like so:
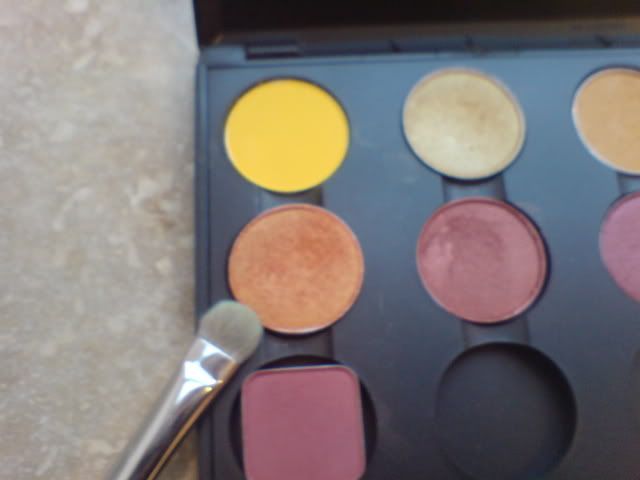
Now, use Coppering with the 217 to kind of round out the edges on the crease:
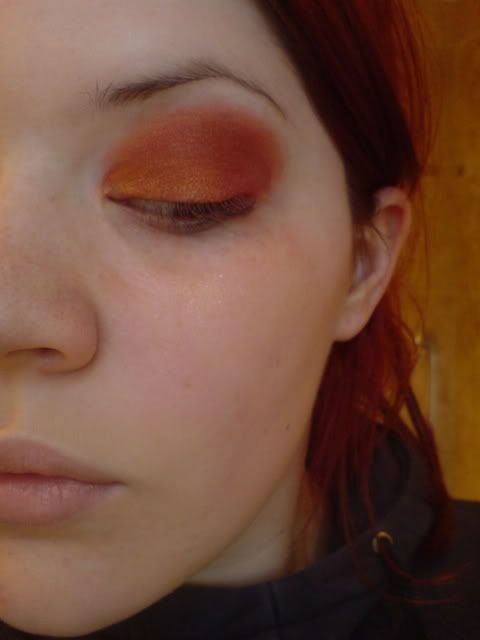
Now, with the 217 (different one or the same, it doesn't really matter. I use the same one, because I only have one. I just swipe it on a tissue between each colour) apply carbon deep in the outer crease:
Okay, my next step is going to be the highlight, so let me explain why-
Usually, highlights are done last (as you know) but I tend to faff around a lot with the shape after I highlight, as when I highlight, I bring the colour too low. So I've decided to highlight now, then add the purples later. Obviously, this is personal preference, and it's probably slightly strange, so you can just ignore this step and save it until last!
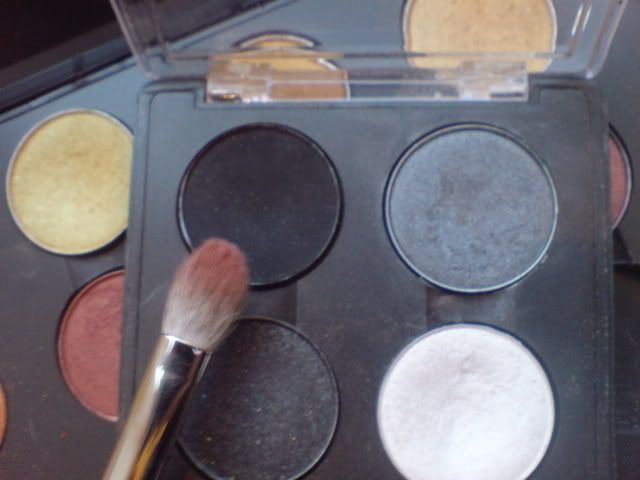
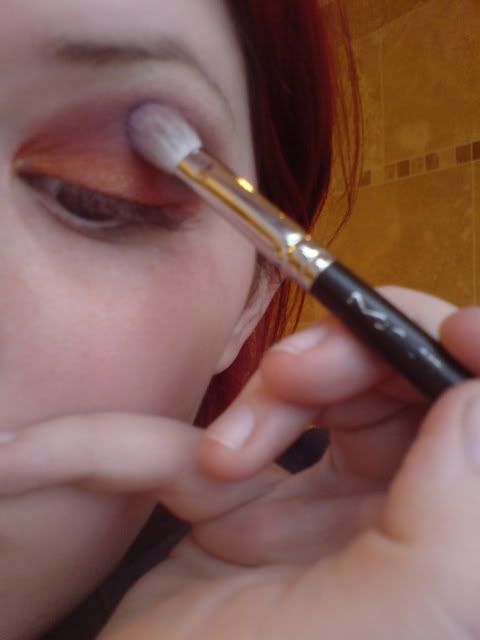
Using a fluffy brush, pick up some Nylon to highlight:
Using the 217 again (srsly, using the same brush over and over doesn't matter, I don't reckon. Helps blend out the colours better, innit), pick up some Fig 1 and apply to the inner crease:
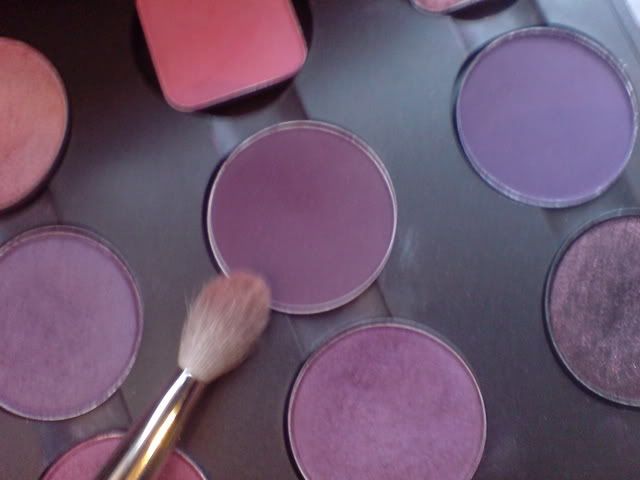
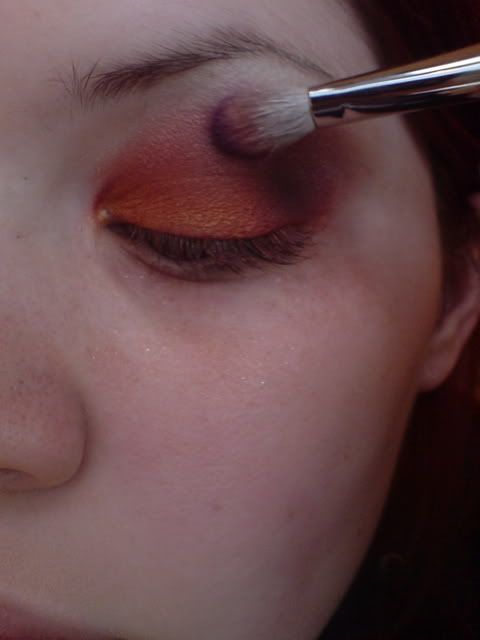
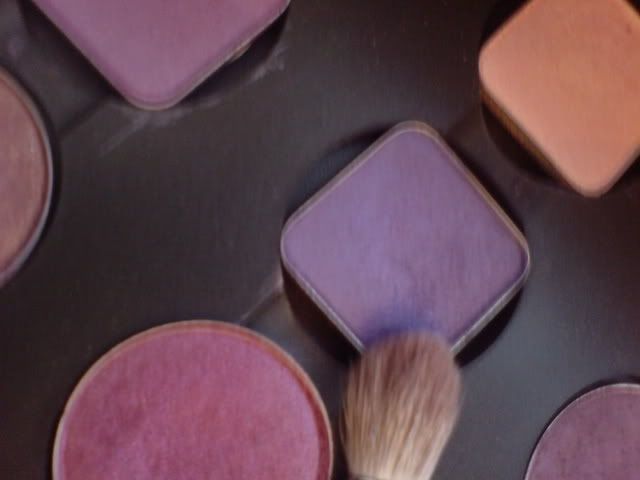
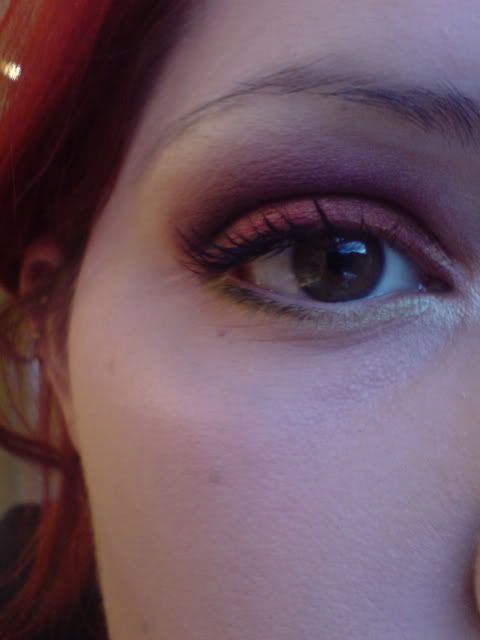
Now, using a light purple (dunno the name of this one, sorry) apply this over the Fig 1. It makes it more vibrant, and less dark.
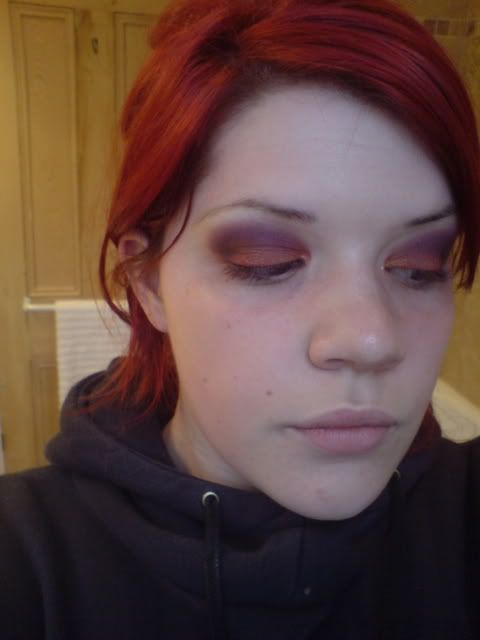
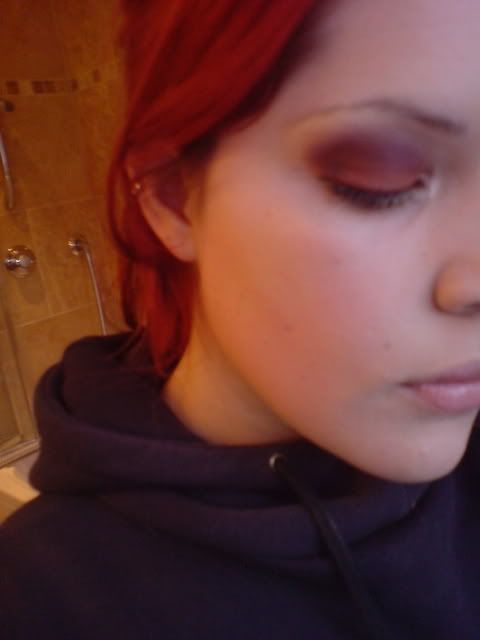
It should look roughly like this so far:
We're gonna finish off the eyes later. (I think I may have a strange way of doing things, but it makes sense in my head, so...onwards!)
Foundation:
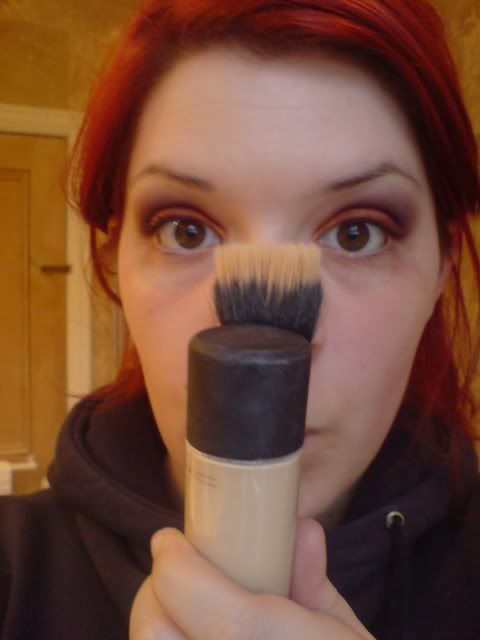
Touche Eclait. I love this stuff. It makes me happy, as you can see. Apply under the eyes, and then pat in with your ring finger
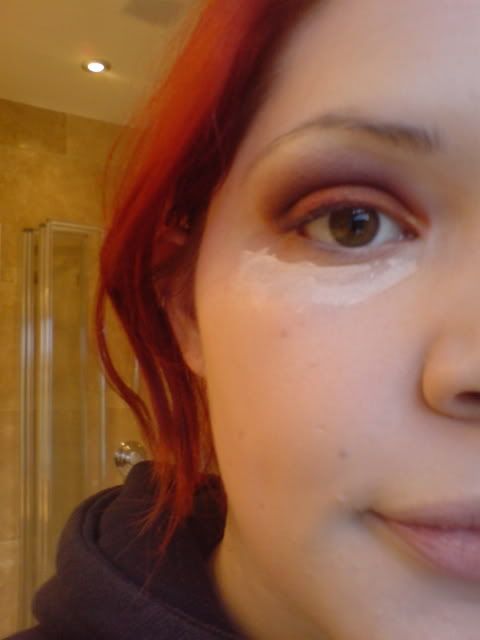
You can continue to do cheeks if you would like, but as I said before, I did this in the evening, so I didn't really see the point!
Back to the eyes! I do it this way so that I don't cover up the shadow I do under the eyes with my foundation/touche eclait.
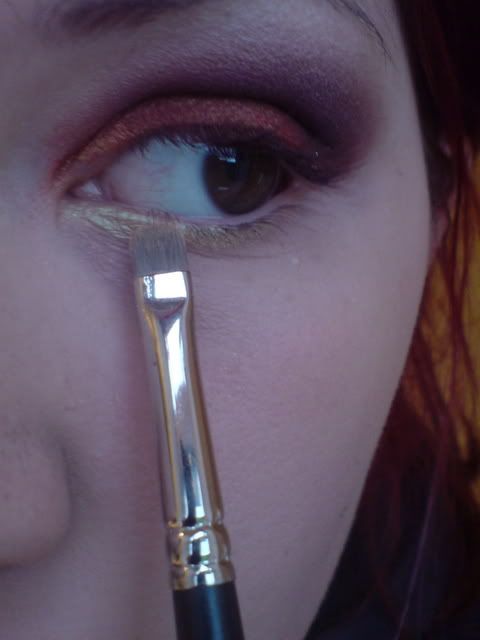
Take Gorgeous Gold e/s with a small paddle brush (I don't know the number of this one, sorry. It's rubbed off!) Apply under the inner lashline:

(Ignore my bloodshot eye)
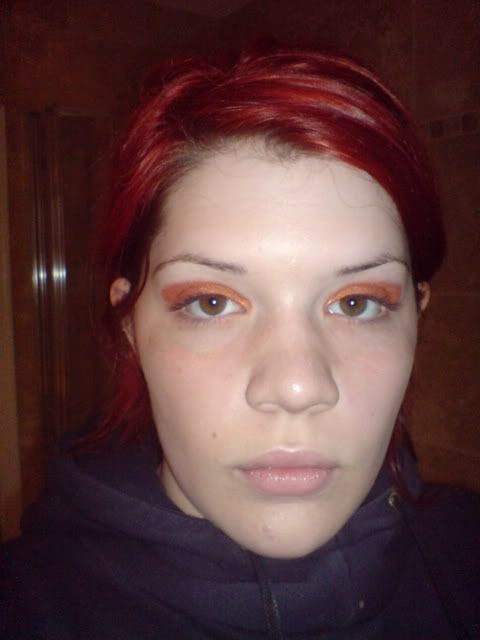
Apply Forever Green on the outer lower lashline. Not too much, just enough so it's noticeable:
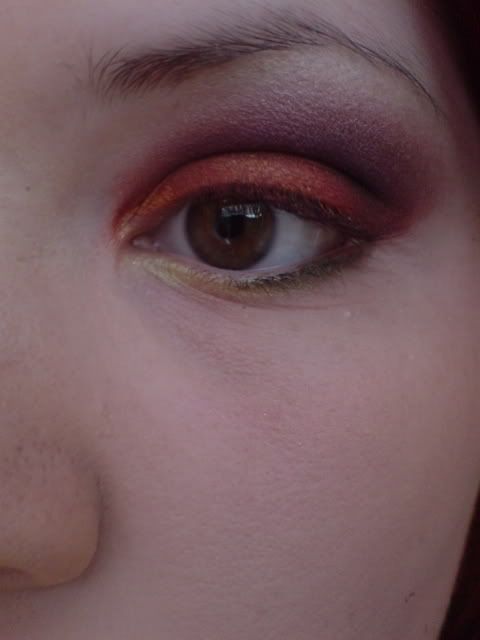
Taking the small paddle brush again, grab your highlight colour again (Nylon) and apply to the tear duct. THIS IS CRUCIAL. By doing this, it stops the whole 'eew, conjunctivitus' thing, haha. I think it really tidies up the eyes, and makes them look a lot sharper and cleaner.
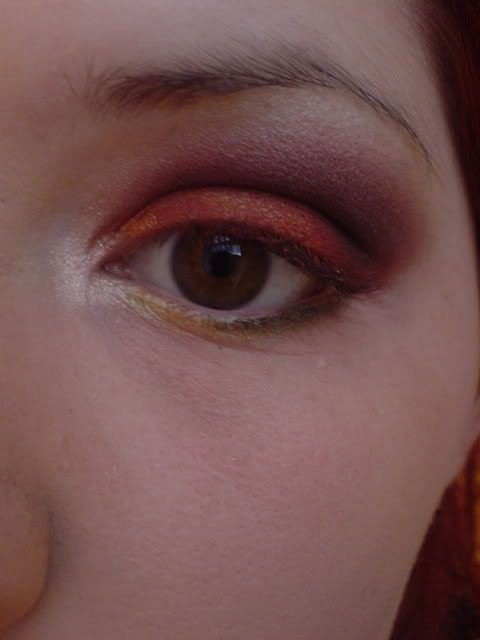
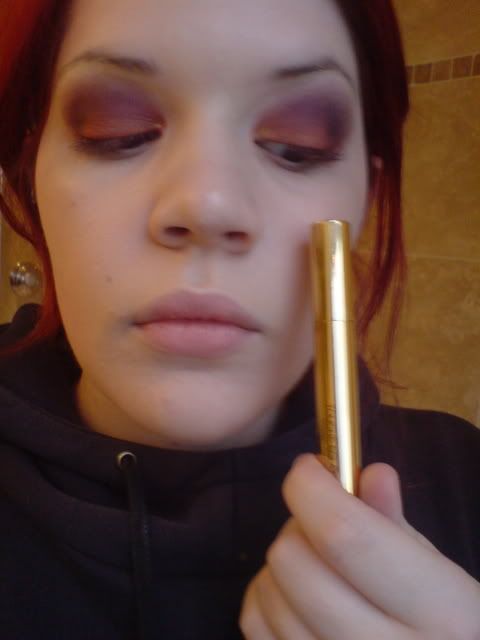
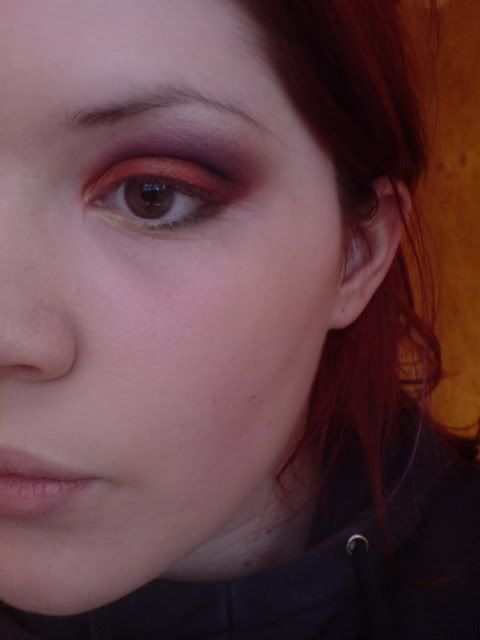
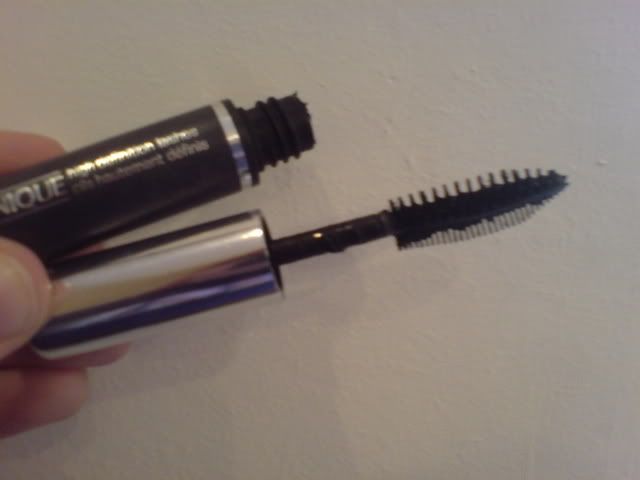
Curl your lashes and apply mascara (Clinique high definition mascara is easily the best I have ever used).
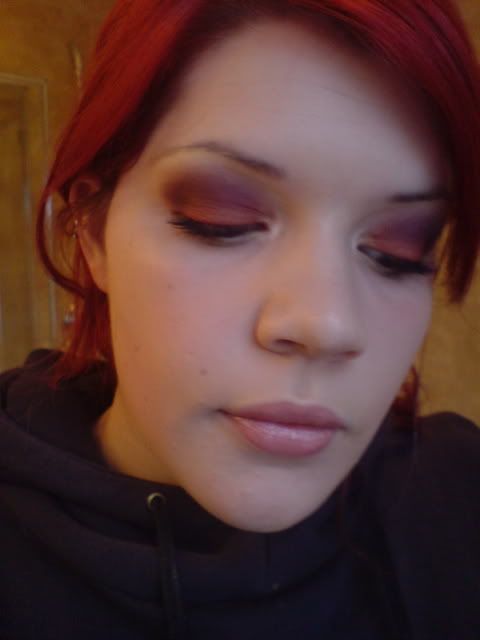
Pick a lip colour (I used a light pink Chromeglass), and you're good to go!

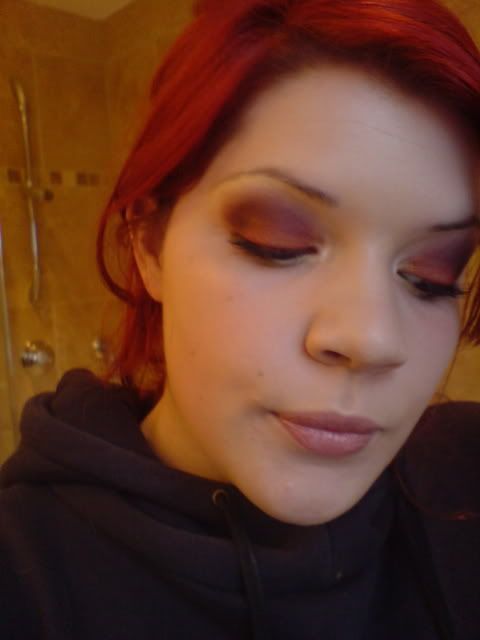
I hope that helped some people out with using orange eyeshadow! It's one of my favourite eyeshadow colours to use, yet I see it so often applied in such a way that it just looks awful!
Using orange or red colours UNDER the eye is, in my opinion, a massive mistake, because then you're seriously in 'eye-infection' territory. I always use greens or purples under the eye instead, when doing this look, because they are much more forgiving!
Also, highlighting the tear duct creates a kind of...break between the orange/redness and the under eye, so you steer clear of looking like you've a stye in your eye!
So...uh...I hope that helped at least someone!
Constructive criticism is totally welcome. This is only my first tutorial, so obviously it's not perfect!
Thanks.
SO, here is what you'll need (sorry I didn't take a picture, I did this tutorial really quickly!)
UDPP
Flammable Paint
Firespot e/s (or any orangey eyeshadow)
Mi'Lady (or any red eyeshadow)
Coppering e/s (or any...well, you get the idea)
Fig 1 e/s
a light purple e/s that I don't have the name of. I think it's probably similar to Sattellite Dreams or Parfait Amour or something like that.
Carbon e/s
Nylon e/s
Gorgeous Gold e/s
Mascara
Forever Green powerpoint pencil
eyeliner for the top lashline (I didn't do that in this tut, as I kind of forgot, hah)
Foundation
Cheek stuff if you want it (I didn't use it, because I did this tutorial at night, and there wasn't much point)
Some form of lipstick/gloss/whatever
OKAY! Let's go.
OH, and be warned, your face will get a LOT worse, before it gets better. You will, at one point or another, look like a member of MCR. BUT DO NOT FRET. It will be fixed.
ALSO BE WARNED-The lighting is so terrible, so apologies for that. And also, my eyes started watering part way through, so that accounts for why some of the eyeshadow near my tear duct looks a lot lighter than it should be.
Start with a bare, clean, cleansed, toned, moisturised, etc etc face (now as it happened, mine was none of the above. I'd just taken my make-up off, so that'll have to do) :
Apply UDPP all over the lid, up to the brow bone:
Using a stiff brush (mine just so happens to be a Bobbi Brown one, but it really doesn't matter) apply Flammable Paint all over the lid, and slightly above the crease in a kind of rounded shape, however it doesn't need to be neat (as you can see, haha):
Now, using the 239, apply Firespot all over where you just applied Flammable:
It should look something like this (please excuse the horrificness of what you are about to see, but like I said, worse before it gets better)
Now, using the same 239 (though wipe it on a tissue or something, to get rid of the remnants of Firespot), pick up some of the red side of Mi'Lady and apply to the outer crease, like so:
Now, use Coppering with the 217 to kind of round out the edges on the crease:
Now, with the 217 (different one or the same, it doesn't really matter. I use the same one, because I only have one. I just swipe it on a tissue between each colour) apply carbon deep in the outer crease:
Okay, my next step is going to be the highlight, so let me explain why-
Usually, highlights are done last (as you know) but I tend to faff around a lot with the shape after I highlight, as when I highlight, I bring the colour too low. So I've decided to highlight now, then add the purples later. Obviously, this is personal preference, and it's probably slightly strange, so you can just ignore this step and save it until last!
Using a fluffy brush, pick up some Nylon to highlight:
Using the 217 again (srsly, using the same brush over and over doesn't matter, I don't reckon. Helps blend out the colours better, innit), pick up some Fig 1 and apply to the inner crease:
Now, using a light purple (dunno the name of this one, sorry) apply this over the Fig 1. It makes it more vibrant, and less dark.
It should look roughly like this so far:
We're gonna finish off the eyes later. (I think I may have a strange way of doing things, but it makes sense in my head, so...onwards!)
Foundation:
Touche Eclait. I love this stuff. It makes me happy, as you can see. Apply under the eyes, and then pat in with your ring finger
You can continue to do cheeks if you would like, but as I said before, I did this in the evening, so I didn't really see the point!
Back to the eyes! I do it this way so that I don't cover up the shadow I do under the eyes with my foundation/touche eclait.
Take Gorgeous Gold e/s with a small paddle brush (I don't know the number of this one, sorry. It's rubbed off!) Apply under the inner lashline:
(Ignore my bloodshot eye)
Apply Forever Green on the outer lower lashline. Not too much, just enough so it's noticeable:
Taking the small paddle brush again, grab your highlight colour again (Nylon) and apply to the tear duct. THIS IS CRUCIAL. By doing this, it stops the whole 'eew, conjunctivitus' thing, haha. I think it really tidies up the eyes, and makes them look a lot sharper and cleaner.
Curl your lashes and apply mascara (Clinique high definition mascara is easily the best I have ever used).
Pick a lip colour (I used a light pink Chromeglass), and you're good to go!
I hope that helped some people out with using orange eyeshadow! It's one of my favourite eyeshadow colours to use, yet I see it so often applied in such a way that it just looks awful!
Using orange or red colours UNDER the eye is, in my opinion, a massive mistake, because then you're seriously in 'eye-infection' territory. I always use greens or purples under the eye instead, when doing this look, because they are much more forgiving!
Also, highlighting the tear duct creates a kind of...break between the orange/redness and the under eye, so you steer clear of looking like you've a stye in your eye!
So...uh...I hope that helped at least someone!
Constructive criticism is totally welcome. This is only my first tutorial, so obviously it's not perfect!
Thanks.


