makeupMOMMA
Well-known member
Aloha folks

Wanted to share with everyone my step-by-step guide as to how I do my eyebrows. Results will vary from person to person, as our shapes are very different, but the general technique of filling in eyebrows is fairly universal. And remember this: Your eyebrows are sisters, not twins

Enjoy!
Aloha,
Mrs. Lynne
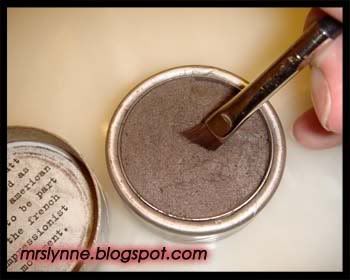
Step 2: Depending on the color of eyebrow powder you're using and the natural color of your eyebrows, you can either tap your brush into the powder for a hint of color or run your brush across the powder a few times to have a bolder application. The inner tips of my eyebrows are much darker than the outer so I scape my powder a couple times to match close to my natural eyebrow hair color.
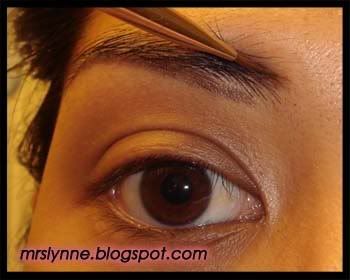
Step 3: Starting near the inner eyebrow where it "appears" the bottom part of your eyebrow starts, place the brush UNDER the eyebrow hair.
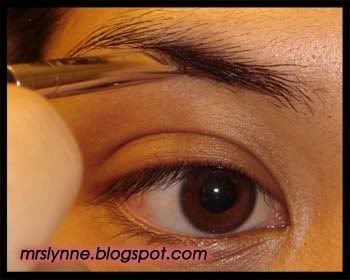
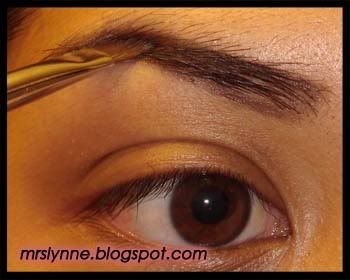
Step 4: Guide the brush along your arch stopping at the tip where your eyebrow "appears" to end. I use these points as a guideline for my eyebrows natural curve. You can choose to extend the length of your eyebrow at this point.
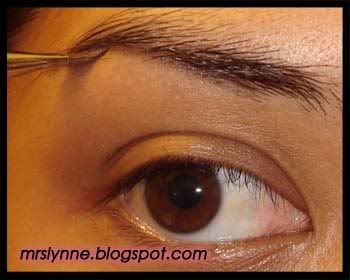
Step 5: Go back to your inner eyebrow and extend it further towards your nose but no more than 25-30 degrees past your tearduct. It should look like this.

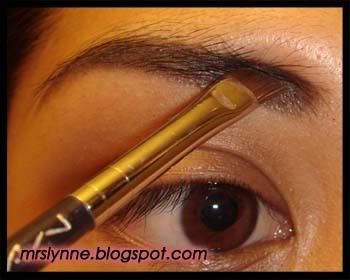
Step 6: Now starting from the inner eyebrow, glide the brush along the top of your eyebrows using the edges of where your eyebrow naturally forms as a guide. Only do this up to the arch.
Step 7: Once I hit the arch of my eyebrow, instead of lining the rest of the upper eyebrow to the tip, I simply position my brush above the upper eyebrow (as if I were to continue lining it) and drag the brush down to meet the line bottom line already drawn in. Doing this shades in the eyebrow and gives you more control in making the tip gradually thinner. Do this until you reach the tip.
Step 8: Go back and shade in the inner part of your eyebrow. Drawing the lines on either side of the brow is similar to lining the lines in a coloring book before coloring inside. It helps to keep the color in one spot.
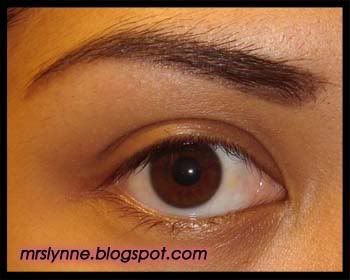
When it's all shaded in, it should look like this.
Step 9: Touch up the bottom part of the eyebrow using a Q-Tip gradually thinning (but not TOO thin) as you approach the arch. Shape to your desire.
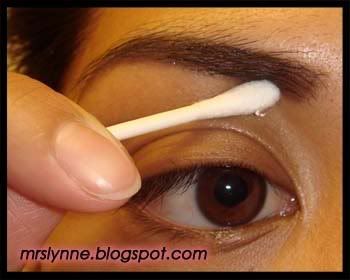
The arch is where I begin to really taper and finish off the eyebrow.
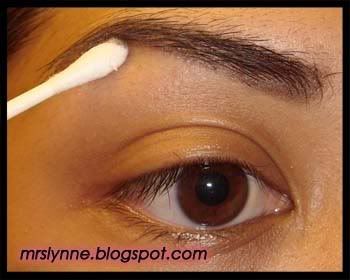
Step 10: Using the other end of the Q-Tip, round off the corners near the inner (upper and lower) part of the eyebrow.

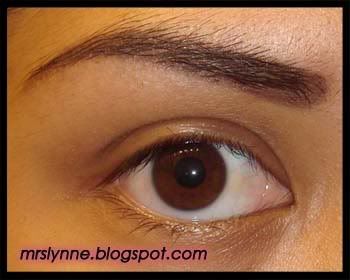
And.... Tada!
Wanted to share with everyone my step-by-step guide as to how I do my eyebrows. Results will vary from person to person, as our shapes are very different, but the general technique of filling in eyebrows is fairly universal. And remember this: Your eyebrows are sisters, not twins
Enjoy!
Aloha,
Mrs. Lynne
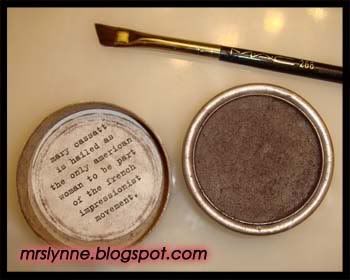
Step 1: Get your materials ready, eyebrow powder and a dense angle brush. Not included in this tutorial, but optional items can include eyebrow wax and/or a water-based medium like MAC's Mixing Medium or MAC's FIX+. I have a preference of using powder for my eyebrows versus pencil because in my experience using eyebrow powder seems to blend more naturally.
The rule of thumb in choosing an eyebrow shade is to go 2-3 notches lighter than the natural hair color of your eyebrows. I use this rule in conjunction with matching my eyebrow shadow closest to what color the hair is on my head also. When my hair was light brown, I chose a much lighter shade than what I'm using today because this shade just made the overall appearance too dramatic. But since my hair is in it's natural black state, this color is suiting. Use your best judgment.
The rule of thumb in choosing an eyebrow shade is to go 2-3 notches lighter than the natural hair color of your eyebrows. I use this rule in conjunction with matching my eyebrow shadow closest to what color the hair is on my head also. When my hair was light brown, I chose a much lighter shade than what I'm using today because this shade just made the overall appearance too dramatic. But since my hair is in it's natural black state, this color is suiting. Use your best judgment.
Step 2: Depending on the color of eyebrow powder you're using and the natural color of your eyebrows, you can either tap your brush into the powder for a hint of color or run your brush across the powder a few times to have a bolder application. The inner tips of my eyebrows are much darker than the outer so I scape my powder a couple times to match close to my natural eyebrow hair color.
Step 3: Starting near the inner eyebrow where it "appears" the bottom part of your eyebrow starts, place the brush UNDER the eyebrow hair.
Step 4: Guide the brush along your arch stopping at the tip where your eyebrow "appears" to end. I use these points as a guideline for my eyebrows natural curve. You can choose to extend the length of your eyebrow at this point.
Step 5: Go back to your inner eyebrow and extend it further towards your nose but no more than 25-30 degrees past your tearduct. It should look like this.
Step 6: Now starting from the inner eyebrow, glide the brush along the top of your eyebrows using the edges of where your eyebrow naturally forms as a guide. Only do this up to the arch.
Step 7: Once I hit the arch of my eyebrow, instead of lining the rest of the upper eyebrow to the tip, I simply position my brush above the upper eyebrow (as if I were to continue lining it) and drag the brush down to meet the line bottom line already drawn in. Doing this shades in the eyebrow and gives you more control in making the tip gradually thinner. Do this until you reach the tip.
Step 8: Go back and shade in the inner part of your eyebrow. Drawing the lines on either side of the brow is similar to lining the lines in a coloring book before coloring inside. It helps to keep the color in one spot.
When it's all shaded in, it should look like this.
Step 9: Touch up the bottom part of the eyebrow using a Q-Tip gradually thinning (but not TOO thin) as you approach the arch. Shape to your desire.
The arch is where I begin to really taper and finish off the eyebrow.
Step 10: Using the other end of the Q-Tip, round off the corners near the inner (upper and lower) part of the eyebrow.
And.... Tada!
