Amaranth
Well-known member
Hi guys and dolls
Okay, so if you've seen any of my FOTDs on the FOTD board, you know I frequently whine and complain about my lack of an eye crease. I have a foldy-thing, but when I close my eyes, my lids are like...extremely flat and there's not even a hint of a crease. I soon realized that I'm not alone in my creaseless-ness, there are MANY other girls who have the same issue. It's always bothered me mainly because I always see tutorials that say "put ___ in the crease", and I'd get to that step and be like, "I don't have a $^&* crease! Now what?" So my years of messing around with make-up to try to figure something out have FINALLY brought you the following crease-making tutorial! Yaaaaaay! Also, this can be done on anyone, not just us creaseless ladies. So even those you deep-creased ladies and gents can still follow this tut, I'm going to be mainly aiming it at crease-less people, since there are few tutorials that address this problem.
Please note, I don't claim to have invented this technique (I honestly don't know who did) I've seen a few people do it, but I figured I'd show you the way *I* do it, especially since I have little-to-no crease.
LET'S GIT ER DONE
All pictures are clickable so you can see my face in creepy, stalker-quality detail.
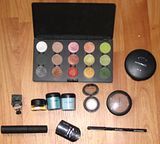
This is what I used. I didn't put all of it in the picture, since I mainly wanted to show you the technique...you can use whatever colours you want. Here is the list of colours I used (from my FOTD):
Face
MAC StudioFix Powder Foundation in C3
MAC Powder Blush in Strada
MAC Powder Blush in Springsheen
Eyes
MAC Paint in Bare Canvas
MAC Eyeshadow in Orb
MAC Eyeshadow in Mulch
MAC Eyeshadow in Rummy (brows)
MAC Pigment in Mutiny
MAC Pigment in Clear Sky Blue
MAC FluidLine in Blitz & Glitz
MAC PlushLash Mascara
Rimmel Soft Kohl Eyeliner in 061 Jet Black
Lips
MAC Lipstick in Overrich
MAC Lipgelee in Lil' Sizzler

Also, here is a before and after ALL IN ONE. Eeeeeeeeeew, I should have put more of the other side of my face in the picture. Avert ye eyes.
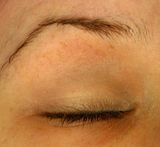
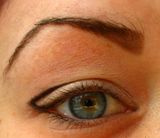
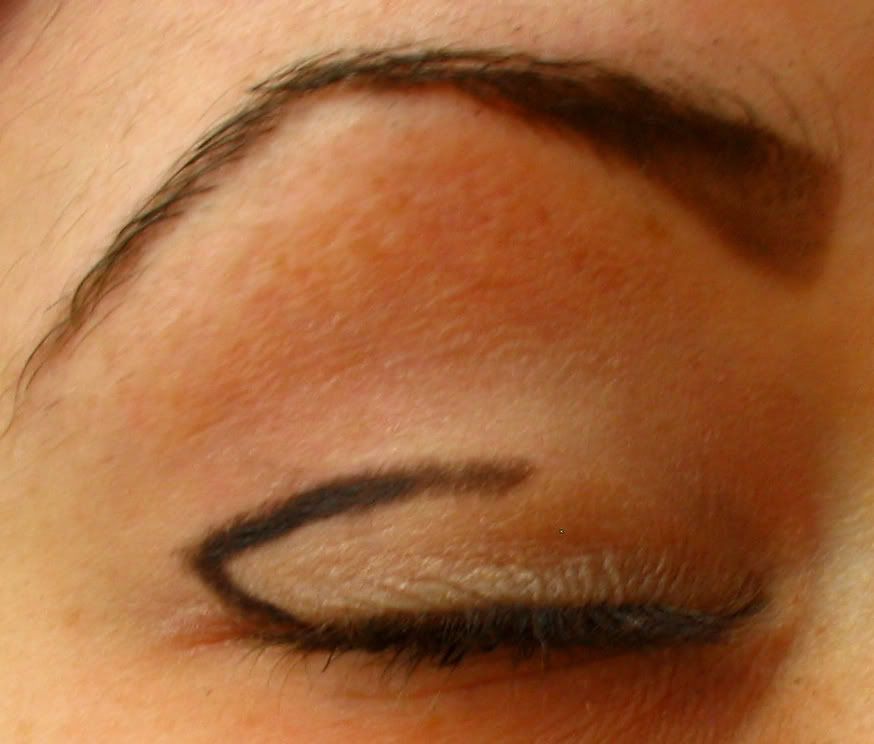
Okay, so here you can see my lack of an eye crease. I have a few eyeliner remnants on there still, since I did the whole look this morning then decided to wipe one eye off to do this tutorial.
Step 1: Apply your eyeshadow base, and set your brows, if you do that. I used MAC Paint in Bare Canvas, and I use L'Oreal Hair Gel to set my brows. Yeah, I'm weird, but it works and it's super cheap.
And here you can see my foldy-thing that pretends to be a crease. But it's not a CREASE! IT'S LIES!!
Step 2: Fill those brows. I used my MAC 208 angled brush with some Rummy eyeshadow. I was trying to go quick and the gel hadn't quite dried so it looks kinda weird...but oh well. You get it.
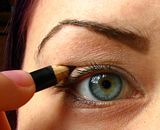
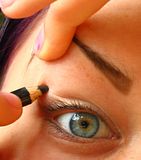
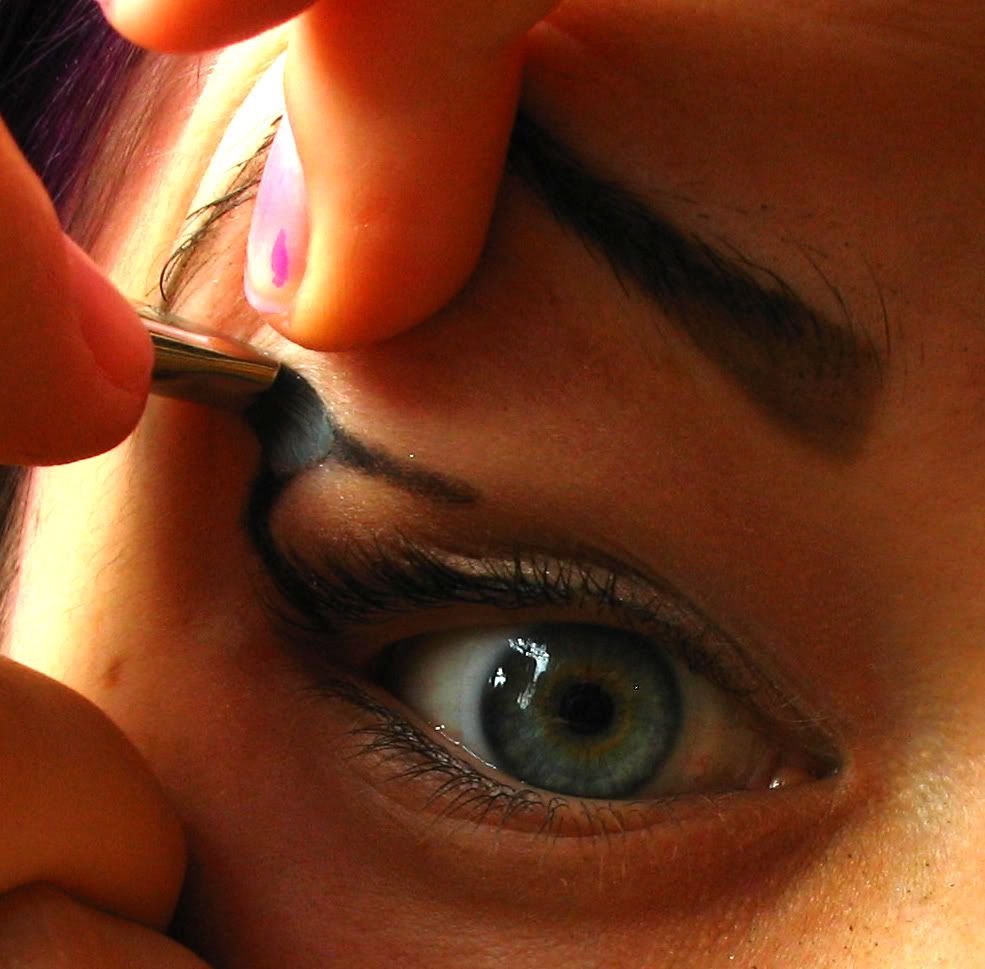
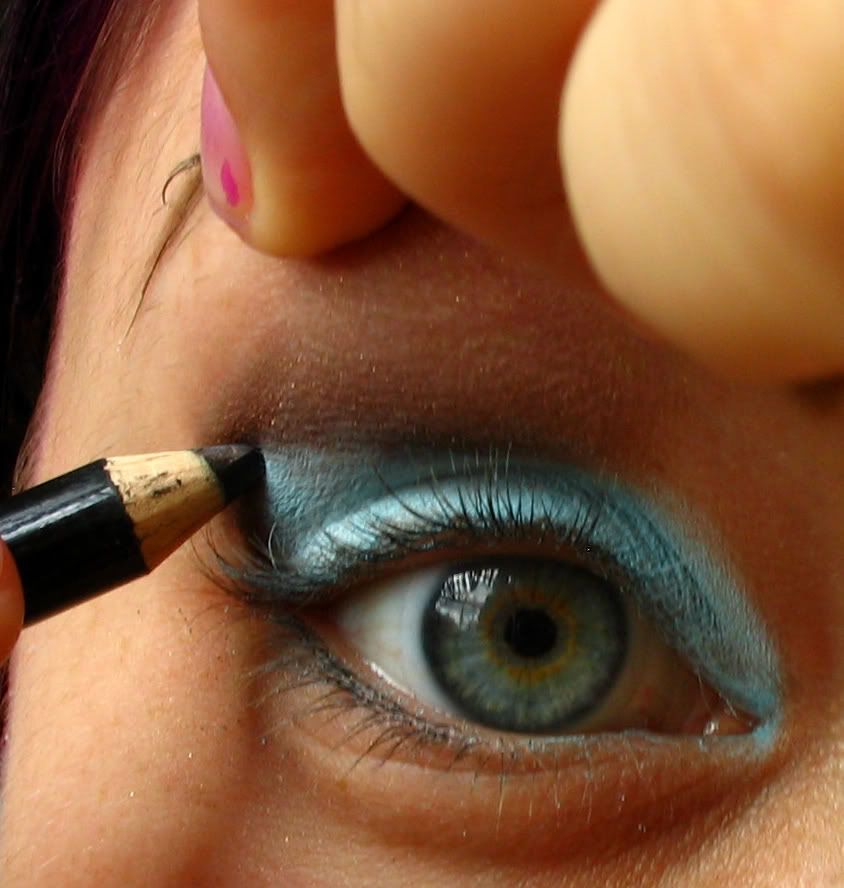
Step 3: Okay, so this is where we start making our crease. It's also where this starts to get really difficult to explain. One way to find where you should put your crease is to open your eyes, and if you have a foldy-thing like I do, jam your Kohl eyeliner into the part where it folds. If you don't even have that foldy-thingy, you can try looking upwards as high as you can, and then do the same trick with the eyeliner.
Step 4: You'll have to pull on your lid a bit so that the liner doesn't come out all squiggly when you go to draw the line. Also, since my eyelids are really droopy, I actually moved the crease line up a little, maybe only by about 3 mm. Don't pull too hard on your eyelid, you do NOT want that. Like I said, my eyelids are pretty droopy so I have a lot of skin to pull around, and it looks like I'm pulling harder than I am. You only need enough tension to keep the skin frm folding over when you apply the kohl. This part may be a little tough at first...it took me a few tries to get the line NOT bumpy, but you'll get it with practice. Plus at this stage, it's easy to fix with a Q-Tip. Also, you should use an eye kohl for this, because they are easy to blend and won't dry up on you before you can blend it.
Step 5: Here I've drawn on the line. You can draw it on all the way around, if you like, but for this look, I'm just going to do it until just about the half-way point. When drawing on the line with your lid stretched like in Step 4, try to follow the shape of your eye and remember to draw a line connecting the line to your lashline. If you have droopy lids like me, a rounder corner is best, because as you can see in this picture, droopy lids tend to make it pointy anyway.
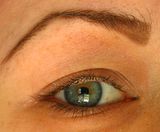
Picture of Step 5 with my eye open. See how even though I moved the line up slightly, it still manages to disappear into my foldy-thingy/wannabe-crease? Moving it up will also give you more lid space to work with if you have tiny lids like me.

Step 6: Gently stretching the lid out again, smudge the liner up towards your brows. Remember to keep the bottom edge sharp and unblended. I used the MAC 231 brush, but you could also try the 219 brush, or even a Q-Tip or Sponge applicator if you're really stuck. I like the 231 best though, because it's nice and skinny so you can see what you're doing and easily avoid blending the edge you want to keep sharp.

So this is what it looks like after the blending. You may need to draw on the line then blend it a few times before it's dark enough. I think I did two or three line+blendings here.
PS - if you want to use this technique for a more natural look, try using a brown kohl. I find black works the best for bright or dark looks, but brown is definitely best for natural looks.
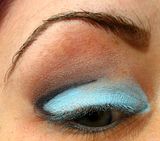
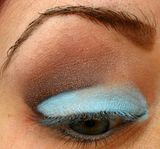
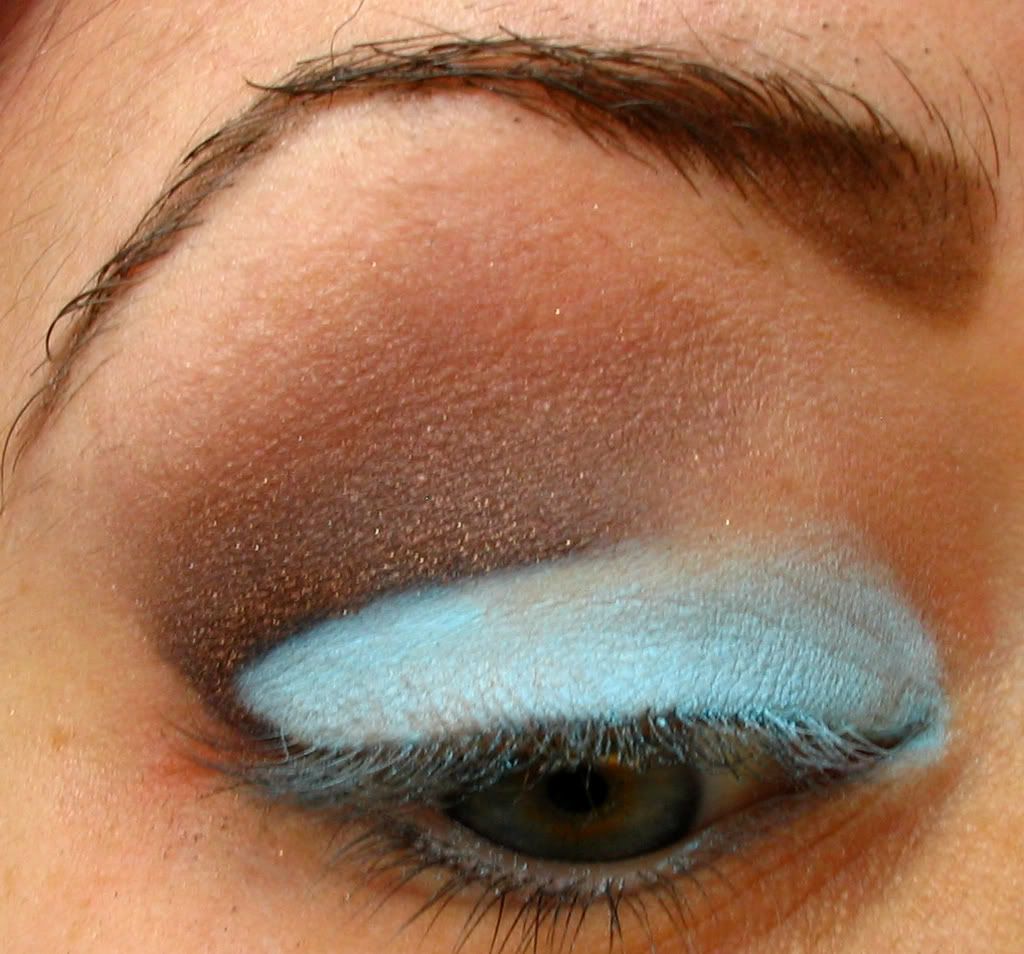
Step 7: Apply your lid colour. I used MAC Clear Sky Blue pigment here (LOVE!) because it's matte and I find the matte colours allow you to get the sharpest line. You can use whatever you want though, and you can even do more than one lid colour. But yeah...just showing you the technique here, so I used a bright matte colour that I love.
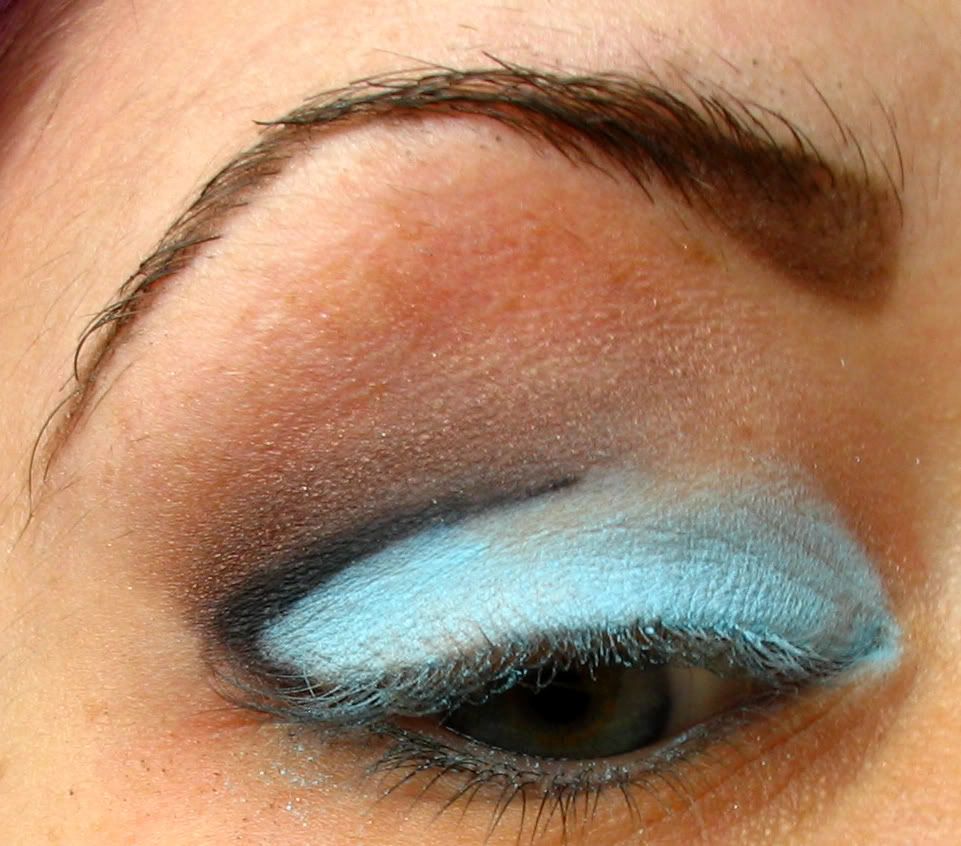
Step 8: Apply your crease colour (I used Mulch). Yay! I can finally say that and actually have a crease to put it on! I patted it over the black kohl with the 231 brush, and then dragged it upwards toward the brow for a blended look. It's okay if it's a bit hard now, we'll blend the edge later.

Step 8: Go grab your kohl again, and draw over the crease line again, exactly as you had originally done in Step 4/5. This time, you have to be really careful to make the line straight. It's not that difficult though, because you now have a guide to help you out. The point of this step is to really define the line between the lid and crease colours.
Here's what it looks like once it's drawn on.

Step 9: Blend it again with the 231 (or whatever you used). Once again, you may have to go over it a few times, adding more kohl to blend. If you mess up the line at this point, it's not a huge deal. I actually messed it up while trying to take pictures. All I did was take a Q-Tip and erase my mistake, put on more Clear Sky Blue, then I drew the kohl line on again. No biggie!
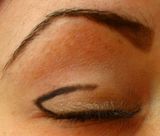
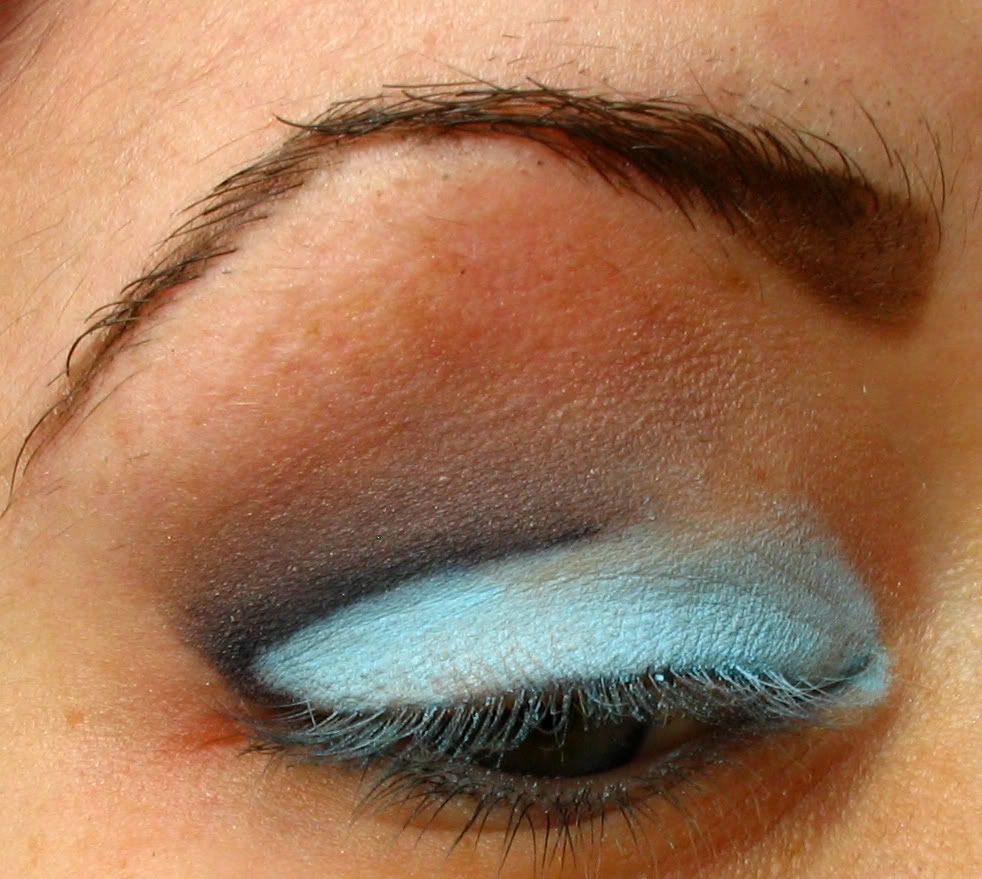
Step 10: Apply more Mulch (or any other crease colour that you used) over the kohl line. As you can see, we now have a really nice defined border between the two colours.
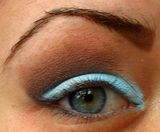
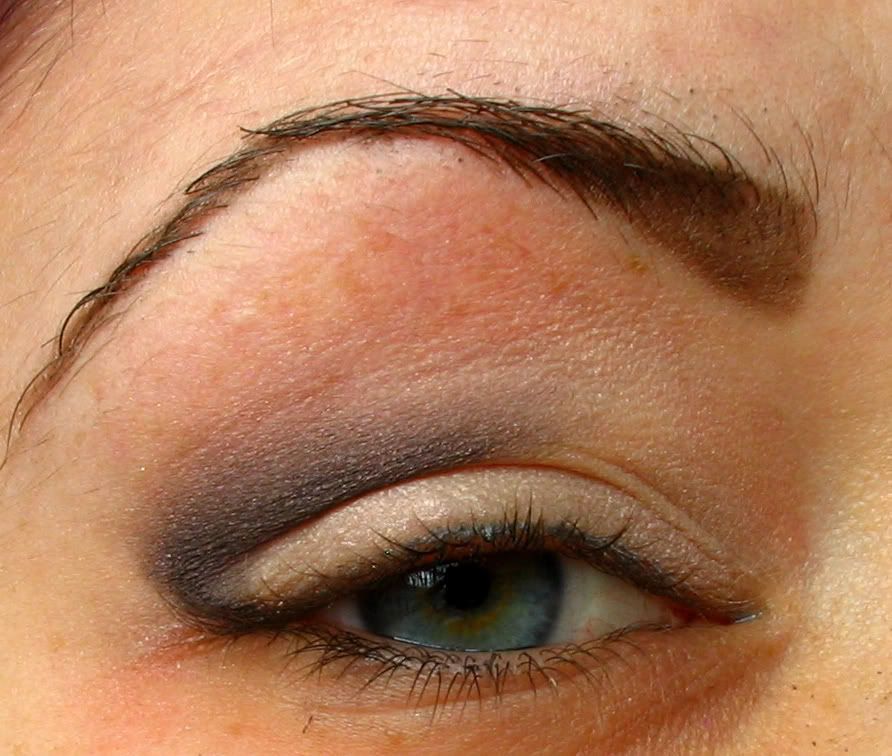
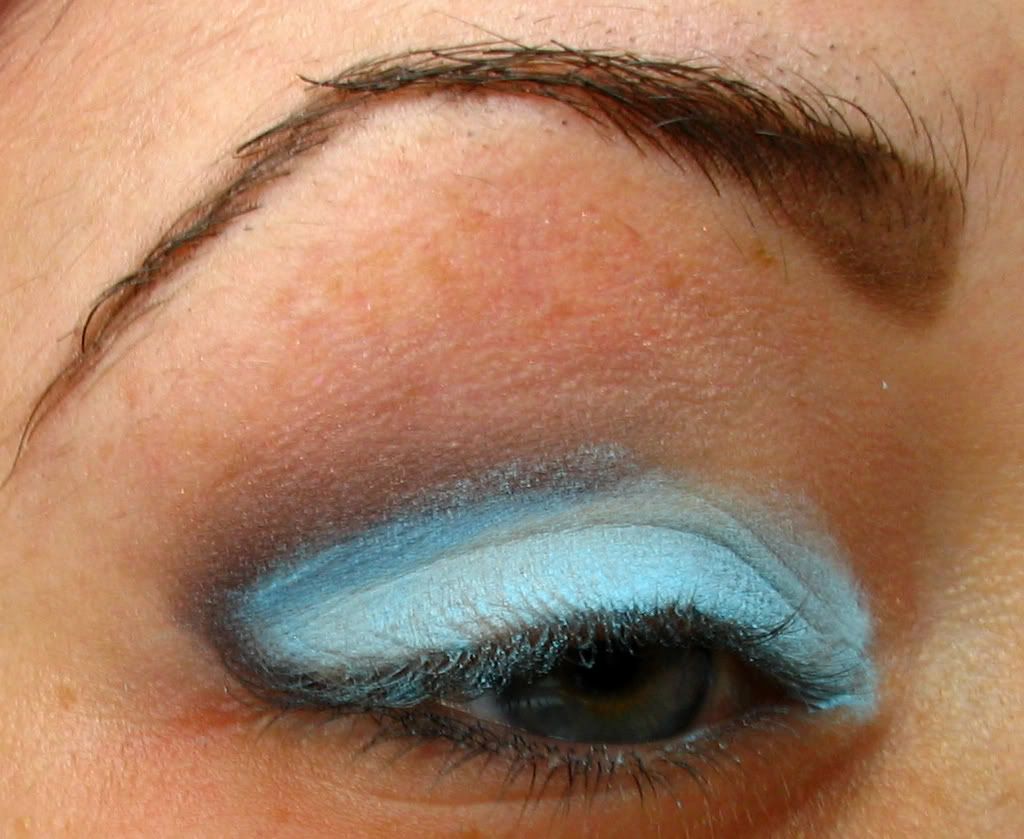
Step 11: Apply your highlight colour with a blending brush. I applied Orb eyeshadow with the 217 brush. Starting at the very top of the browbone, I blended the Orb side to side, gradually moving down into the Mulch.
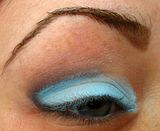
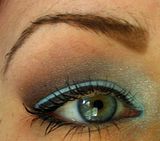
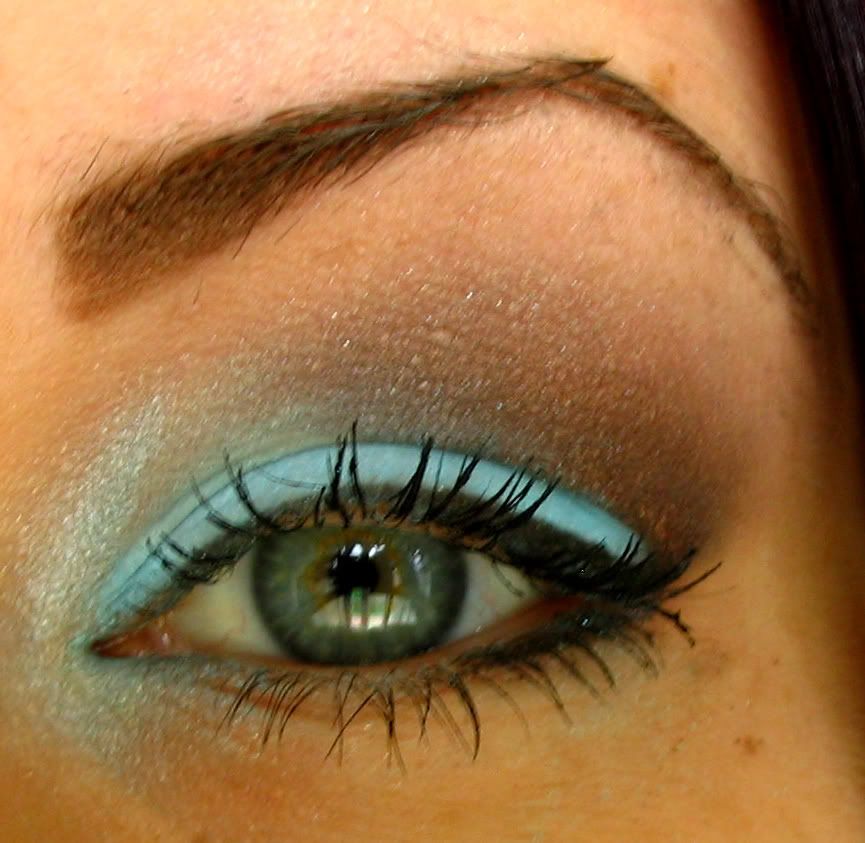
And this is what it looks like with the eye open. Look ma! I have a crease!
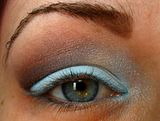
Step 12: Apply your inner crease and tear duct colour with a blending brush. I used Mutiny and patted it on with the 217 brush. Put it in the inner crease (extending inwards from where the Mulch left off), and drag it down to the tear duct. Using a shimmery light colour will make your eye seem more open. You may need to apply a bit more Mulch at this point too, especially since I found the Mutiny pigment really flew around and dusted over the Mulch.
Step 13: Apply your eyeliner. I used MAC Blitz & Glitz with the 208, and applied it nice and thick to the upper lash line and to the outer corner of the bottom lash line.
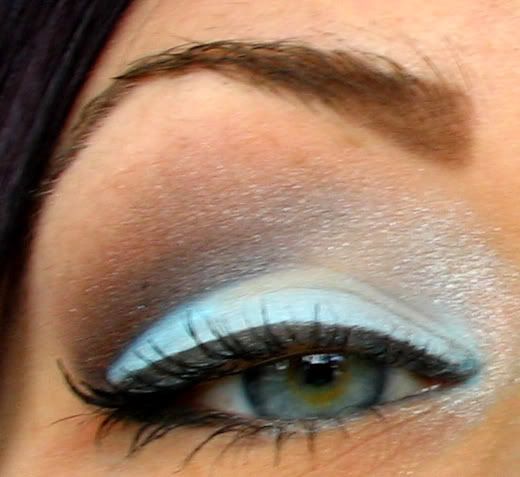
Step 14: Curl those lashes and apply lots of Mascara. I used my Inglot lash curler and MAC Plushlash Mascara. And that's it for the eyes! You're done!!
Now onto the face. I'm not going to go into huge detail here, since, as stated NUMEROUS time, I wanted to focus primarily on the eye technique.
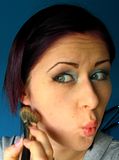
Step 15: Apply your foundation and blush. I just used MAC StudioFix Powder Foundation (applied with the 180 brush), and applied my contour with the 169. When choosing your contour colour, try a matte or other non-shimmery finish, since shimmer reflects light and will end up defeating the purpose of a contour. I used Strada blush, which is about one or two shades darker than my skin. Making the fishy face, I applied the contour colour, sweeping from the hairline to the centre of my cheeks. Then, using a blush brush, apply your cheek colour. I used the 187 brush to apply just a tiny bit of Springsheen blush. Make your super happy smiley face and put the blush on the "apples" (parts of the cheeks that stick out)
Step 16: Apply your lipstick. I used a tiny, TINY bit of Lil' Sizzler Lipgelee over an equally tiny bit of Overrich lipstick.
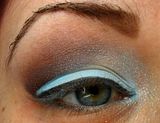
Step 17: Go be FABULOUS and SEXY with that shiny new eye crease of yours.
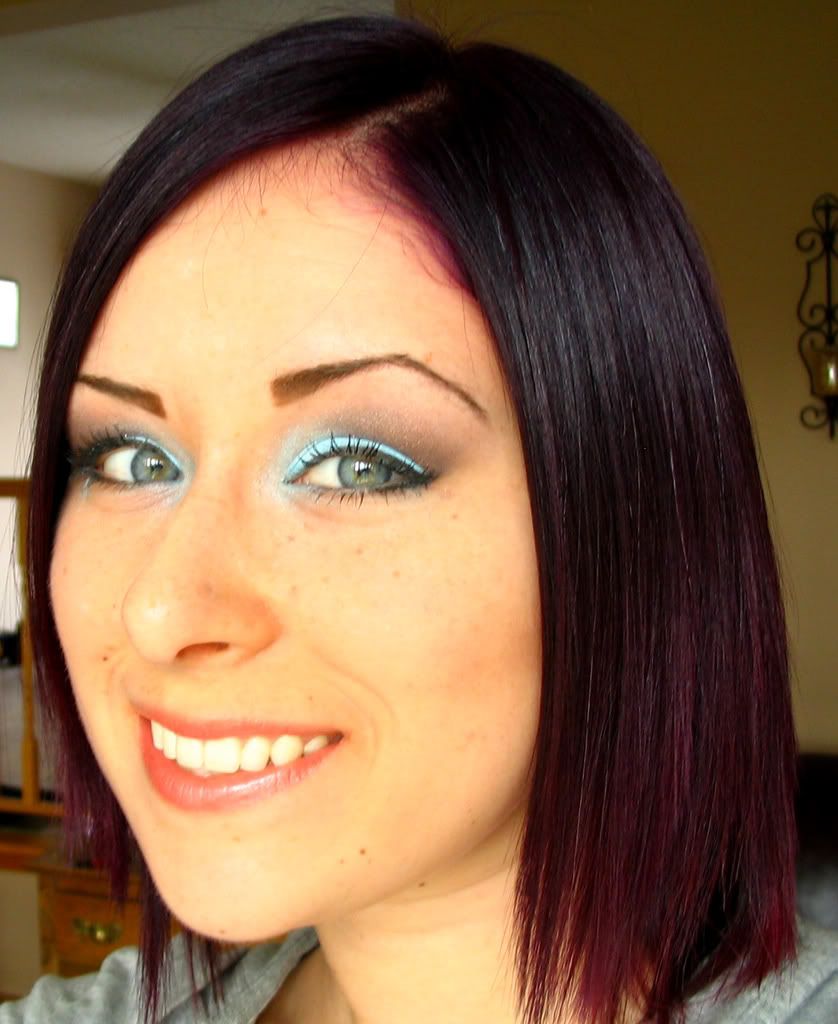
The Finished Product:


Thanks a lot for checking out my tutorial, and hopefully it was of use to someone. I know that some parts may be difficult to understand, but I tried to be thorough. If you still don't understand something, just ask and I'll try to clear it up for you.
Thanks again!
Okay, so if you've seen any of my FOTDs on the FOTD board, you know I frequently whine and complain about my lack of an eye crease. I have a foldy-thing, but when I close my eyes, my lids are like...extremely flat and there's not even a hint of a crease. I soon realized that I'm not alone in my creaseless-ness, there are MANY other girls who have the same issue. It's always bothered me mainly because I always see tutorials that say "put ___ in the crease", and I'd get to that step and be like, "I don't have a $^&* crease! Now what?" So my years of messing around with make-up to try to figure something out have FINALLY brought you the following crease-making tutorial! Yaaaaaay! Also, this can be done on anyone, not just us creaseless ladies. So even those you deep-creased ladies and gents can still follow this tut, I'm going to be mainly aiming it at crease-less people, since there are few tutorials that address this problem.
Please note, I don't claim to have invented this technique (I honestly don't know who did) I've seen a few people do it, but I figured I'd show you the way *I* do it, especially since I have little-to-no crease.
LET'S GIT ER DONE
All pictures are clickable so you can see my face in creepy, stalker-quality detail.
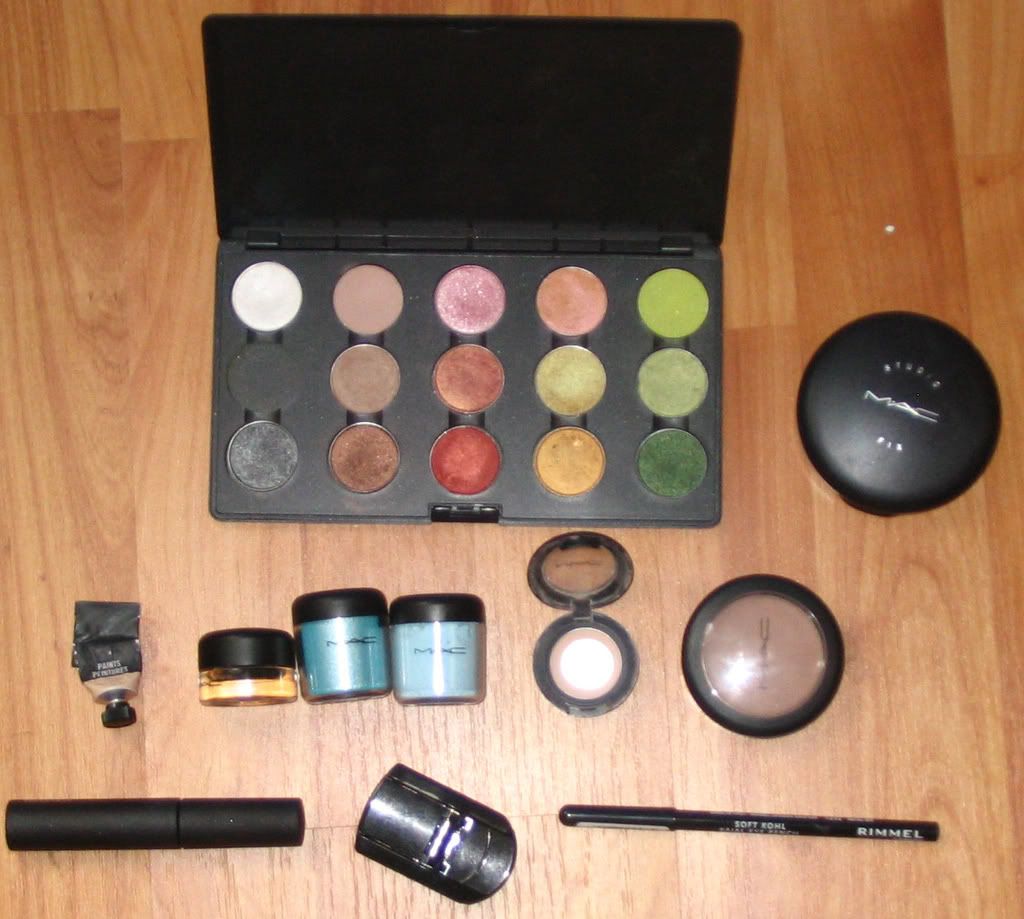
This is what I used. I didn't put all of it in the picture, since I mainly wanted to show you the technique...you can use whatever colours you want. Here is the list of colours I used (from my FOTD):
Face
MAC StudioFix Powder Foundation in C3
MAC Powder Blush in Strada
MAC Powder Blush in Springsheen
Eyes
MAC Paint in Bare Canvas
MAC Eyeshadow in Orb
MAC Eyeshadow in Mulch
MAC Eyeshadow in Rummy (brows)
MAC Pigment in Mutiny
MAC Pigment in Clear Sky Blue
MAC FluidLine in Blitz & Glitz
MAC PlushLash Mascara
Rimmel Soft Kohl Eyeliner in 061 Jet Black
Lips
MAC Lipstick in Overrich
MAC Lipgelee in Lil' Sizzler
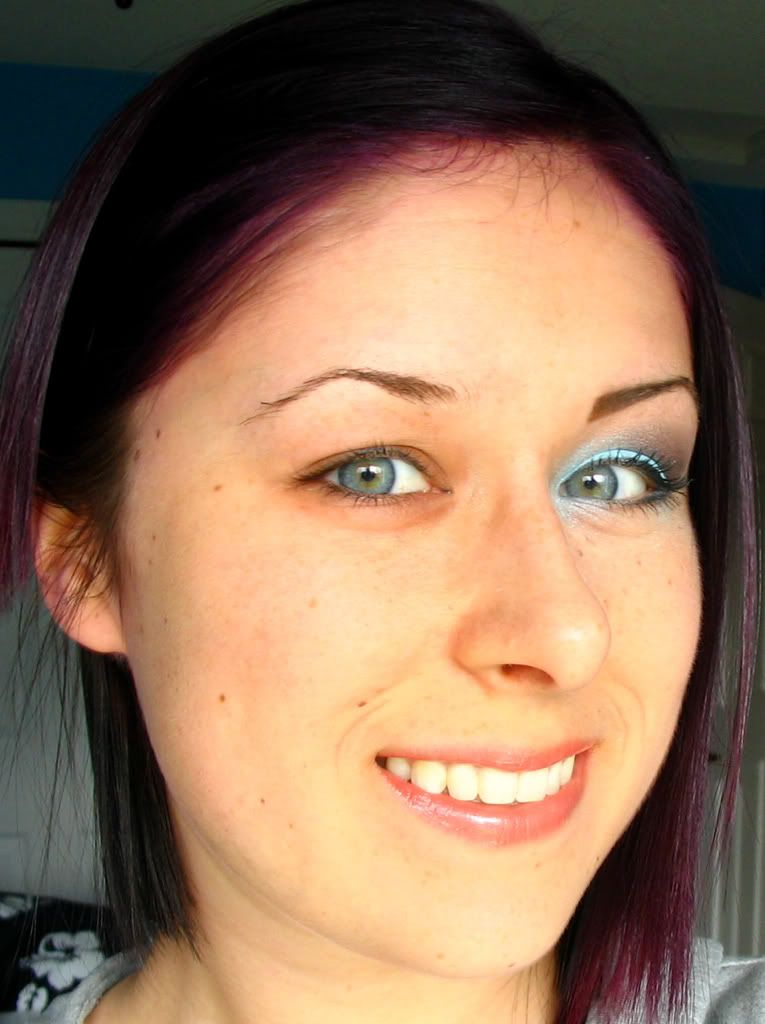
Also, here is a before and after ALL IN ONE. Eeeeeeeeeew, I should have put more of the other side of my face in the picture. Avert ye eyes.

Okay, so here you can see my lack of an eye crease. I have a few eyeliner remnants on there still, since I did the whole look this morning then decided to wipe one eye off to do this tutorial.
Step 1: Apply your eyeshadow base, and set your brows, if you do that. I used MAC Paint in Bare Canvas, and I use L'Oreal Hair Gel to set my brows. Yeah, I'm weird, but it works and it's super cheap.

And here you can see my foldy-thing that pretends to be a crease. But it's not a CREASE! IT'S LIES!!
Step 2: Fill those brows. I used my MAC 208 angled brush with some Rummy eyeshadow. I was trying to go quick and the gel hadn't quite dried so it looks kinda weird...but oh well. You get it.

Step 3: Okay, so this is where we start making our crease. It's also where this starts to get really difficult to explain. One way to find where you should put your crease is to open your eyes, and if you have a foldy-thing like I do, jam your Kohl eyeliner into the part where it folds. If you don't even have that foldy-thingy, you can try looking upwards as high as you can, and then do the same trick with the eyeliner.

Step 4: You'll have to pull on your lid a bit so that the liner doesn't come out all squiggly when you go to draw the line. Also, since my eyelids are really droopy, I actually moved the crease line up a little, maybe only by about 3 mm. Don't pull too hard on your eyelid, you do NOT want that. Like I said, my eyelids are pretty droopy so I have a lot of skin to pull around, and it looks like I'm pulling harder than I am. You only need enough tension to keep the skin frm folding over when you apply the kohl. This part may be a little tough at first...it took me a few tries to get the line NOT bumpy, but you'll get it with practice. Plus at this stage, it's easy to fix with a Q-Tip. Also, you should use an eye kohl for this, because they are easy to blend and won't dry up on you before you can blend it.
Step 5: Here I've drawn on the line. You can draw it on all the way around, if you like, but for this look, I'm just going to do it until just about the half-way point. When drawing on the line with your lid stretched like in Step 4, try to follow the shape of your eye and remember to draw a line connecting the line to your lashline. If you have droopy lids like me, a rounder corner is best, because as you can see in this picture, droopy lids tend to make it pointy anyway.

Picture of Step 5 with my eye open. See how even though I moved the line up slightly, it still manages to disappear into my foldy-thingy/wannabe-crease? Moving it up will also give you more lid space to work with if you have tiny lids like me.
Step 6: Gently stretching the lid out again, smudge the liner up towards your brows. Remember to keep the bottom edge sharp and unblended. I used the MAC 231 brush, but you could also try the 219 brush, or even a Q-Tip or Sponge applicator if you're really stuck. I like the 231 best though, because it's nice and skinny so you can see what you're doing and easily avoid blending the edge you want to keep sharp.
So this is what it looks like after the blending. You may need to draw on the line then blend it a few times before it's dark enough. I think I did two or three line+blendings here.
PS - if you want to use this technique for a more natural look, try using a brown kohl. I find black works the best for bright or dark looks, but brown is definitely best for natural looks.
Step 7: Apply your lid colour. I used MAC Clear Sky Blue pigment here (LOVE!) because it's matte and I find the matte colours allow you to get the sharpest line. You can use whatever you want though, and you can even do more than one lid colour. But yeah...just showing you the technique here, so I used a bright matte colour that I love.

Step 8: Apply your crease colour (I used Mulch). Yay! I can finally say that and actually have a crease to put it on! I patted it over the black kohl with the 231 brush, and then dragged it upwards toward the brow for a blended look. It's okay if it's a bit hard now, we'll blend the edge later.
Step 8: Go grab your kohl again, and draw over the crease line again, exactly as you had originally done in Step 4/5. This time, you have to be really careful to make the line straight. It's not that difficult though, because you now have a guide to help you out. The point of this step is to really define the line between the lid and crease colours.
Here's what it looks like once it's drawn on.
Step 9: Blend it again with the 231 (or whatever you used). Once again, you may have to go over it a few times, adding more kohl to blend. If you mess up the line at this point, it's not a huge deal. I actually messed it up while trying to take pictures. All I did was take a Q-Tip and erase my mistake, put on more Clear Sky Blue, then I drew the kohl line on again. No biggie!
Step 10: Apply more Mulch (or any other crease colour that you used) over the kohl line. As you can see, we now have a really nice defined border between the two colours.
Step 11: Apply your highlight colour with a blending brush. I applied Orb eyeshadow with the 217 brush. Starting at the very top of the browbone, I blended the Orb side to side, gradually moving down into the Mulch.
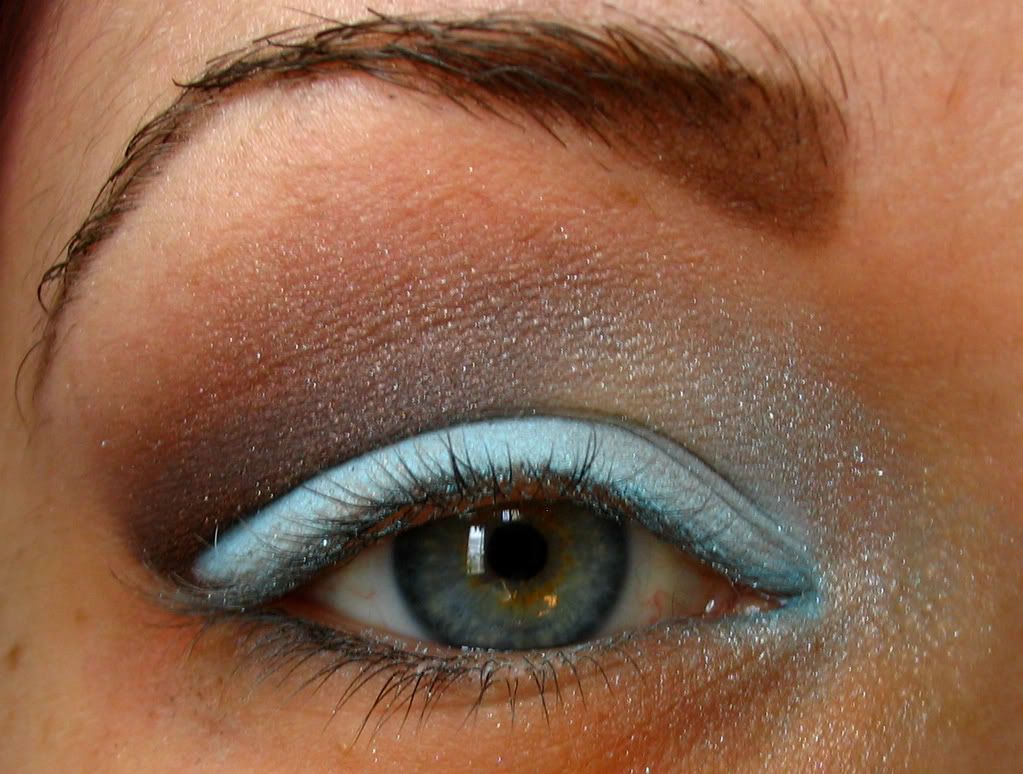
And this is what it looks like with the eye open. Look ma! I have a crease!
Step 12: Apply your inner crease and tear duct colour with a blending brush. I used Mutiny and patted it on with the 217 brush. Put it in the inner crease (extending inwards from where the Mulch left off), and drag it down to the tear duct. Using a shimmery light colour will make your eye seem more open. You may need to apply a bit more Mulch at this point too, especially since I found the Mutiny pigment really flew around and dusted over the Mulch.

Step 13: Apply your eyeliner. I used MAC Blitz & Glitz with the 208, and applied it nice and thick to the upper lash line and to the outer corner of the bottom lash line.

Step 14: Curl those lashes and apply lots of Mascara. I used my Inglot lash curler and MAC Plushlash Mascara. And that's it for the eyes! You're done!!

Now onto the face. I'm not going to go into huge detail here, since, as stated NUMEROUS time, I wanted to focus primarily on the eye technique.
Step 15: Apply your foundation and blush. I just used MAC StudioFix Powder Foundation (applied with the 180 brush), and applied my contour with the 169. When choosing your contour colour, try a matte or other non-shimmery finish, since shimmer reflects light and will end up defeating the purpose of a contour. I used Strada blush, which is about one or two shades darker than my skin. Making the fishy face, I applied the contour colour, sweeping from the hairline to the centre of my cheeks. Then, using a blush brush, apply your cheek colour. I used the 187 brush to apply just a tiny bit of Springsheen blush. Make your super happy smiley face and put the blush on the "apples" (parts of the cheeks that stick out)
Step 16: Apply your lipstick. I used a tiny, TINY bit of Lil' Sizzler Lipgelee over an equally tiny bit of Overrich lipstick.
Step 17: Go be FABULOUS and SEXY with that shiny new eye crease of yours.
The Finished Product:
Thanks a lot for checking out my tutorial, and hopefully it was of use to someone. I know that some parts may be difficult to understand, but I tried to be thorough. If you still don't understand something, just ask and I'll try to clear it up for you.
Thanks again!


