PomPoko
Well-known member
So, I tried to post this yesterday, and i got logged out, I logged back in again and it was GONE. GONE i tell ye!
 I was so angry at myself for not saving it in a separate word file or some such. Took me hours as well! Haha.
Anyway, I've not been very well over the last few days, so I thought to cheer myself up I'd do a tutorial. I said I might do one a while ago, so here it finally is. I just want to point out that this is going to be quite long, since I said for lovely specktra-ette i_luv_mac that I'd try and do an eyeliner tut, so this is a two birds, one stone sort of thing. I have no idea if my eyeliner bit will be any help, cos its a lot harder than I thought to do and take pics as you go!
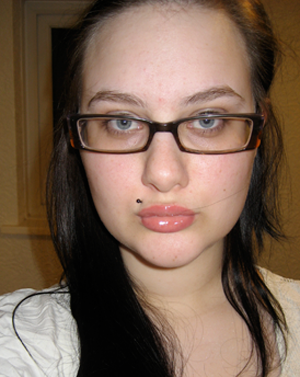
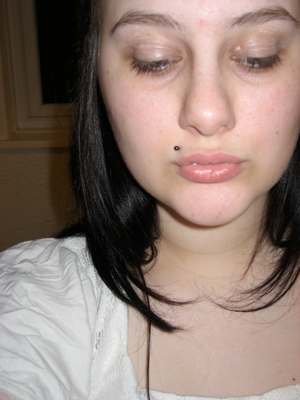
I apologise in advance for my stupid faces, I have a hard enough time keeping a neutral face at the best of times
 Also, please excuse my eyebrows and nails. I have no excuse aside from I'm lazy and need to get them sorted.
Righty-oh, this is what you will need (obv not the whole 15 pallette
just the coppering)
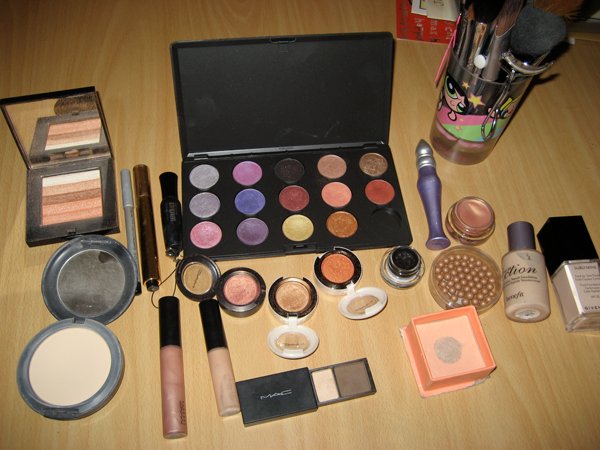
Which is (in no particular order)
Benefit non-fiction foundation
Givenchy Sublimine foundation (I think thats spelled wrong)
Bobbi Brown Shimmerbrick in Apricot
StudioFix Powder
Benefit Georgia Powder
UDPP
Bronzing Pearls or Bronzing Powder. Matte is best

Cosmic eyeshadow
Coppering Eyeshadow
Expensive Pink eyeshadow
Firespot Eyeshadow
Blacktrack Fluidline
Prestige eyeliner pencil
Bourjois Volume Ultra Mascara
Rubenesque paint pot
Babied Lacquer
Myth Lipstick (not pictured)
Hug me Lipstick (also not pictured)
YSL Touche Eclat
Walnut/Ivoire Brow Shader
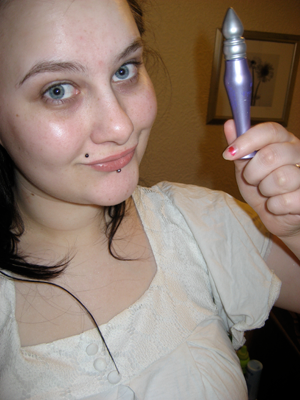
Brushes and tools you need are:
134SE
168SE
187SE
219SE
190SE
224
202
Ruby And Millie Angled Brush for eyeliner
Ruby and Millie Fluff Brush
Ruby and Millie Brow and Lash Comb
Cosmopolitan Blusher Brush
A Lip Brush of no discernable origins
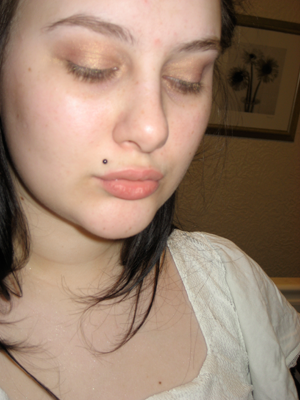
Start with a clean, moisterised face. Yuck @ me. I put on some Lip Injection before this picture, I regretted it almost instantly

Take your UDPP and put it on. I decided to do my eyes first as these colours have a tendency to leave a lot of fall out. This means I can clean up without taking off my facemakeup as well!
Take your Rubenesque Paint Pot. Look bored. Even though you LOVE rubenesque. It is your ultimate favorite. Just playing it cool though.
Smooth it on with your ring finger like so:
All the way from lashline to brow. :O make it a bit thicker on the lid though and thinner by the brow. Voila:
Next, take your 202. I know a lot of people don't like sponge tip applicators, but I think they are useful for inside lid corners
That being said, use the 202 to put cosmic on the inner corners of your lid
Take your 224 and blow kisses at it
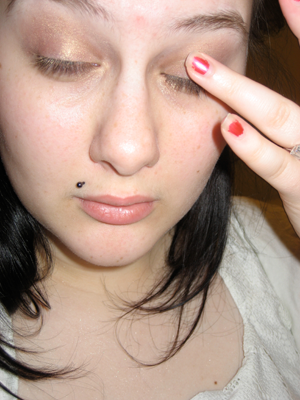
Put on expensive pink over the rest of your lid, over and a bit above your crease. You should hopefully look like this. Only with your face...
Brandish your 219 like a wand.
Ok that doesnt help, but get some firespot on your wand...I mean 219 and place it on the very outer corner of your eye and in the crease. You can just about see it on this picture. Blend it gently using a 224. You might need to put on a bit more, since I find it blends off quite easily.
Now using the 219 again, put some coppering over the firespot. Only not as big an area, as it were.
Now take a fluff brush and blend it up and out a little. It should look a little like this
After blending it, I put some more coppering in the very outer v and gently blend. Sorry no picture for this step!
Now tidy up your fall out
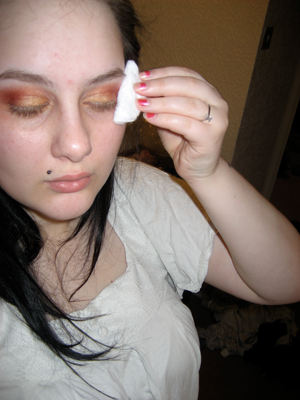
I like a nice crisp line where my eyeshadow finishes. I take a cotton pad and fold it in half, place it like this on your outer eye.
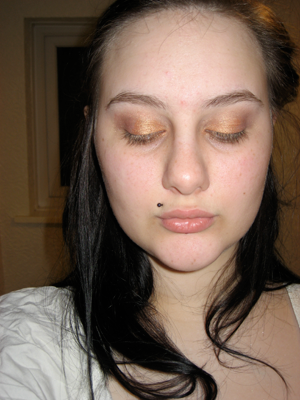
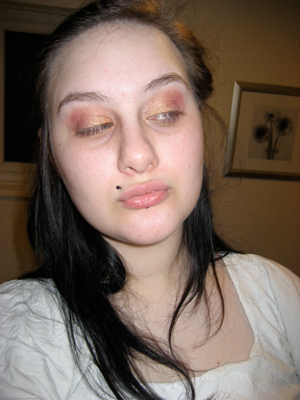
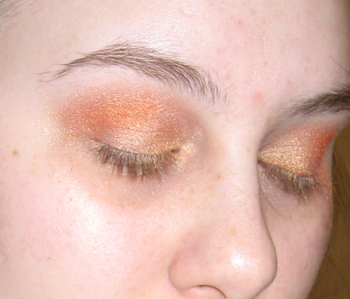
And clean upwards, gently. Go slowly and gently to make sure you dont take off too much. Eep. Now the eyeshadow should look like this!
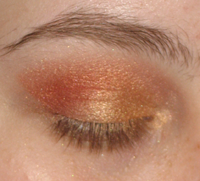
After this I used the Ivoire side of my browshader to highlight under my brow.
****Now I'm gonna do my liner, but I am trying to go into as much detail as I can. If youre not interested, just put on some blacktrack. w00ts!****
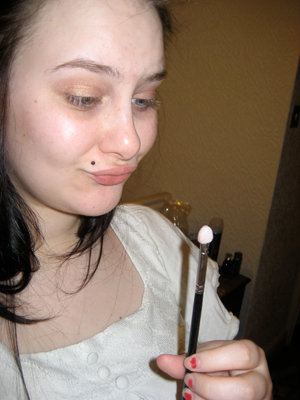
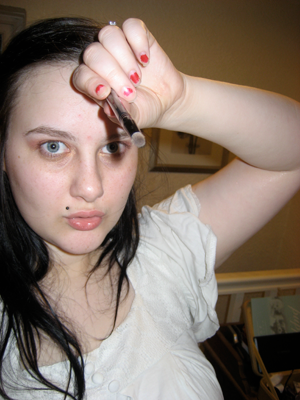
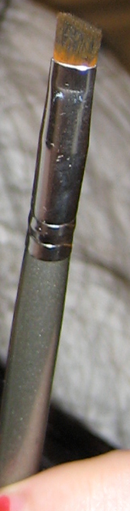
I use a brush that looks like this
Start from the centre of your eye, using a really light amount of blacktrack, think so its almost sheer. Use gentle dabbing strokes with the end of the brush. Get as close to the lashline as possible. As odd as it sounds I almost dab the brush into my lashes.
Carry on outwards (still going very lightly)

At this point now, on the last few millimetres of lashline, instead of keeping the line as close to the lashline, take the line gently in an upwards curve. You can sort of see what i mean here

Then with the highest point of the brush take the line from the corner of your eye up to connect to the other line.
Goback over the original line now, building up the intensity of the blackness, and making the line thicker on the outer corner of the eye if you like.
Now do the inner bit of eye. I do this bit extremely thin so the line is almost none existant (if I can!) or if i mess it up (as I do sometimes
)
For the next bit take your black eyeliner pencil and line the water line of your top lid. Make sure you really get it into the roots of your lashes. This works best if the pencil is sharp, but soft IMO.
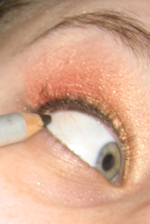
and thats it for liner!!
**************
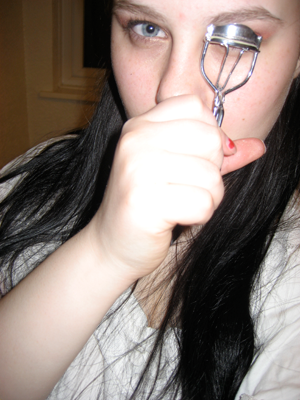
Now curl your lashes! I heated my lash curler with a hairdryer first. I have the worlds straightest lashes. They never hold curl. I try anyway.
Put on your mascara. Brush up your eyebrows using your lash and brow comb. Looking good...ooor not. Also comb any clumps put of your lashes. If you have any that is!
Now, I helpfully left my concealer at my best friends house! Groan. So I am using Touche eclat as a sort of subsitute. Loooovely. So use the 194 to dab it on, then I dab it in with my ring finger. But this is mostly cos of the touche elcat being a bit of a pain.
Ick. Corpselike!
Put on your foundation using the 190. Yay. My foundation doesnt actually make me look this white. I shall guess its the flash! Also I applied studio fix using a 134 brush.
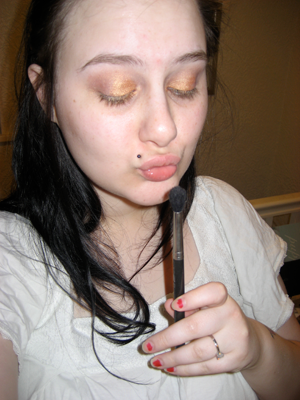
Make a fish face and use the 168 to apply bronzer to the hollows of your cheeks.
Still with the fishface, put on the Georgia Powder using a regular blush brush.

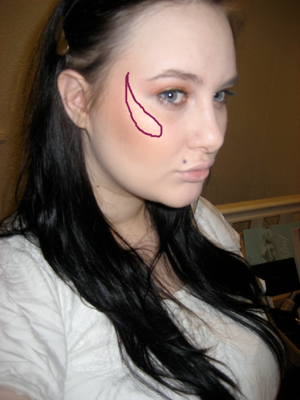
Take your Apricot shimmer brick and highlight the top of your cheekbone. I have helpfully done you a diagram cos you cant really see without. Fear my painshop skillz
Put on your Myth Lipstick using a Lip Brush. I have to dab on a tad bit of Hug Me since I look dead otherwise. Then A tiny bit of babied over the lipsticks.
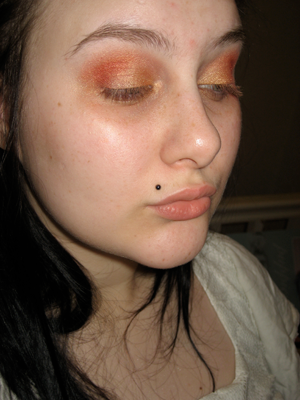
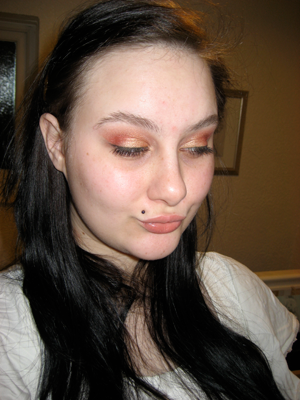
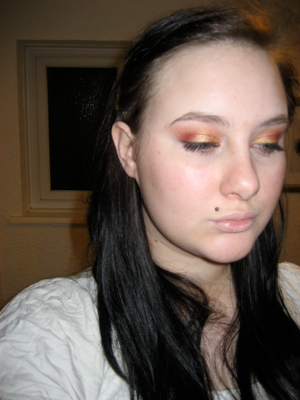
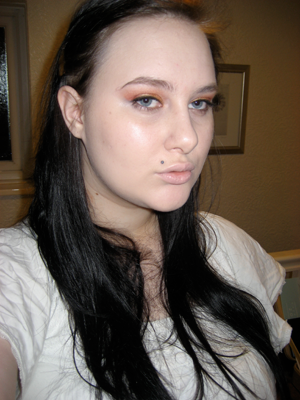
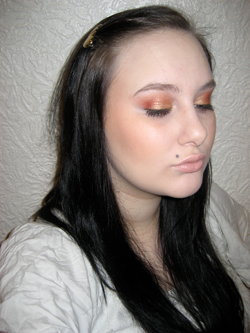
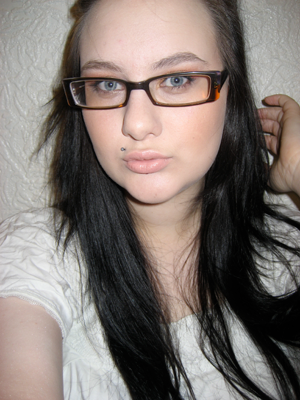
And we're done! Time to play camera!
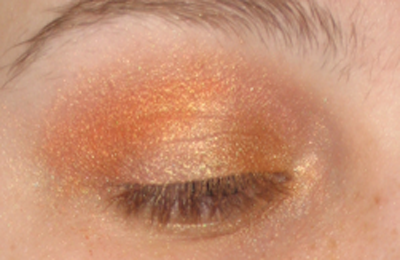
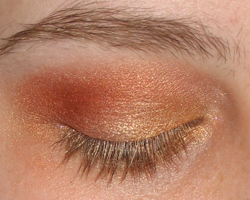
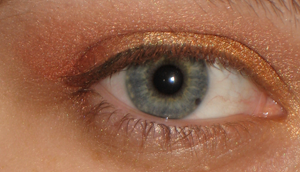
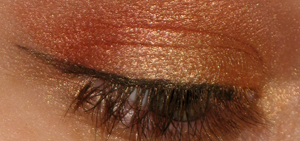
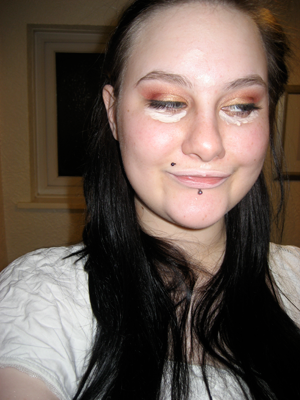
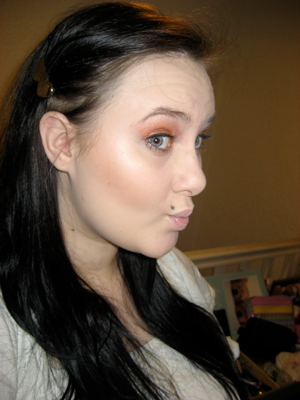
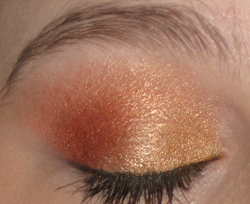
Finished eye close up:
Thanks for looking and reading if you made it this far! Hope this is understandable!

Anyway, I've not been very well over the last few days, so I thought to cheer myself up I'd do a tutorial. I said I might do one a while ago, so here it finally is. I just want to point out that this is going to be quite long, since I said for lovely specktra-ette i_luv_mac that I'd try and do an eyeliner tut, so this is a two birds, one stone sort of thing. I have no idea if my eyeliner bit will be any help, cos its a lot harder than I thought to do and take pics as you go!
I apologise in advance for my stupid faces, I have a hard enough time keeping a neutral face at the best of times
Righty-oh, this is what you will need (obv not the whole 15 pallette
Which is (in no particular order)
Benefit non-fiction foundation
Givenchy Sublimine foundation (I think thats spelled wrong)
Bobbi Brown Shimmerbrick in Apricot
StudioFix Powder
Benefit Georgia Powder
UDPP
Bronzing Pearls or Bronzing Powder. Matte is best
Cosmic eyeshadow
Coppering Eyeshadow
Expensive Pink eyeshadow
Firespot Eyeshadow
Blacktrack Fluidline
Prestige eyeliner pencil
Bourjois Volume Ultra Mascara
Rubenesque paint pot
Babied Lacquer
Myth Lipstick (not pictured)
Hug me Lipstick (also not pictured)
YSL Touche Eclat
Walnut/Ivoire Brow Shader
Brushes and tools you need are:
134SE
168SE
187SE
219SE
190SE
224
202
Ruby And Millie Angled Brush for eyeliner
Ruby and Millie Fluff Brush
Ruby and Millie Brow and Lash Comb
Cosmopolitan Blusher Brush
A Lip Brush of no discernable origins
Start with a clean, moisterised face. Yuck @ me. I put on some Lip Injection before this picture, I regretted it almost instantly
Take your UDPP and put it on. I decided to do my eyes first as these colours have a tendency to leave a lot of fall out. This means I can clean up without taking off my facemakeup as well!
Take your Rubenesque Paint Pot. Look bored. Even though you LOVE rubenesque. It is your ultimate favorite. Just playing it cool though.
Smooth it on with your ring finger like so:
All the way from lashline to brow. :O make it a bit thicker on the lid though and thinner by the brow. Voila:
Next, take your 202. I know a lot of people don't like sponge tip applicators, but I think they are useful for inside lid corners
That being said, use the 202 to put cosmic on the inner corners of your lid
Take your 224 and blow kisses at it
Put on expensive pink over the rest of your lid, over and a bit above your crease. You should hopefully look like this. Only with your face...
Brandish your 219 like a wand.
Ok that doesnt help, but get some firespot on your wand...I mean 219 and place it on the very outer corner of your eye and in the crease. You can just about see it on this picture. Blend it gently using a 224. You might need to put on a bit more, since I find it blends off quite easily.
Now using the 219 again, put some coppering over the firespot. Only not as big an area, as it were.
Now take a fluff brush and blend it up and out a little. It should look a little like this
After blending it, I put some more coppering in the very outer v and gently blend. Sorry no picture for this step!
Now tidy up your fall out
And clean upwards, gently. Go slowly and gently to make sure you dont take off too much. Eep. Now the eyeshadow should look like this!
After this I used the Ivoire side of my browshader to highlight under my brow.
****Now I'm gonna do my liner, but I am trying to go into as much detail as I can. If youre not interested, just put on some blacktrack. w00ts!****
I use a brush that looks like this
Start from the centre of your eye, using a really light amount of blacktrack, think so its almost sheer. Use gentle dabbing strokes with the end of the brush. Get as close to the lashline as possible. As odd as it sounds I almost dab the brush into my lashes.
Carry on outwards (still going very lightly)
At this point now, on the last few millimetres of lashline, instead of keeping the line as close to the lashline, take the line gently in an upwards curve. You can sort of see what i mean here
Then with the highest point of the brush take the line from the corner of your eye up to connect to the other line.
Goback over the original line now, building up the intensity of the blackness, and making the line thicker on the outer corner of the eye if you like.
Now do the inner bit of eye. I do this bit extremely thin so the line is almost none existant (if I can!) or if i mess it up (as I do sometimes
For the next bit take your black eyeliner pencil and line the water line of your top lid. Make sure you really get it into the roots of your lashes. This works best if the pencil is sharp, but soft IMO.
and thats it for liner!!
**************
Now curl your lashes! I heated my lash curler with a hairdryer first. I have the worlds straightest lashes. They never hold curl. I try anyway.
Put on your mascara. Brush up your eyebrows using your lash and brow comb. Looking good...ooor not. Also comb any clumps put of your lashes. If you have any that is!
Now, I helpfully left my concealer at my best friends house! Groan. So I am using Touche eclat as a sort of subsitute. Loooovely. So use the 194 to dab it on, then I dab it in with my ring finger. But this is mostly cos of the touche elcat being a bit of a pain.
Ick. Corpselike!
Put on your foundation using the 190. Yay. My foundation doesnt actually make me look this white. I shall guess its the flash! Also I applied studio fix using a 134 brush.
Make a fish face and use the 168 to apply bronzer to the hollows of your cheeks.
Still with the fishface, put on the Georgia Powder using a regular blush brush.
Take your Apricot shimmer brick and highlight the top of your cheekbone. I have helpfully done you a diagram cos you cant really see without. Fear my painshop skillz
Put on your Myth Lipstick using a Lip Brush. I have to dab on a tad bit of Hug Me since I look dead otherwise. Then A tiny bit of babied over the lipsticks.
And we're done! Time to play camera!
Finished eye close up:
Thanks for looking and reading if you made it this far! Hope this is understandable!


