Bowker2
Well-known member
hello hello, this is my first tutorial- it is without much mac- i havent let myself buy any until i get my pro card! who knows when it will come! so until then mostly non mac!
here is the look we are trying to achieve:

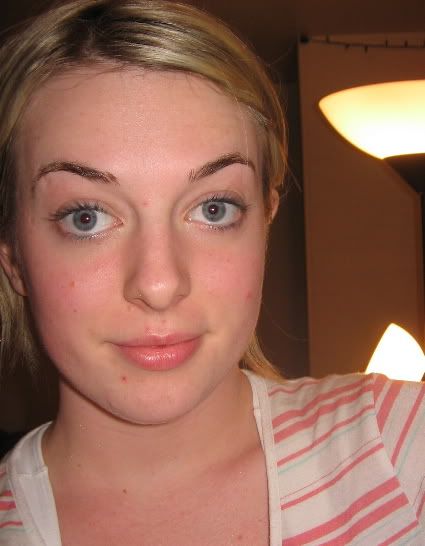
start all gross and pasty:
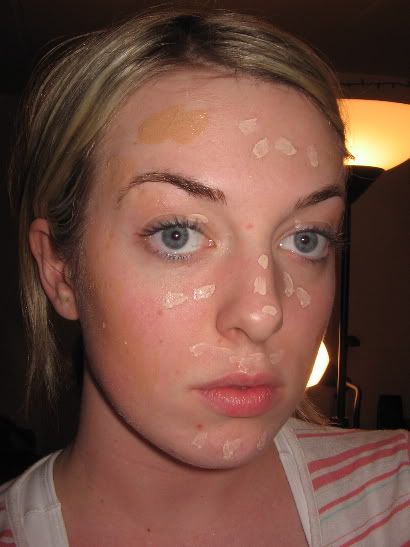
dot foundation one shade light than your skin on the inner portion of your face, a shade darker around the perimeter and in hollows of your cheeks like so:
 ha!
ha!
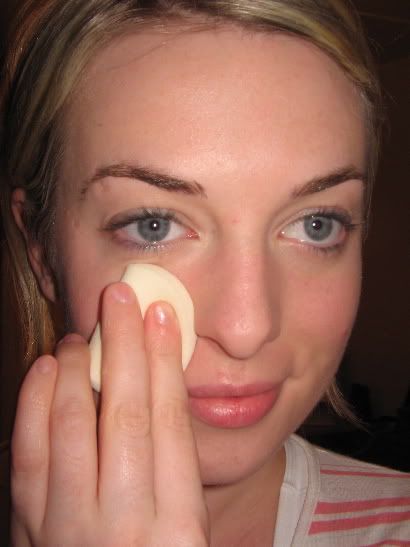
I blend with my fingers mostly, from the inside of my face out, and then buff the darker color inward with my fingers- blend it all with a sponge.
curl your lashes and sweep a clean powder brush all over face- i think it adds to the buffed foundation look.
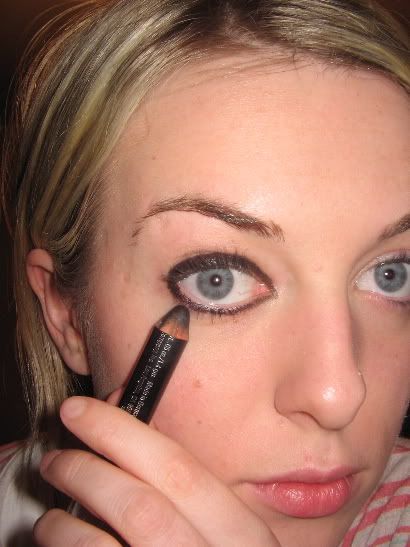
now you will draw a HIDEOUS line around the entire eye with a soft chubby black pencil mine is ben nye. thicker on top than on bottom.- do not be afraid, try and keep it as basic as possible but do NOT fret about it looking terrible!
then using a very small rounded brush (mine is aveda) smooth the lines and blend them ever so slightly.
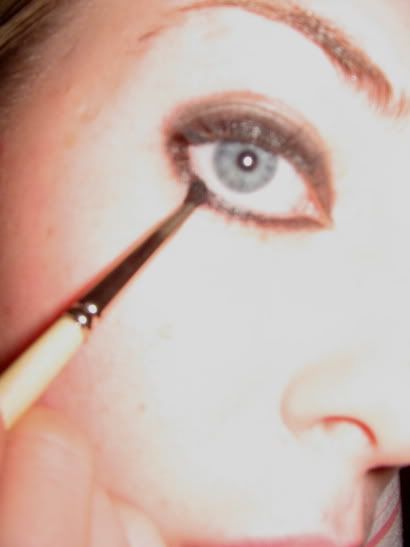
now you may blend the liner onto the lid and into the crease. (once again it should still def. look awful-no worries) Now you will take a smaller black liner and draw out a squared off cat eye-(this took me awhile of drawing on and cleaning up with damp qtips, to make it the size and shape i wanted)
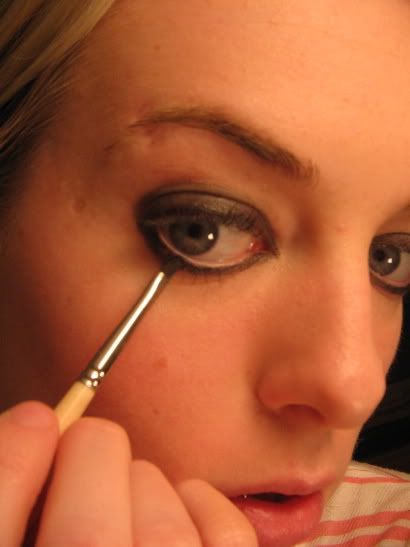
now you shall pack an opaque black shadow over the liner and yes, blend! over lid and into crease.
(i had to blend it into the shape i wanted FOREVER)
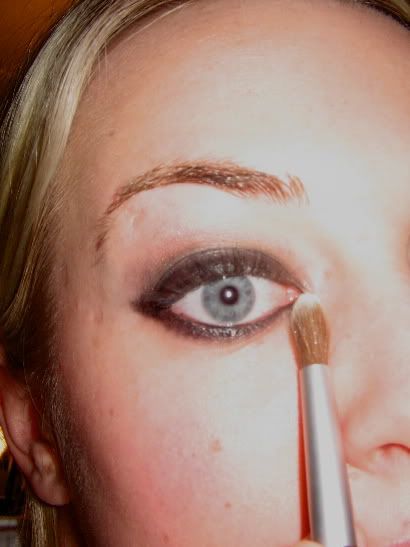
now get out an opaque white (no shimmer) and use a fluffy tapered blending brush to apply to the inner hollow of the eye socket- not the eye. and under the brow.
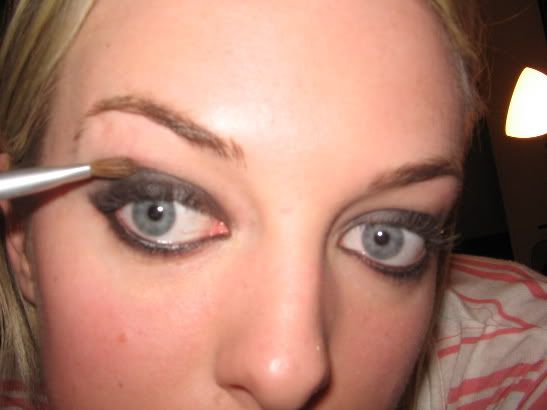
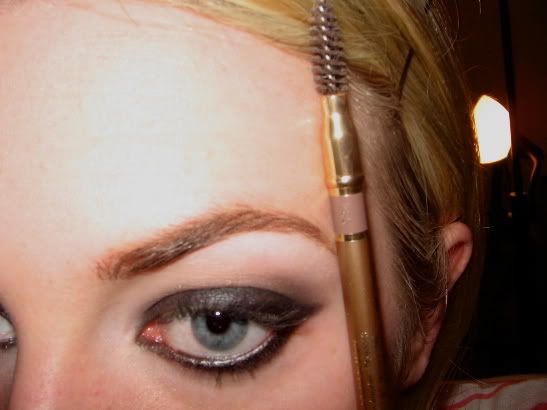
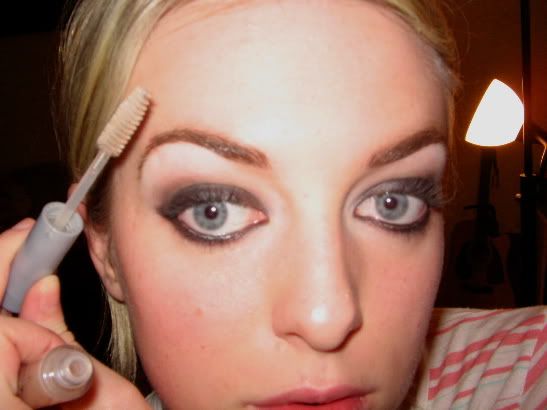
eyebrow time!!! my favorite.
im using to colors for this look, normally i only use the lighter one but its to blonde for these eyes-
 see? this is the brow with only blond pencil-to warm.
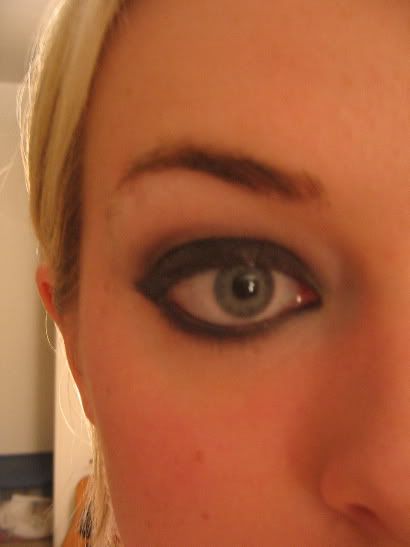
it is a very straight controlled brow. and i extended it out a little far (best thing ever to make eyes look bigger and wider apart)
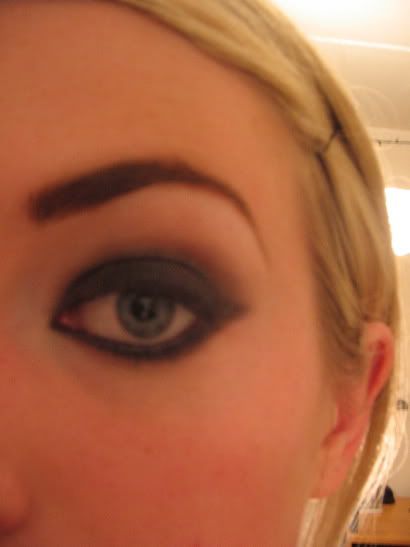
here is the undone and done brow:
brow gel is always good!
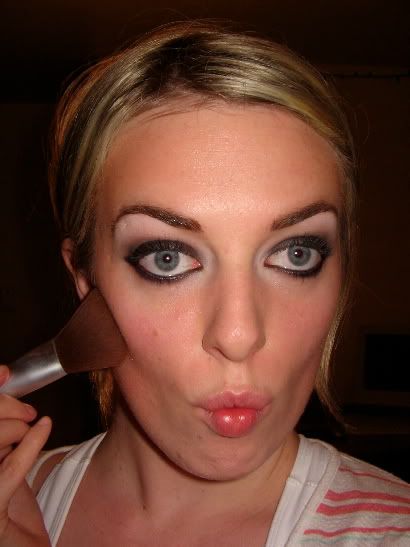
now its time to contour!
get a big powder brush a swipe a good amount of bronzer on- i like nars laguna. fishy face it up and buff it in and up.
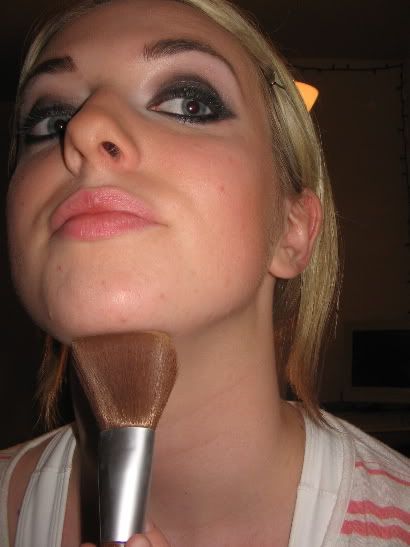
now apply it to the temples and down again into the cheek hollows, like a big number 3.
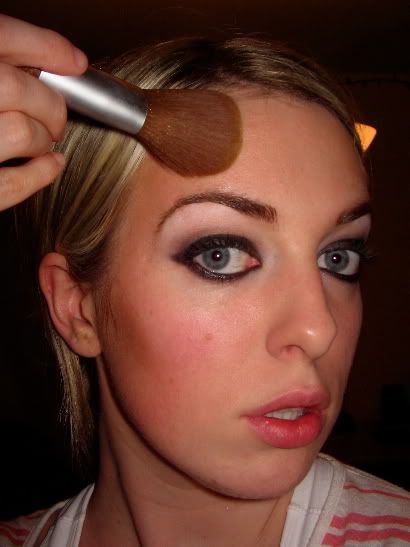
apply a whole bunch right under your chin and blend down and out on your neck- combatting a double chin! wahoo!
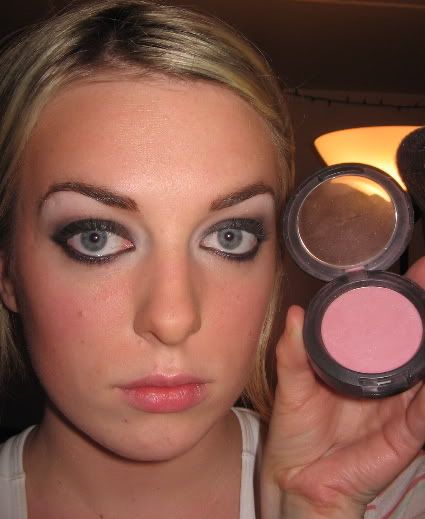
blush time, choose a medium-light pink, nothing too bright or too chalky, mine is Dame. apply slightly back from the apples, more on the bone and then add a layer of transluscent powder over top.
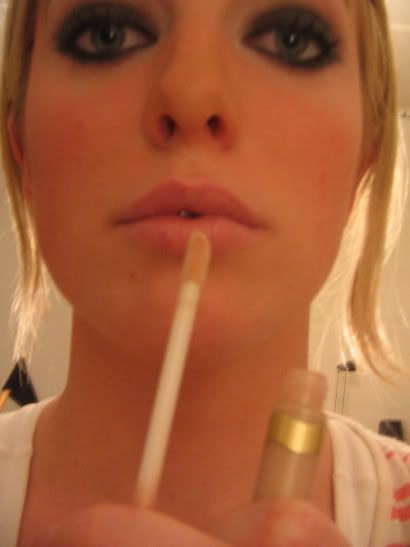
blend a little concealer over whole mouth and then add two more little blobs to the lower lip- blend mostly right there and out.

apply a light opaque gloss- mine wasnt right, it was shimmery. oh well.
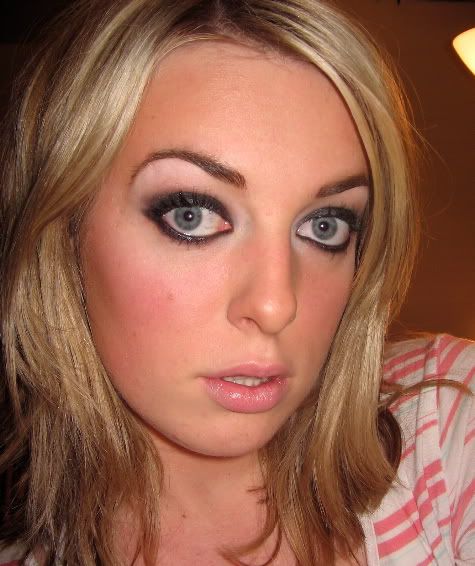
oh my gosh were done! throughout the whole process i was touching up my eyeliner and adding black shadow, so really- dont be scared of being a little messy- damp qtips are your friend!
so heres the comparison- whew that was a ton of work!!!
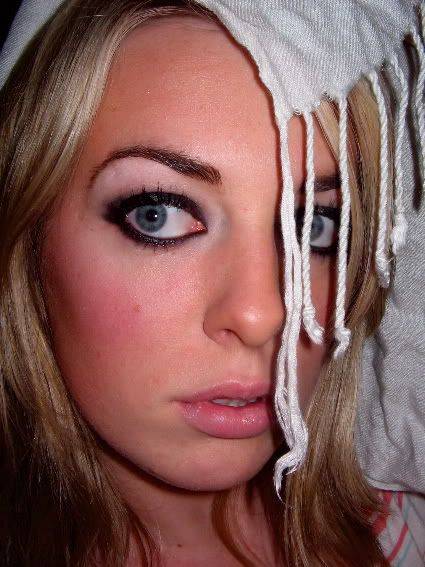
haha theres my rendition of what shes doing in the photo!!
xoxoxoxox
Francie pants!
here is the look we are trying to achieve:
start all gross and pasty:
dot foundation one shade light than your skin on the inner portion of your face, a shade darker around the perimeter and in hollows of your cheeks like so:
I blend with my fingers mostly, from the inside of my face out, and then buff the darker color inward with my fingers- blend it all with a sponge.
curl your lashes and sweep a clean powder brush all over face- i think it adds to the buffed foundation look.
now you will draw a HIDEOUS line around the entire eye with a soft chubby black pencil mine is ben nye. thicker on top than on bottom.- do not be afraid, try and keep it as basic as possible but do NOT fret about it looking terrible!
then using a very small rounded brush (mine is aveda) smooth the lines and blend them ever so slightly.
now you may blend the liner onto the lid and into the crease. (once again it should still def. look awful-no worries) Now you will take a smaller black liner and draw out a squared off cat eye-(this took me awhile of drawing on and cleaning up with damp qtips, to make it the size and shape i wanted)
now you shall pack an opaque black shadow over the liner and yes, blend! over lid and into crease.
(i had to blend it into the shape i wanted FOREVER)
now get out an opaque white (no shimmer) and use a fluffy tapered blending brush to apply to the inner hollow of the eye socket- not the eye. and under the brow.
eyebrow time!!! my favorite.
im using to colors for this look, normally i only use the lighter one but its to blonde for these eyes-
it is a very straight controlled brow. and i extended it out a little far (best thing ever to make eyes look bigger and wider apart)
here is the undone and done brow:
brow gel is always good!
now its time to contour!
get a big powder brush a swipe a good amount of bronzer on- i like nars laguna. fishy face it up and buff it in and up.
now apply it to the temples and down again into the cheek hollows, like a big number 3.
apply a whole bunch right under your chin and blend down and out on your neck- combatting a double chin! wahoo!
blush time, choose a medium-light pink, nothing too bright or too chalky, mine is Dame. apply slightly back from the apples, more on the bone and then add a layer of transluscent powder over top.
blend a little concealer over whole mouth and then add two more little blobs to the lower lip- blend mostly right there and out.
apply a light opaque gloss- mine wasnt right, it was shimmery. oh well.
oh my gosh were done! throughout the whole process i was touching up my eyeliner and adding black shadow, so really- dont be scared of being a little messy- damp qtips are your friend!
so heres the comparison- whew that was a ton of work!!!
haha theres my rendition of what shes doing in the photo!!
xoxoxoxox
Francie pants!


